
A One Day Yosemite Travel Itinerary
For some, Yosemite is a once-in-a-lifetime experience. Often regarded as one of California’s crown jewels, Yosemite reigns…
Disclosure: This post contains affiliate links. If you make a purchase through these links, I may earn a small commission at no additional cost to you. I only recommend products or services that I believe will add value to my readers.
For some, Yosemite is a once-in-a-lifetime experience. Often regarded as one of California’s crown jewels, Yosemite reigns as one of the most visited destinations in the state and in the national park system as a whole.
Despite that, a good chunk of the millions who visit Yosemite annually do so for the first time. Additionally, with work and school commitments ever present, many are short on time or want to include multiple destinations in one trip.
If that’s your situation, then this one day Yosemite itinerary is for you. In it, I’m going to provide a doable schedule to follow to see most of the top sights and trails Yosemite has to offer.
Note that this itinerary isn’t exactly small-kid friendly. If your kids are older (or have experience with long, active days), then they should be able to handle it. For a solo traveler or pair of adult travelers with hiking experience, it definitely shouldn’t be an issue.
Buy me a coffee?
If you found this blog helpful, consider leaving a tip through the Buy Me A Coffee button below! Whether it’s $1 or $5, every bit helps offset small travel costs like coffee, water, lunch, parking, or park entry fees. Your support means the world—thank you!
Best Time to Visit Yosemite
The answer to that all depends on your travel preferences and goals but if you’re asking me, spring and fall are my favorite times of year to go to Yosemite. Summer comes in third, with winter coming in dead last because many hiking trails are largely inaccessible due to snow.
I prefer spring and fall mainly due to the pleasant weather and cooler temperatures. Spring is best for waterfall viewing (specifically Yosemite Falls) as some deplete as summer progresses. Conversely, fall offers golden foliage colors that pop against the massive granite walls.
For the purpose of this itinerary, we’ll focus on visiting during spring or early summer. Note that you’re traveling to the mountains, which tend to create their own weather. Just because it’s normally pleasant, that doesn’t mean it won’t change on any given day.
Yosemite Reservations
One aspect to visiting in spring or summer is having to contend with Yosemite’s reservation system. There are exceptions but most people, visiting during these times will require one. One exception to take advantage of, however, is what I’ll recommend - arriving before 6am.
On select dates in spring and all days in summer, you’ll need a reservation if you arrive between 6am and 2pm. Outside of those hours, you’re good to go. I highly suggest getting there prior to 6am to avoid crowds, but to also see as much as you can on your one day visit to Yosemite.
Where to Stay and Eat
Believe it or not, there are no shortages of places to eat in Yosemite Valley. Quick service and mid-range options include Base Camp Eatery, Mountain Room Lounge and Curry Village Pizza Patio. For a more upscale experience, The Ahwahnee has you covered.
Keep in mind that while food may not be scarce, the restaurants are exceptionally overpriced for what you get and while I haven’t eaten everywhere in Yosemite Valley, the ones I have tried weren’t all that great, in my opinion.
This itinerary will include time to enjoy lunch, but I recommend packing a plethora of snacks and even picnic foods to save yourself time (and money, no less). You’ll practically be spending your entire day in the valley with no time to leave the park and return later.
I suggest bringing a Yeti Soft Cooler backpack (or something similar) to keep food cold. Remember to NOT leave any food or scented items in your vehicle (including the trunk) and to utilize bear boxes. Bears WILL ruin your day by ripping your vehicle apart looking for them.
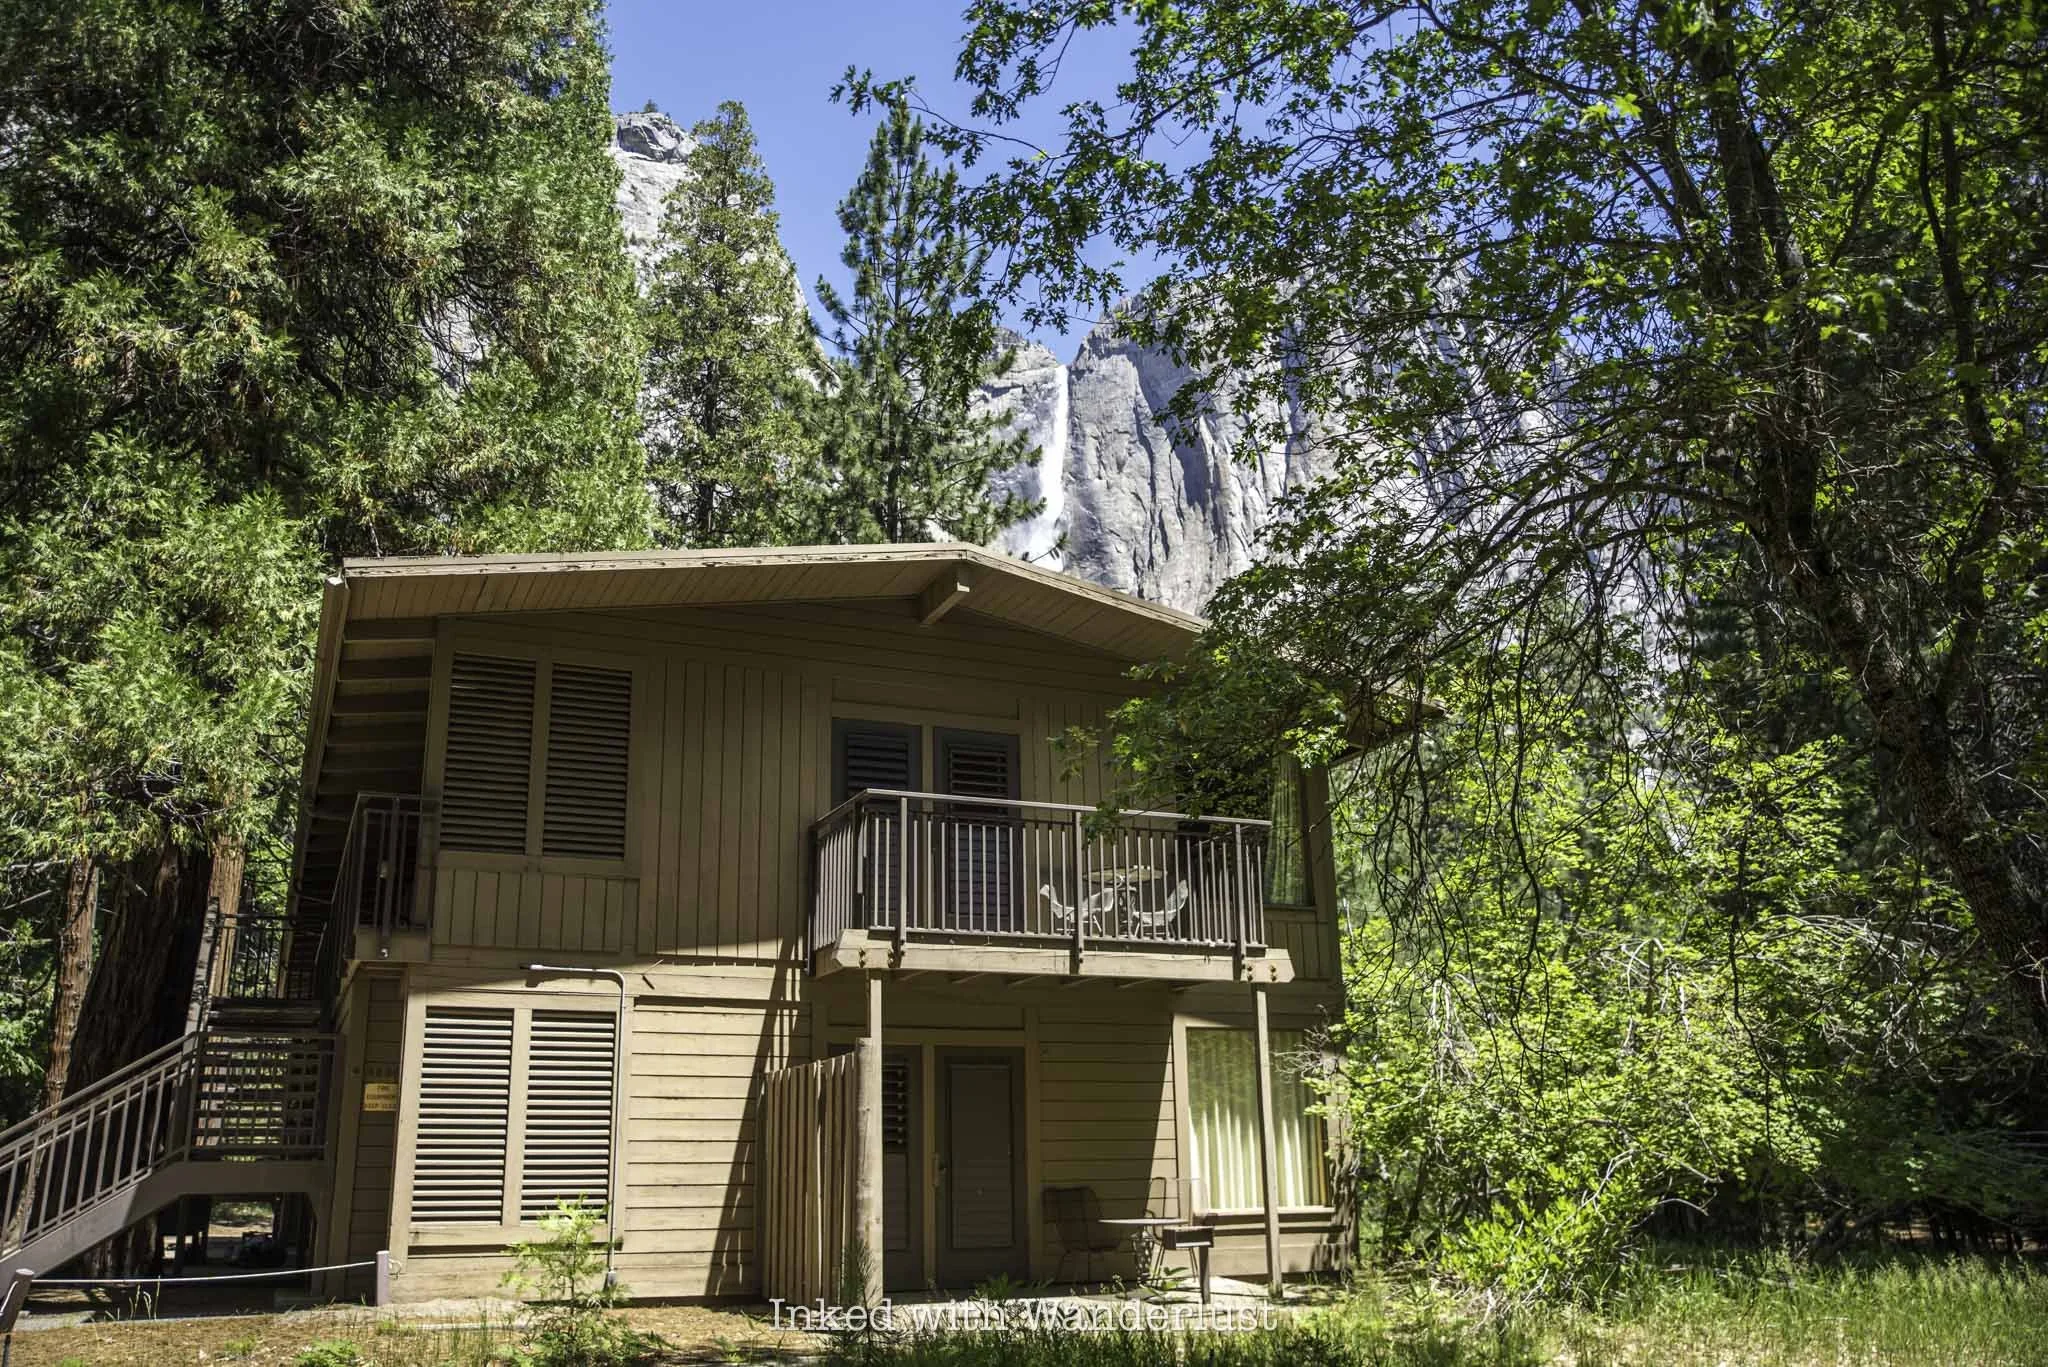
As far as lodging goes, I recommend staying at a hotel or campground in Yosemite, or somewhere close by. This is so you can begin the itinerary right away and maximize your one day at Yosemite. Hotels and campgrounds in Yosemite Valley proper include:
The Ahwahnee
Yosemite Valley Lodge
Curry Village
Camp 4
Upper Pines
Lower Pines
North Pines
Keep in mind that reservations at the in-park hotels and campgrounds are competitive. Often requiring booking months in advance to secure a room during the summer at Ahwahnee. Cancelations happen, though. So just keep trying.
Additionally, there are also hotels and campgrounds in the surrounding gateway towns that are often easier to come by. These include El Portal, Mariposa, Oakhurst, Groveland and Lee Vining (east side).
This itinerary is assuming that you’ll be staying outside of the park. If you’ll be staying inside the park, simply adjust the itinerary below (arrival time, where you’ll initially board the shuttle, etc) accordingly.
One Day Yosemite Travel Itinerary

Since you’ll only have one day at Yosemite, your time on this itinerary will heavily focus on the highlights of Yosemite Valley, as well as a visit to Glacier Point. Remember, if you weren’t able to secure a reservation, be sure to arrive before 6am.
If you’re like most, you’ll be driving in through the Arch Rock entrance. Either present or purchase your America the Beautiful pass ($80) or pay the regular fee ($35) to enter. Remember, cash is not accepted. Only credit/debit cards.
1) Tunnel View (30 minutes or less)
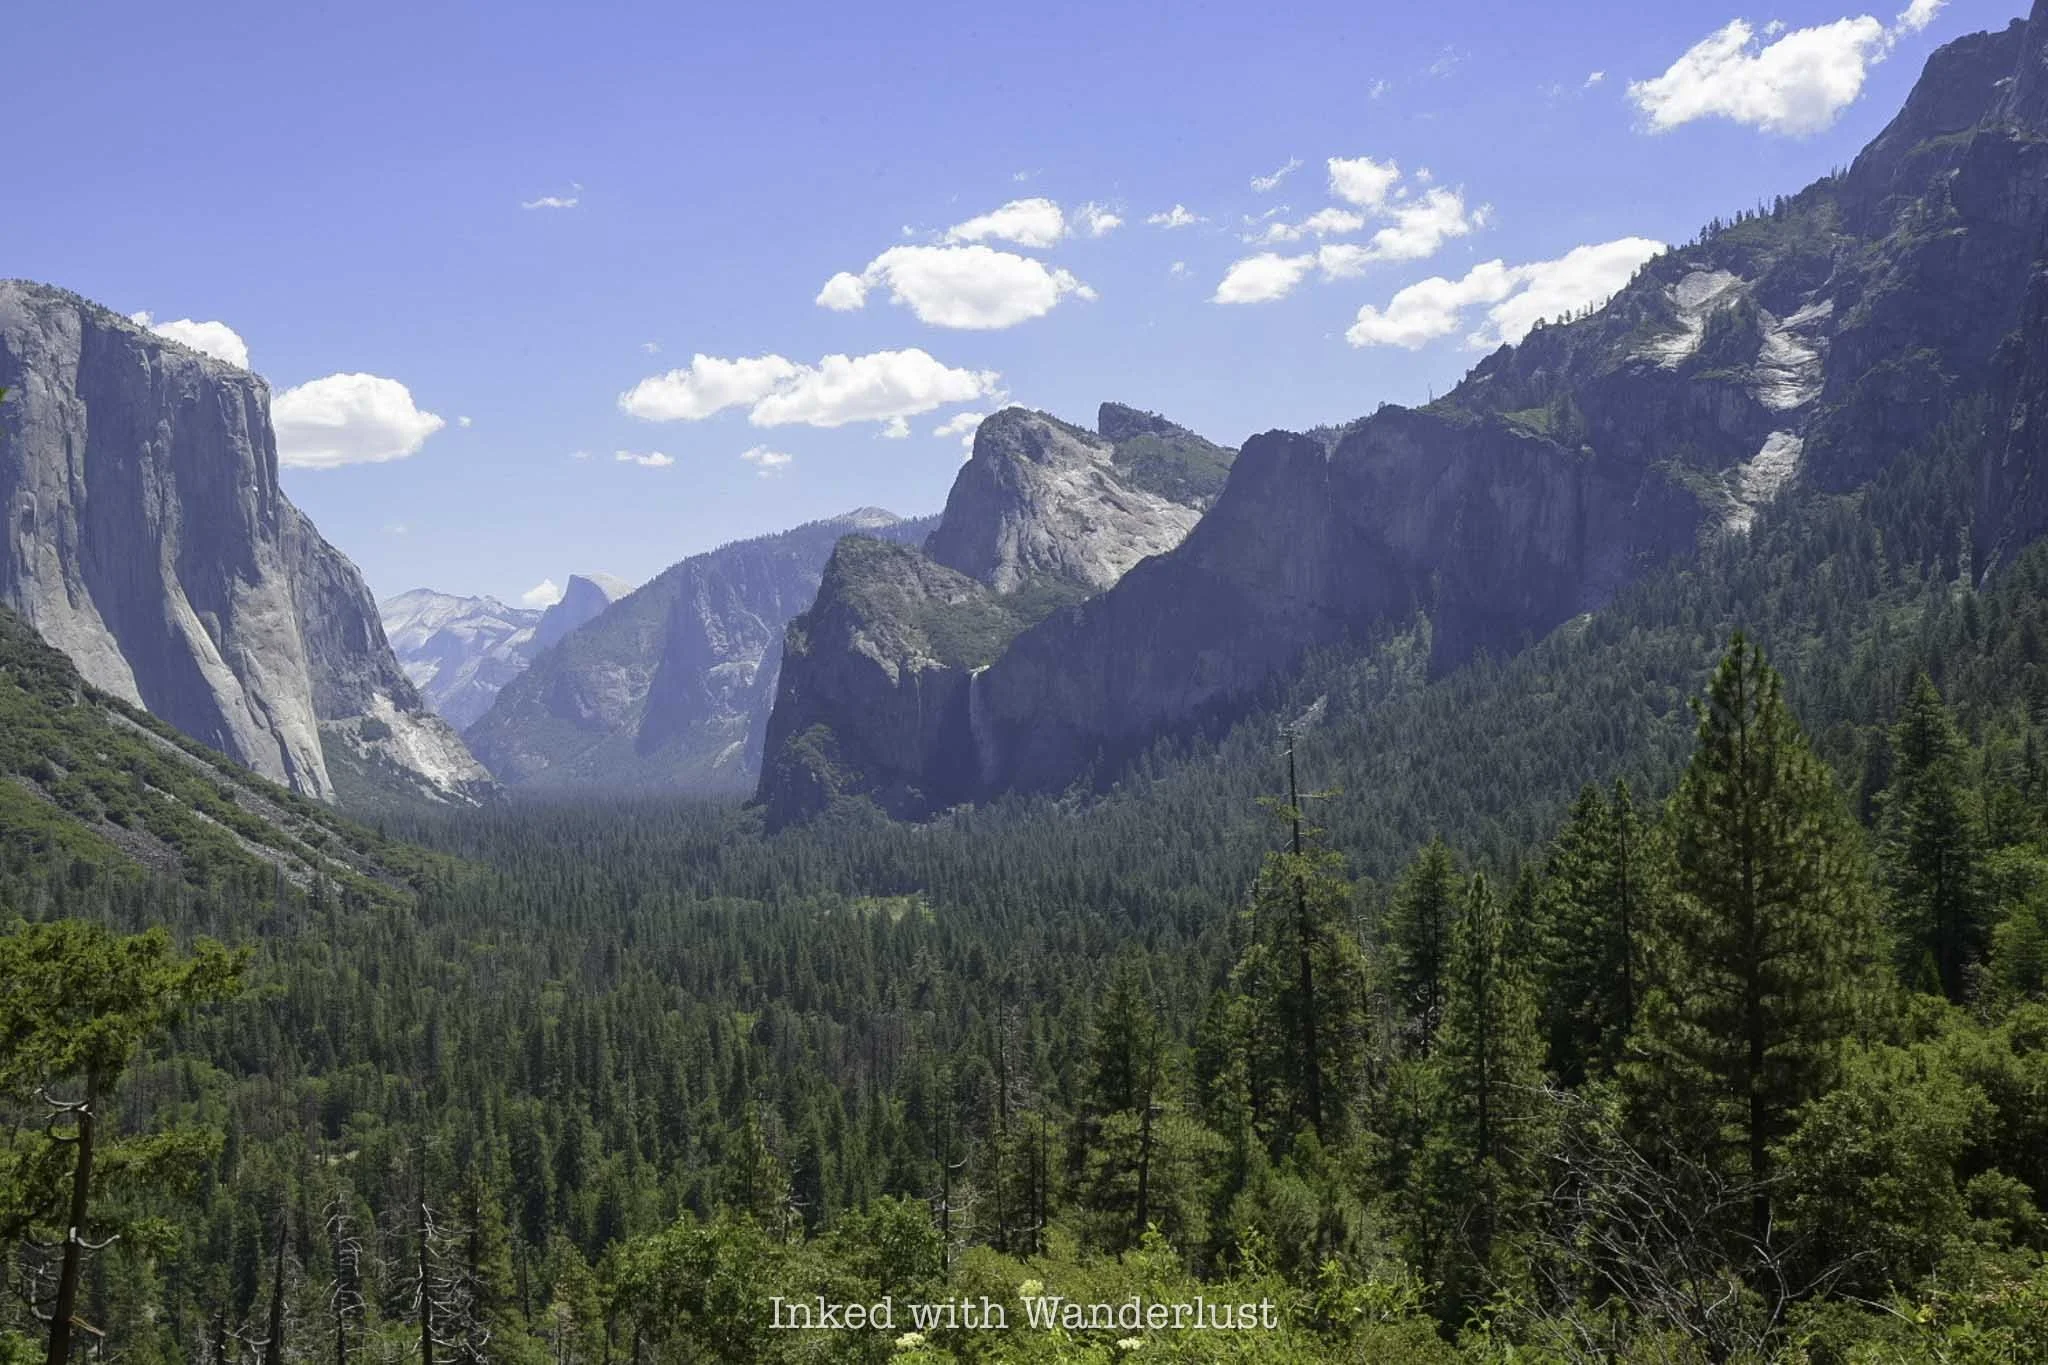
Tunnel View is one of the quintessential Yosemite experiences that anyone, especially first-timers, should check out. You’ve likely seen it on the various social media sites and probably on merchandise as it’s the infamous postcard view of the park.
Despite seeing it in photos, you simply must see it for yourself as photos and video do it no justice. From Tunnel View, you can see many of the park’s most infamous landmarks including Half Dome, El Capitan, Cathedral Rocks and Bridalveil Falls.
READ: “Tunnel View: How to See the Most Iconic View in Yosemite”
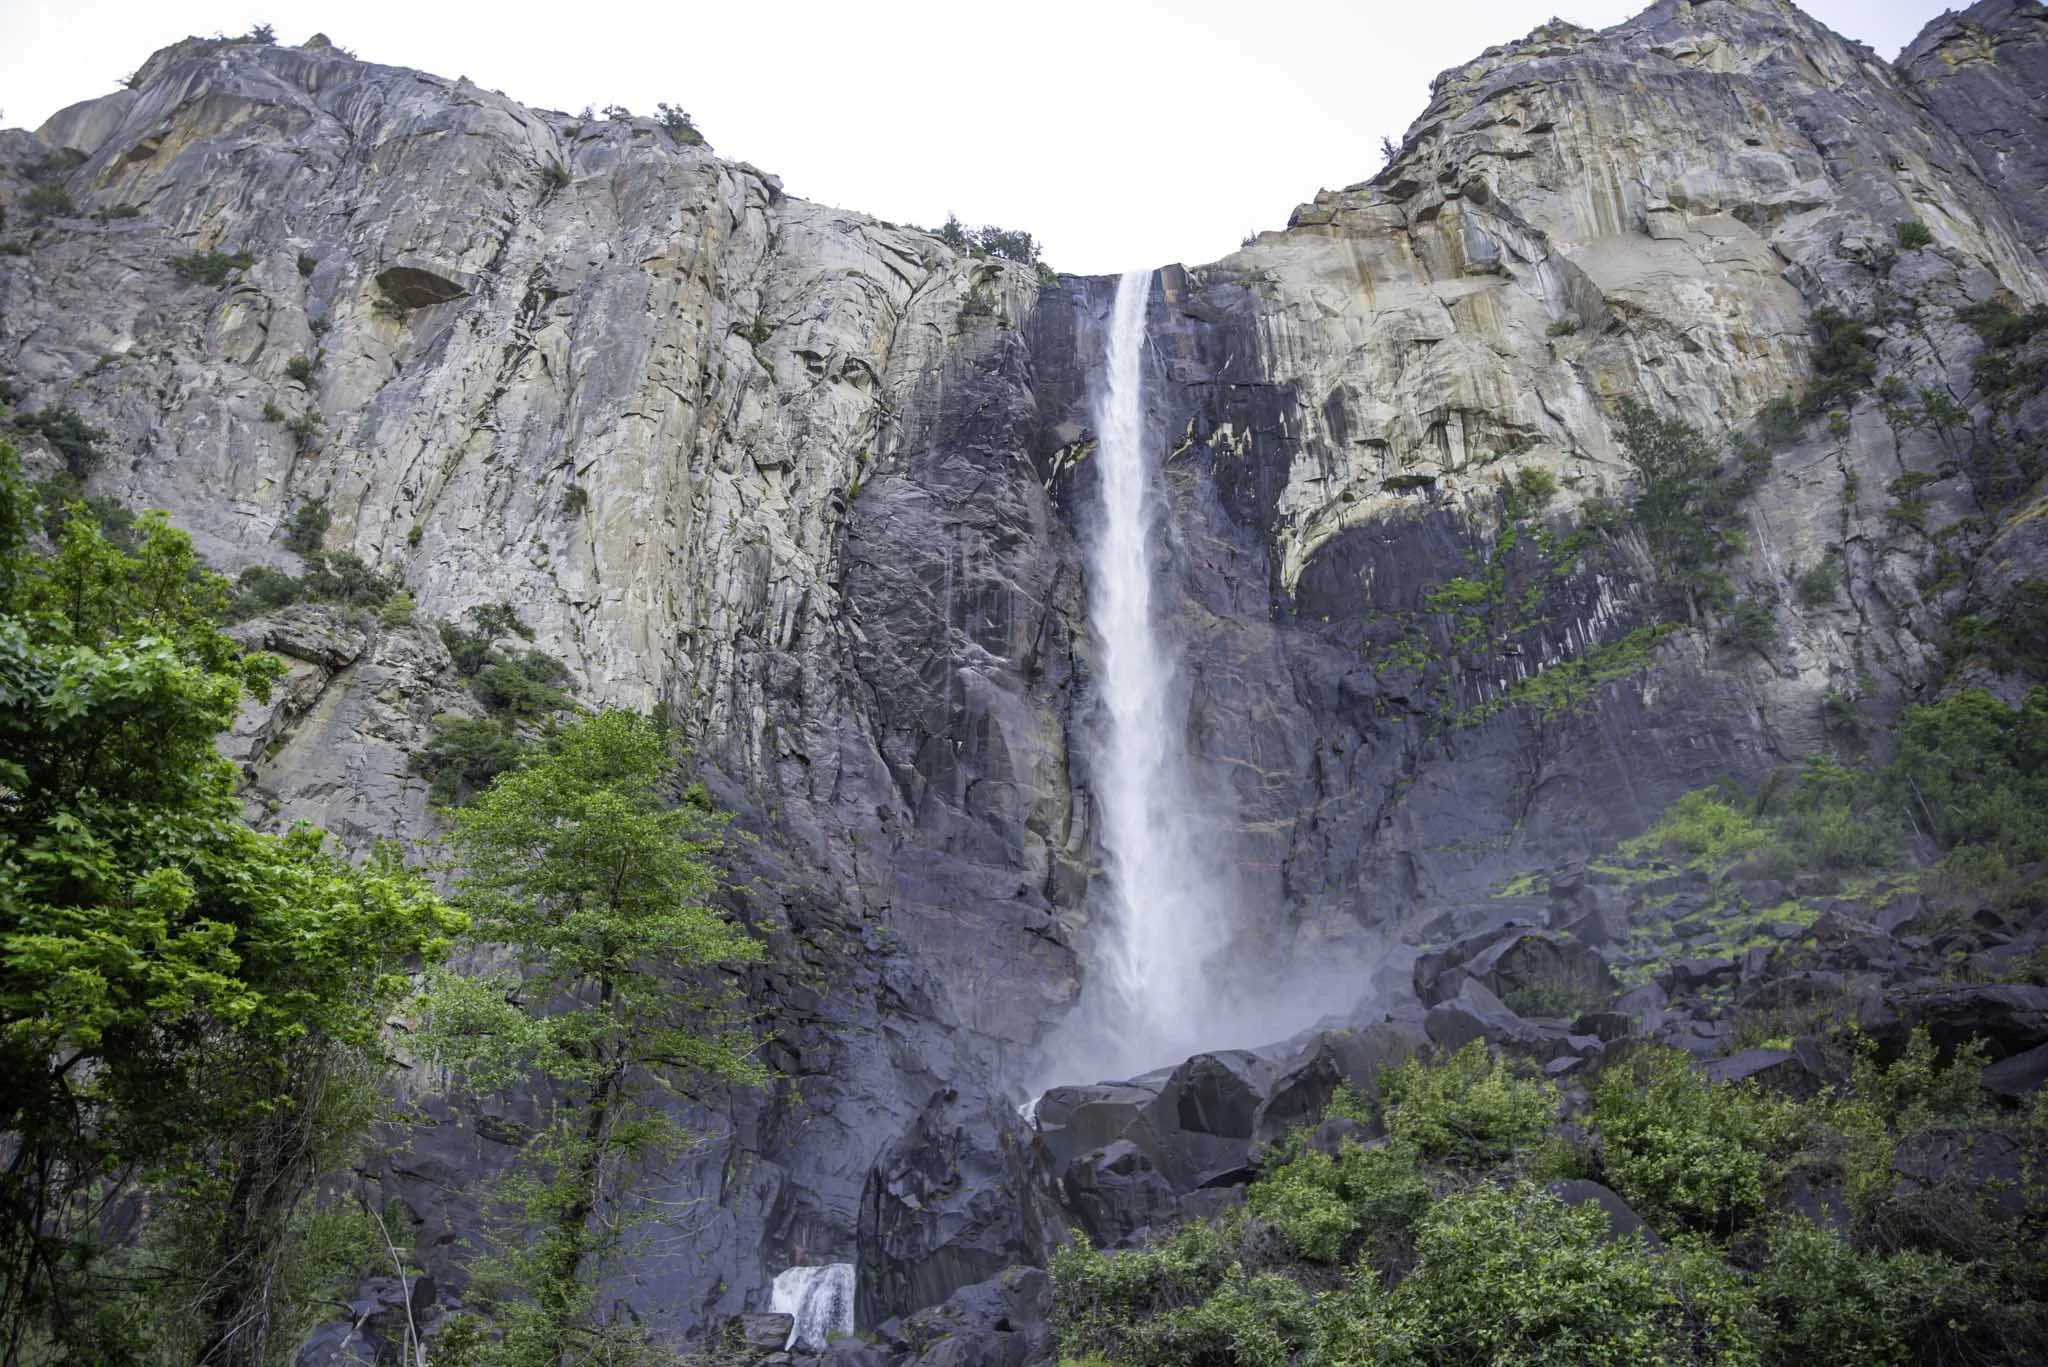
2) Bridalveil Falls (one hour or less)
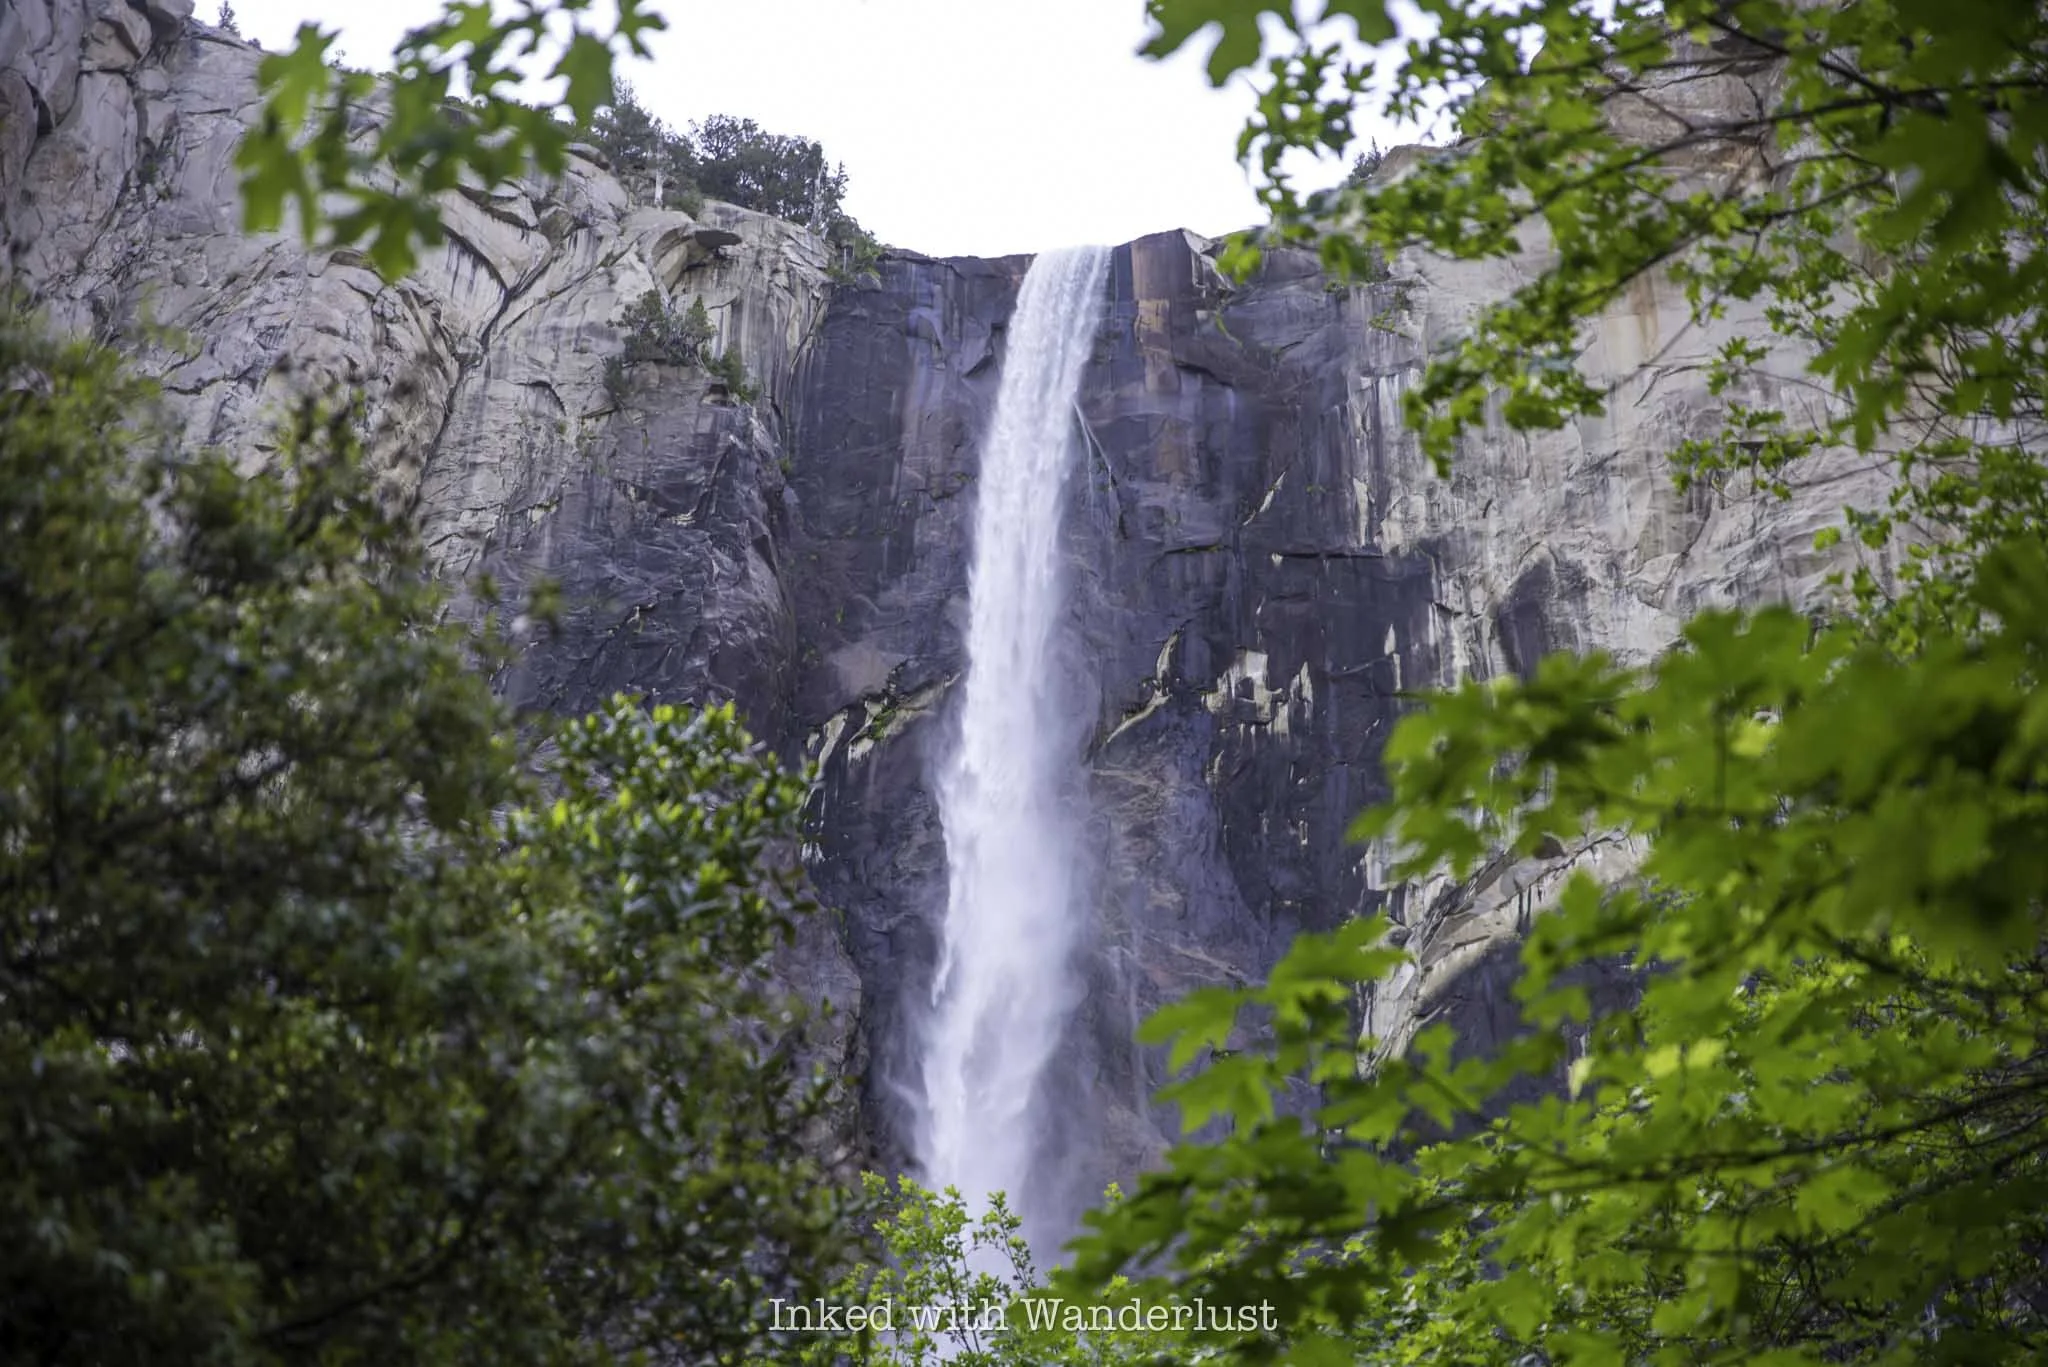
From Tunnel View, you’ll work your way down the road and over to the first waterfall of your visit - Bridalveil Fall. Unlike most waterfalls in Yosemite, Bridalveil is spring fed, so it flows year-round (though it’ll be heavier in the spring and early summer).
Parking is plentiful here, especially in the early morning. The reason I’m recommending starting your day at Tunnel View and Bridalveil is because they’re both mega-popular and the park shuttle doesn’t go to either - and that’s your next stop.
READ: “How to See Bridalveil Fall in Yosemite National Park”
3) Board the Yosemite Valley Shuttle at Stop #11 (15-20 minute wait for the shuttle)
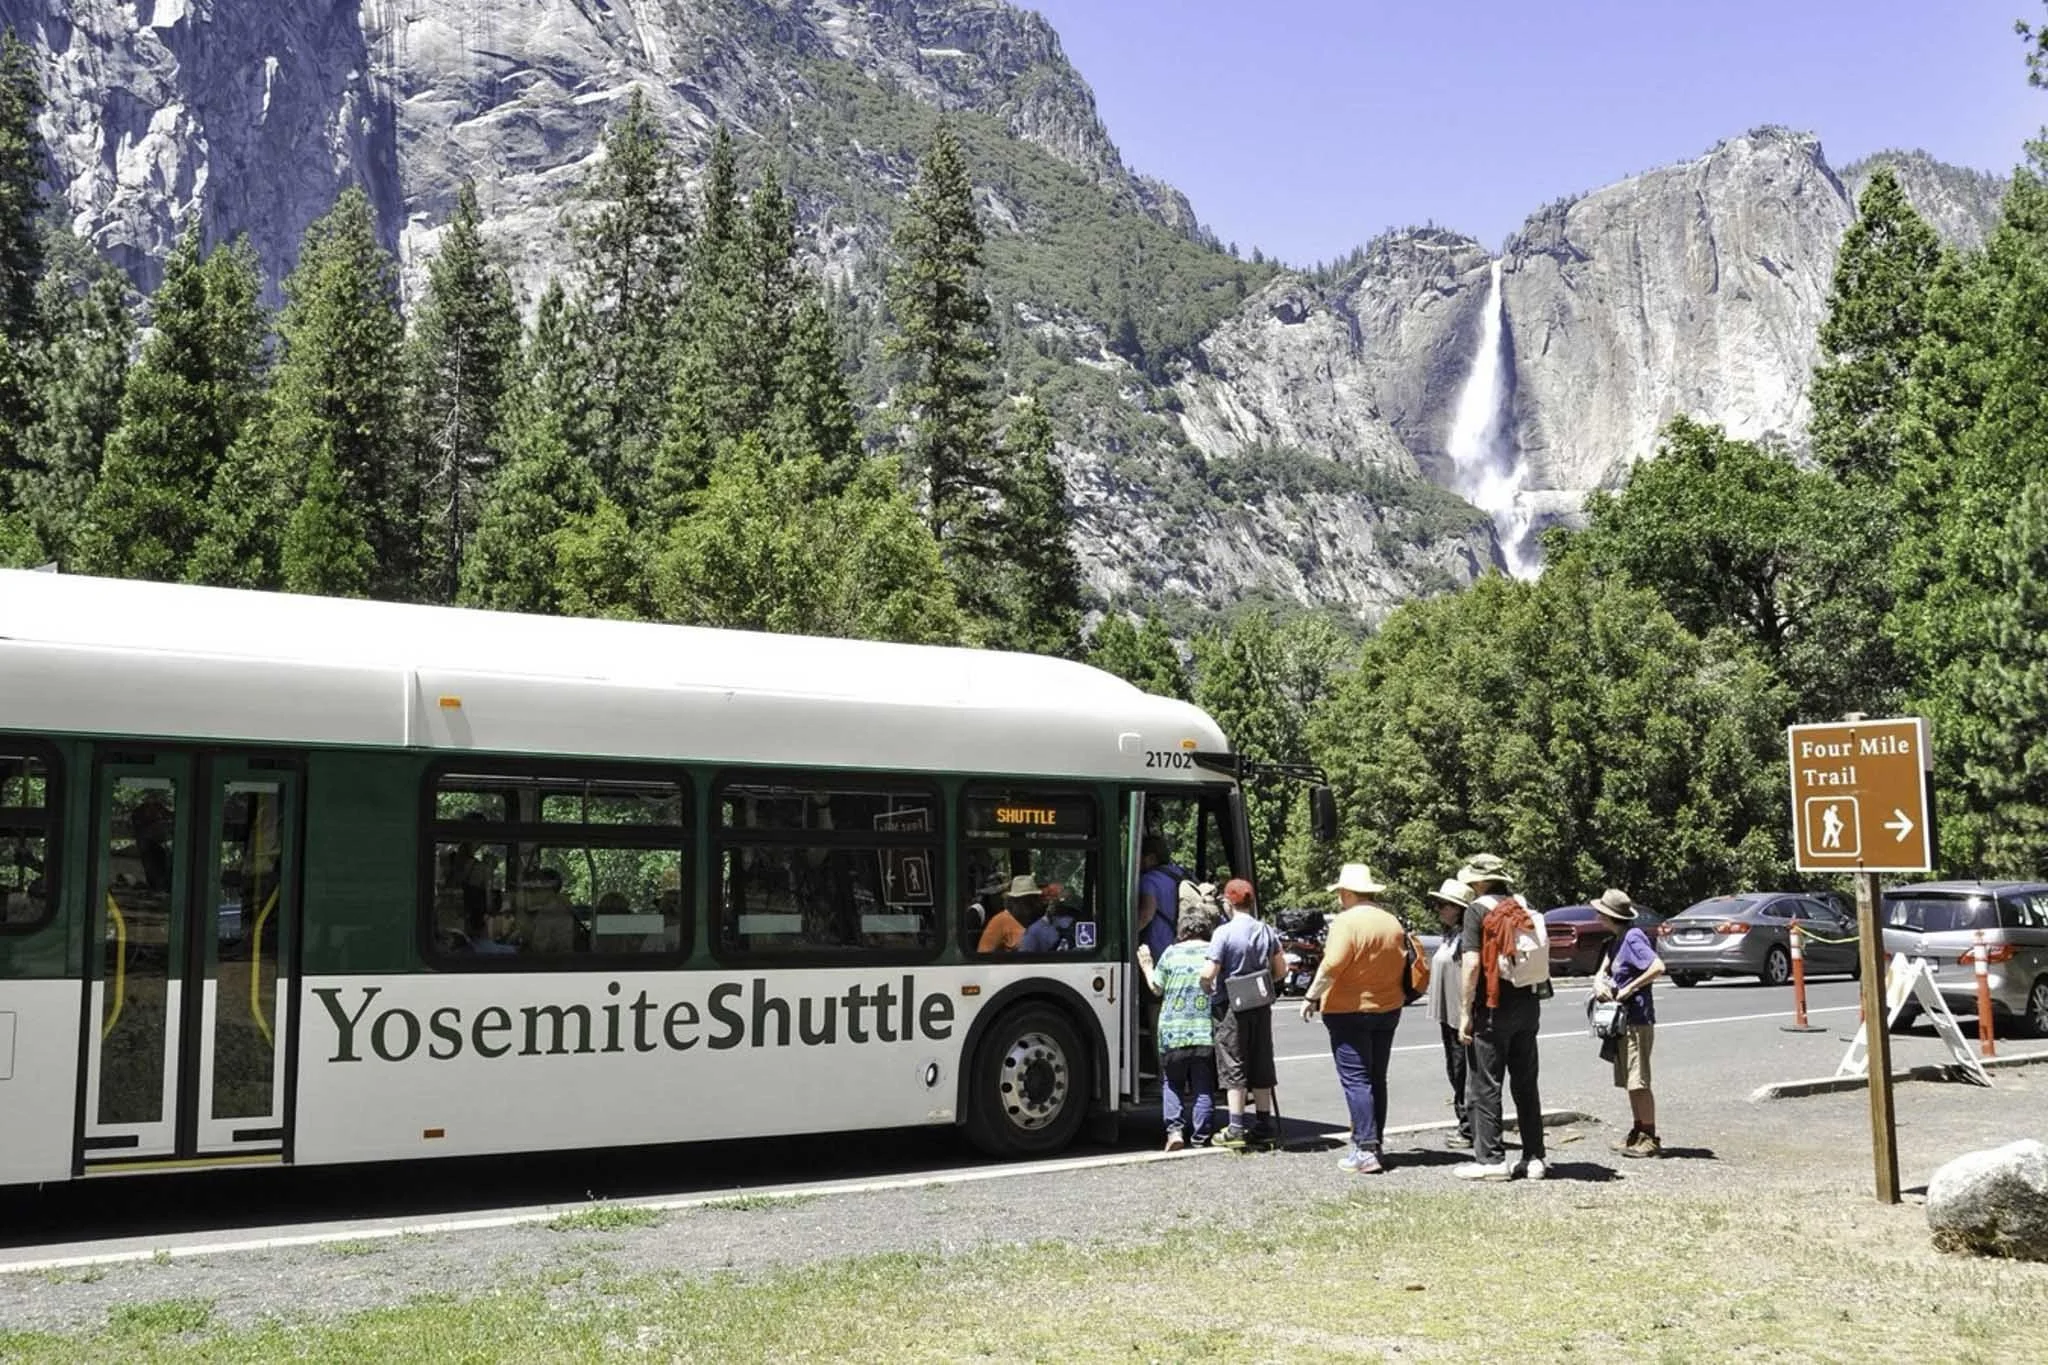
From Bridalveil, you’ll drive for three miles on Southside Drive to the trailhead to the Four Mile Trail. Find a place to park and wait for the Yosemite Valley shuttle (green line) to arrive and board it when it does.
As the day progresses, parking will become increasingly difficult. By utilizing the free valley shuttle, you’ll save yourself from the hassle of finding a place to park, a ton of time and it’ll help to cut down on the effect of emissions on the park.
4) Hike The Mist Trail (4 hours or less)

To hike the Mist Trail, you’ll get off of the valley shuttle at Happy Isles, which is stop sixteen. From the shuttle stop, you’ll walk a short distance down the road to the official trailhead (which goes upwards through a gate).
The Mist Trail is one of the premiere hiking trails in all of Yosemite. It’s mega popular, attracting hikers and tourists alike by the millions, annually. It’s no walk in the park (pun intended), but it’s totally doable if you take your time.
According to AllTrails, it takes an average of four hours, round-trip, to hike to the top of Nevada Fall (the second waterfall on this hike) and back. To save time, many hike to Vernal Fall and stop there. However, I highly recommend completing the entire trail if you can.
READ: “The Mist Trail: Hike One of Yosemite’s Most Beautiful Trail”
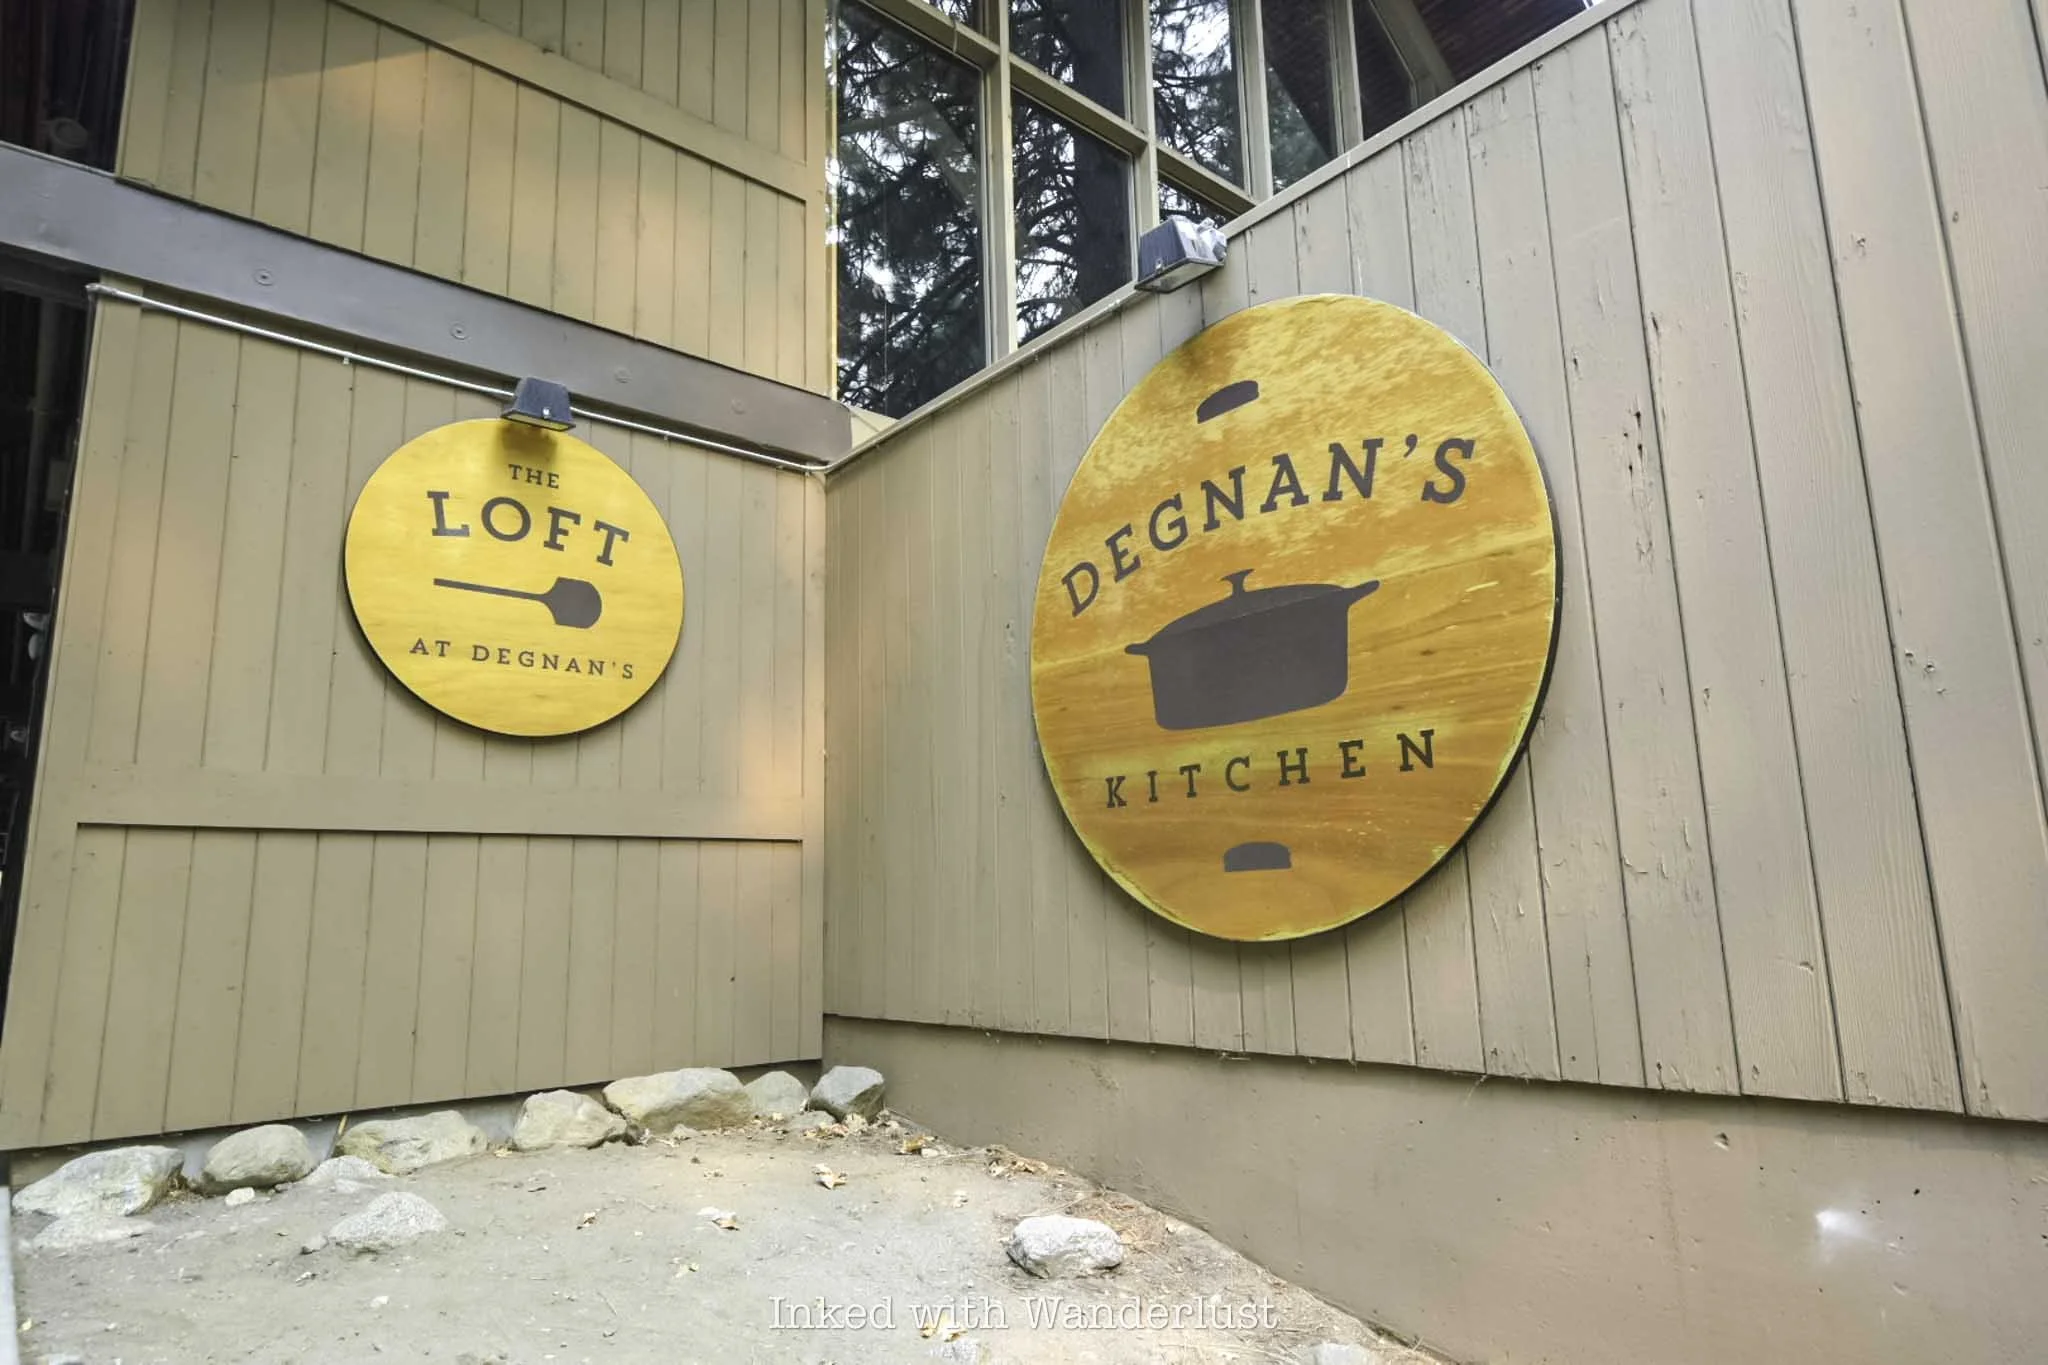
5) Enjoy Lunch At and Explore Yosemite Village (one hour)

After completing the Mist Trail, it should be somewhere around noon or 1pm. Get back on the valley shuttle (you can board the green or purple lines here) and take the short ride to stop one (Yosemite Village) or stop two (Welcome Center).
There, you and your group can take a break, enjoy lunch at one of the valley restaurants, enjoy a picnic, scope out historic photographs at the Ansel Adams Gallery, learn about the Ahwahnee people at Indian Village, shop for souvenirs and more.
Once you’re feeling ready to get back at it, hop back onto the valley shuttle (green line only) and take the short trip to stop six - Lower Yosemite Falls.
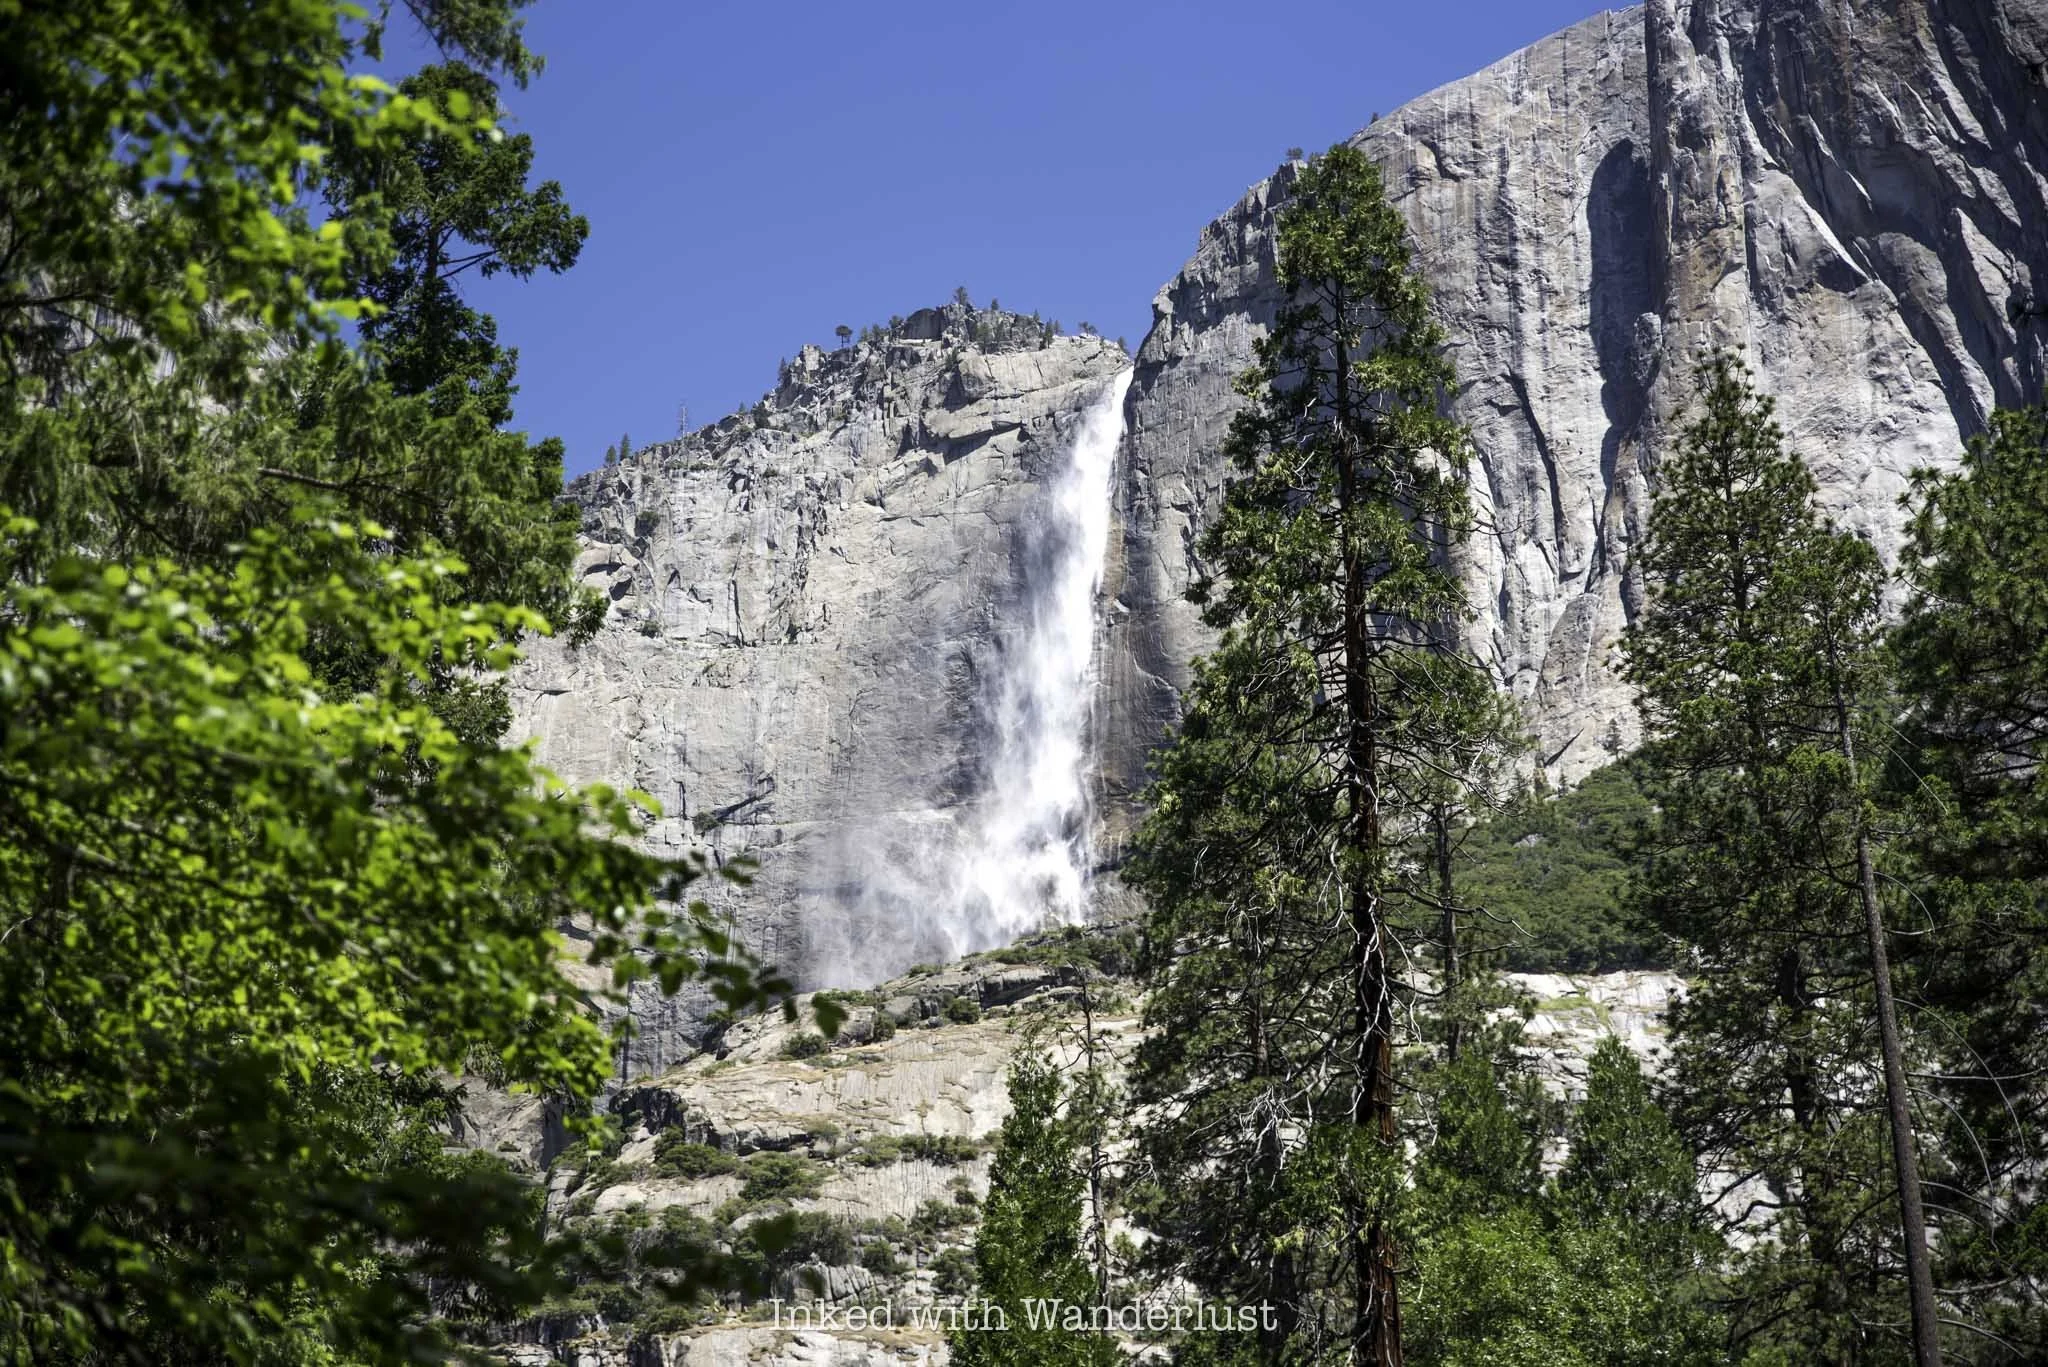
6) Lower Yosemite Falls (45 minutes to one hour)

Much like Tunnel View and Bridalveil Fall, taking the short hike to the base of Yosemite Falls, the tallest waterfall in North America, is quintessential Yosemite. You can hike the full loop (1.2 miles) or simply to the base and back.
How much of the falls you’ll see depends entirely on when you’re visiting, as Yosemite Falls dries up as summer progresses. If you’re visiting in spring or early summer, you’re good to go. From mid-July and on, though, there isn’t much to see.
If Yosemite Falls is dry, I recommend skipping it and going straight to the next location discussed below and spending that extra time there.
7) Stroll El Cap Meadow (one to two hours)
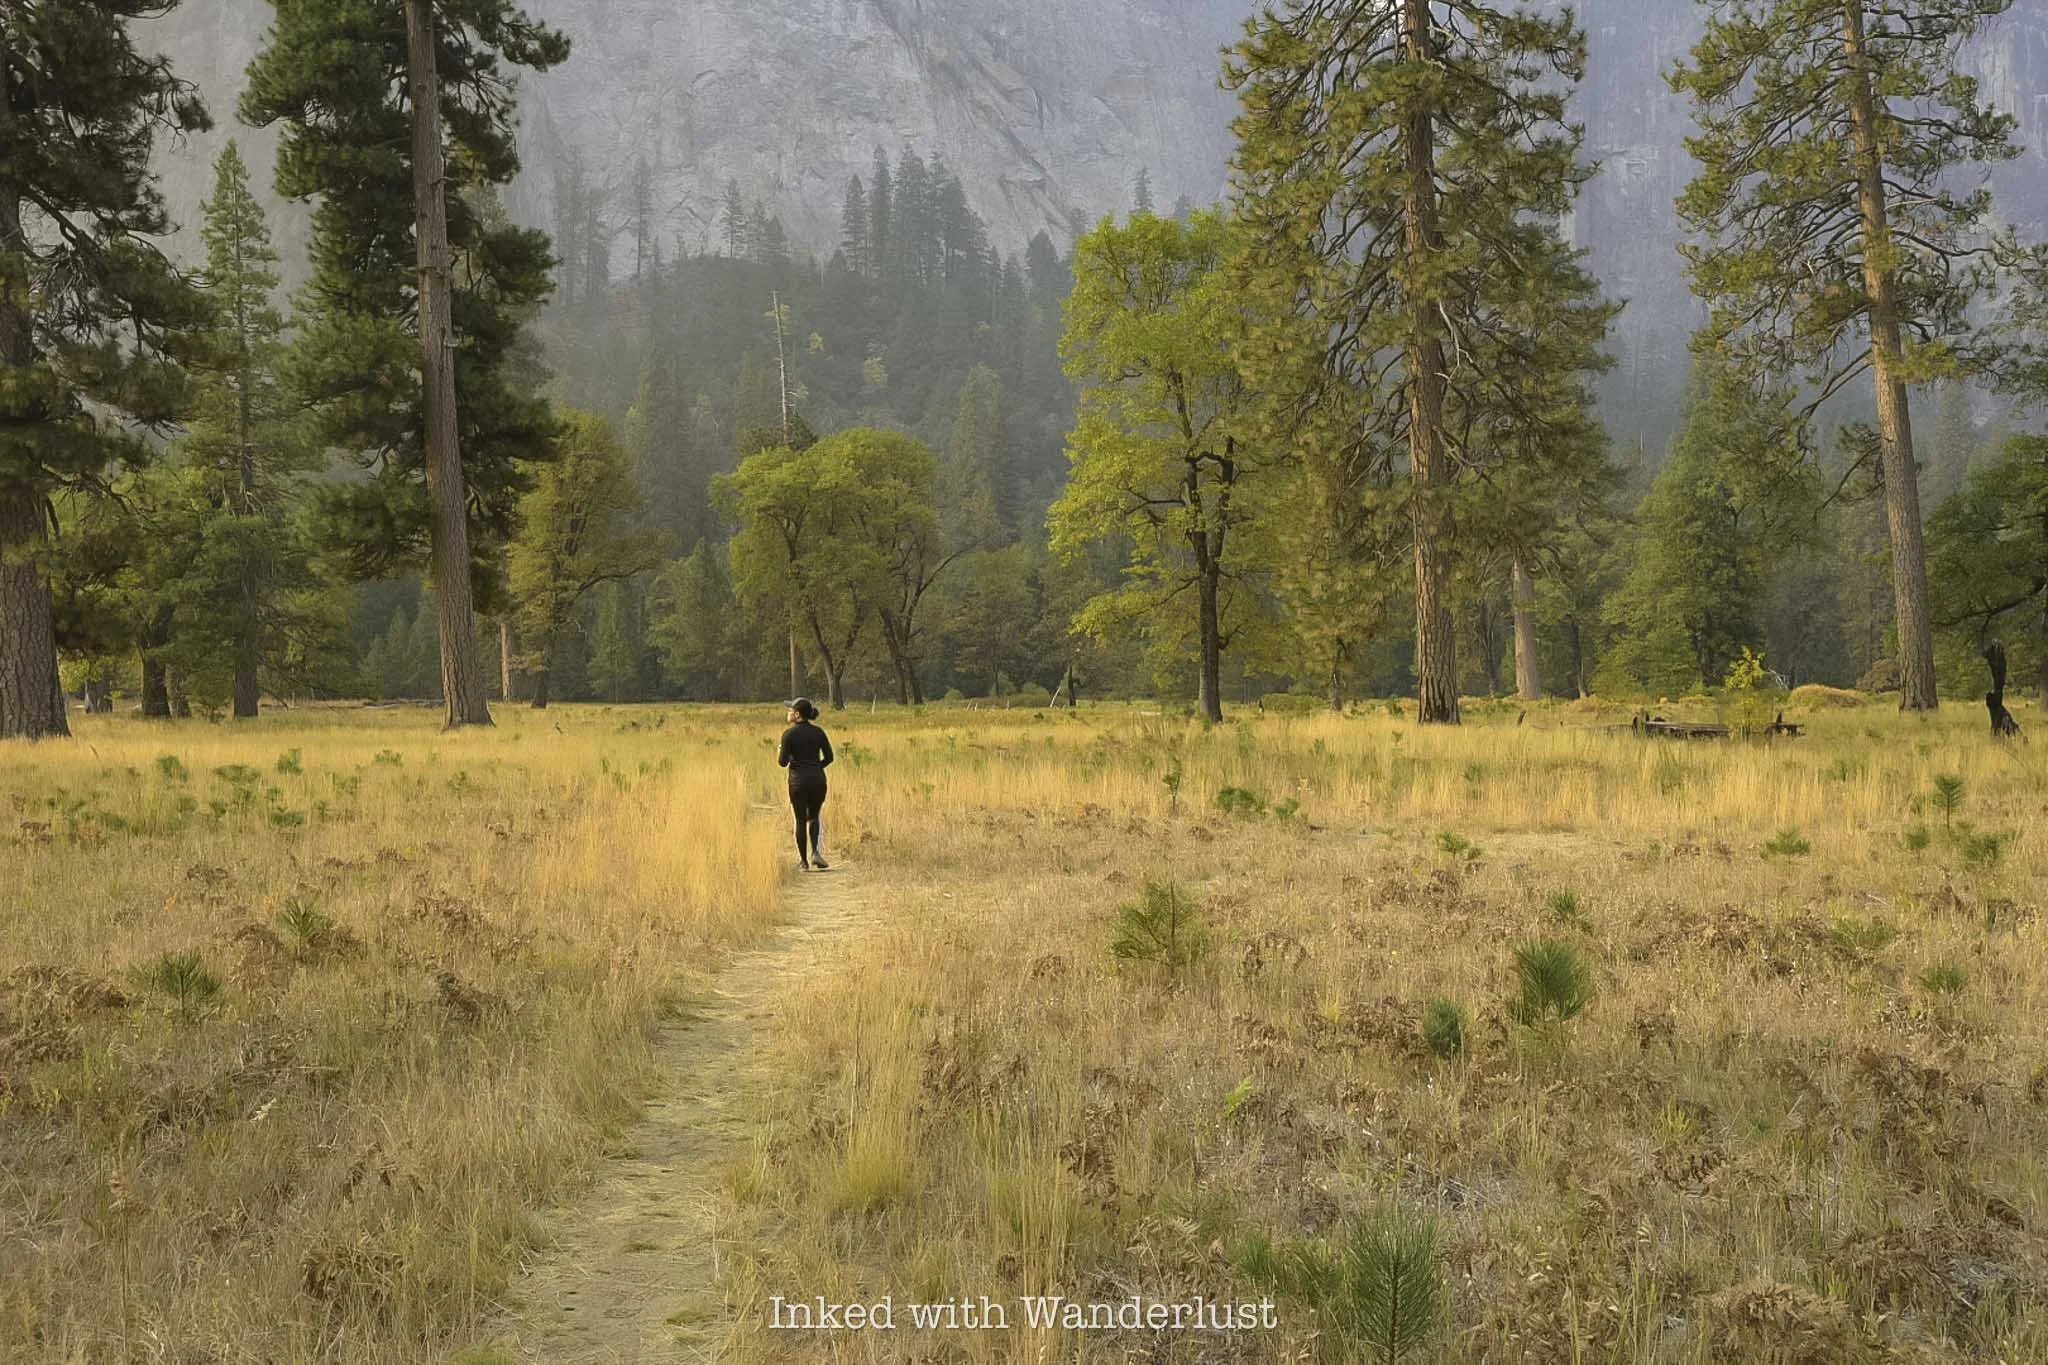
From Lower Yosemite Falls, take the shuttle to stop nine - El Capitan Meadow. Strolling through this gorgeous meadow is an experience like none other. It’s flanked by towering granite formations, including El Cap itself on one side and Cathedral Rocks on the other.
The jaw-dropping views aren’t the only feature of El Cap Meadow. Other activities include observing rock climbers on El Cap, photography, access to Merced River and enjoying a picnic. If you’re running short on time, then take a short stroll through the meadow and take in the sights.
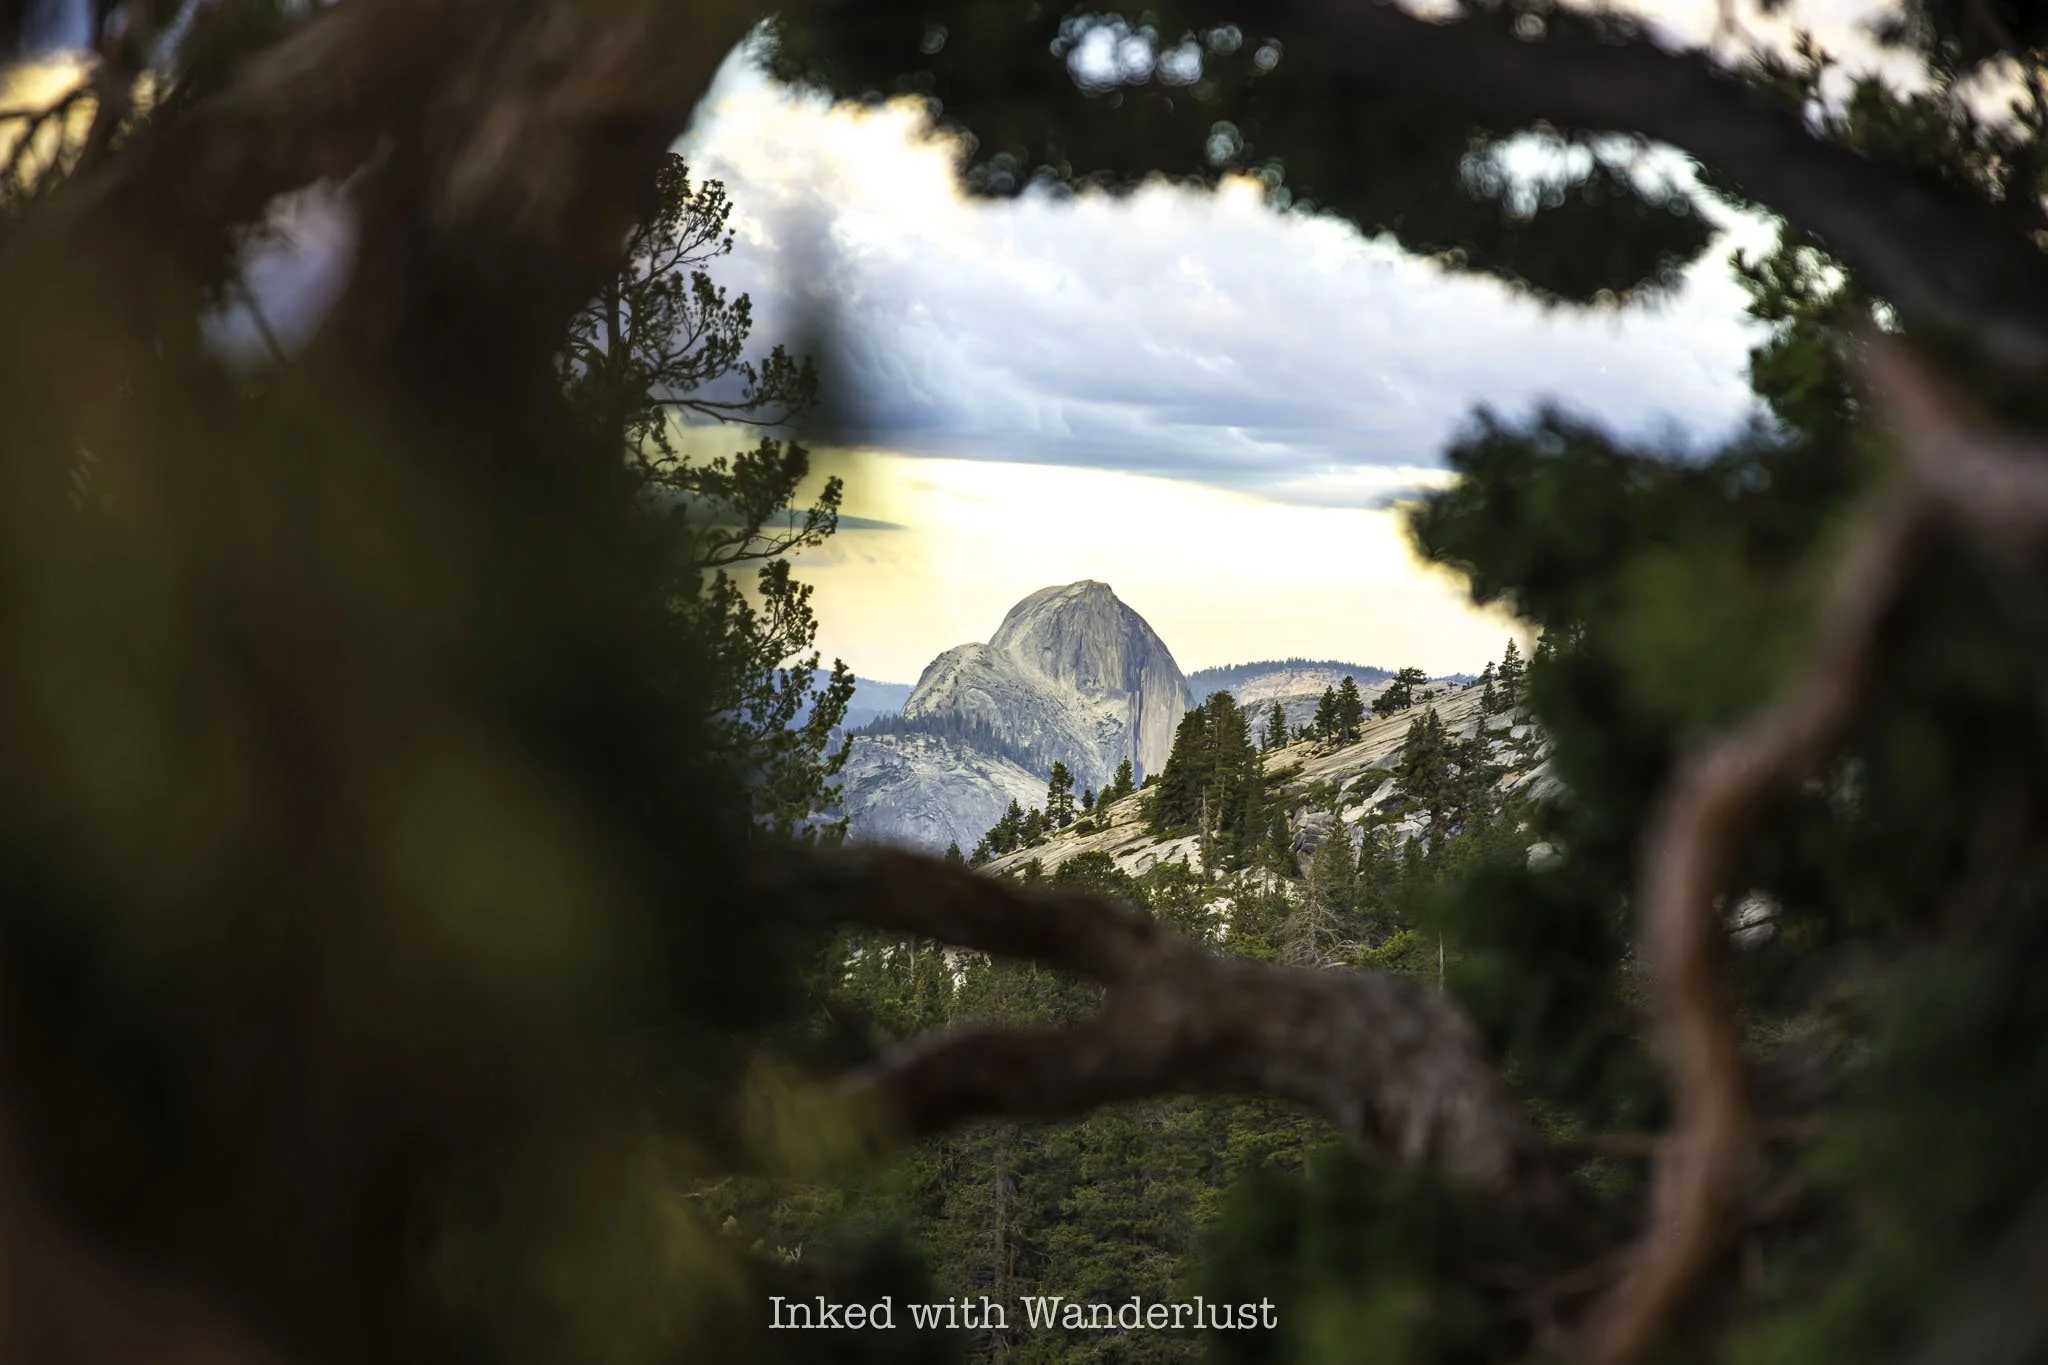
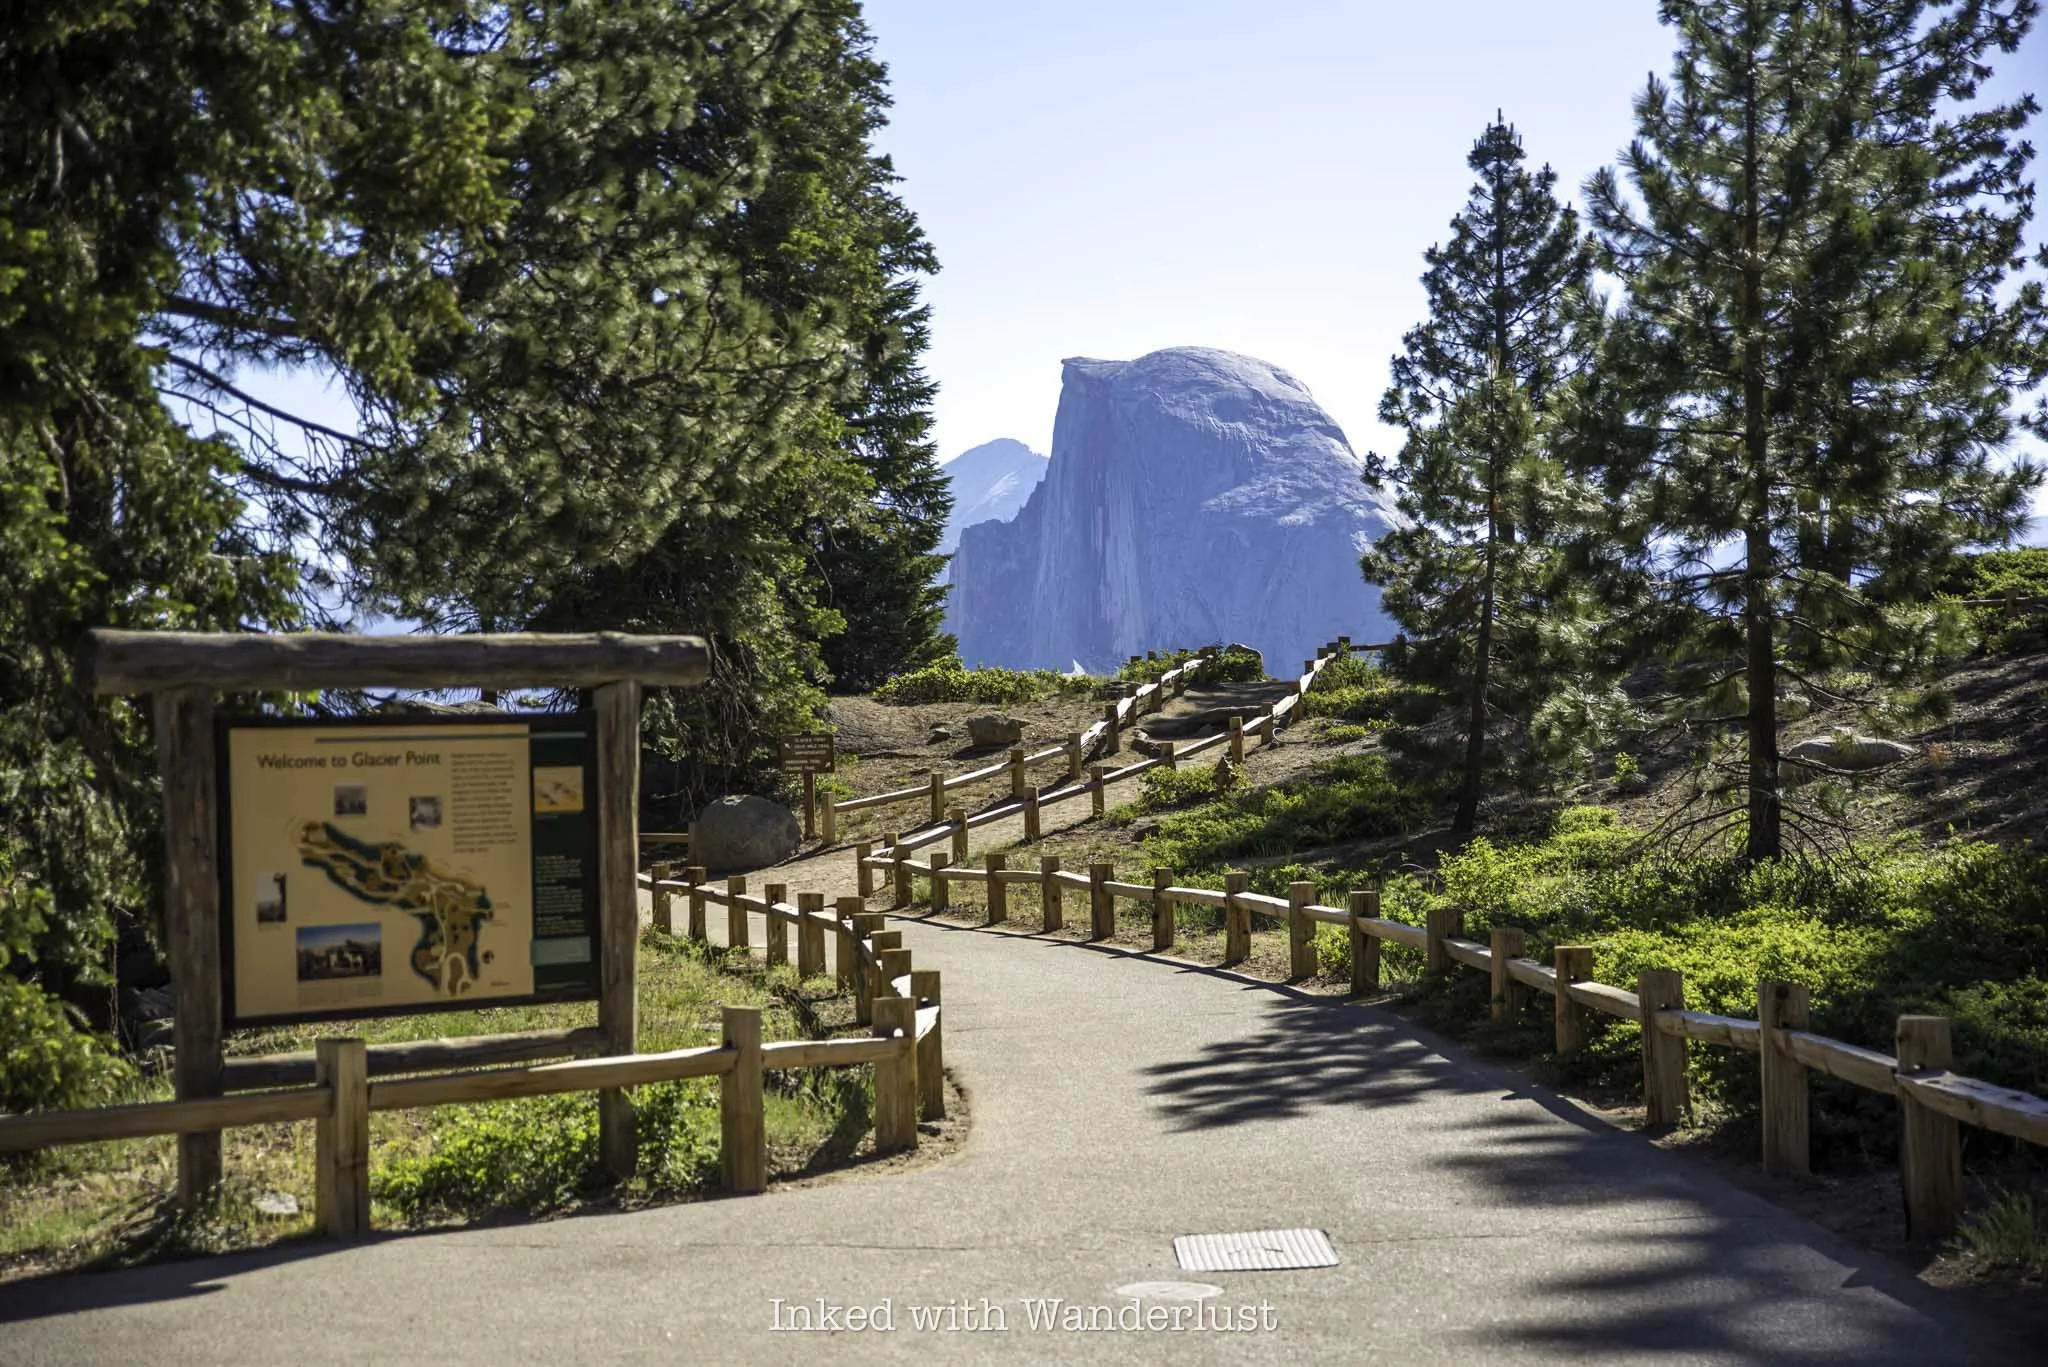
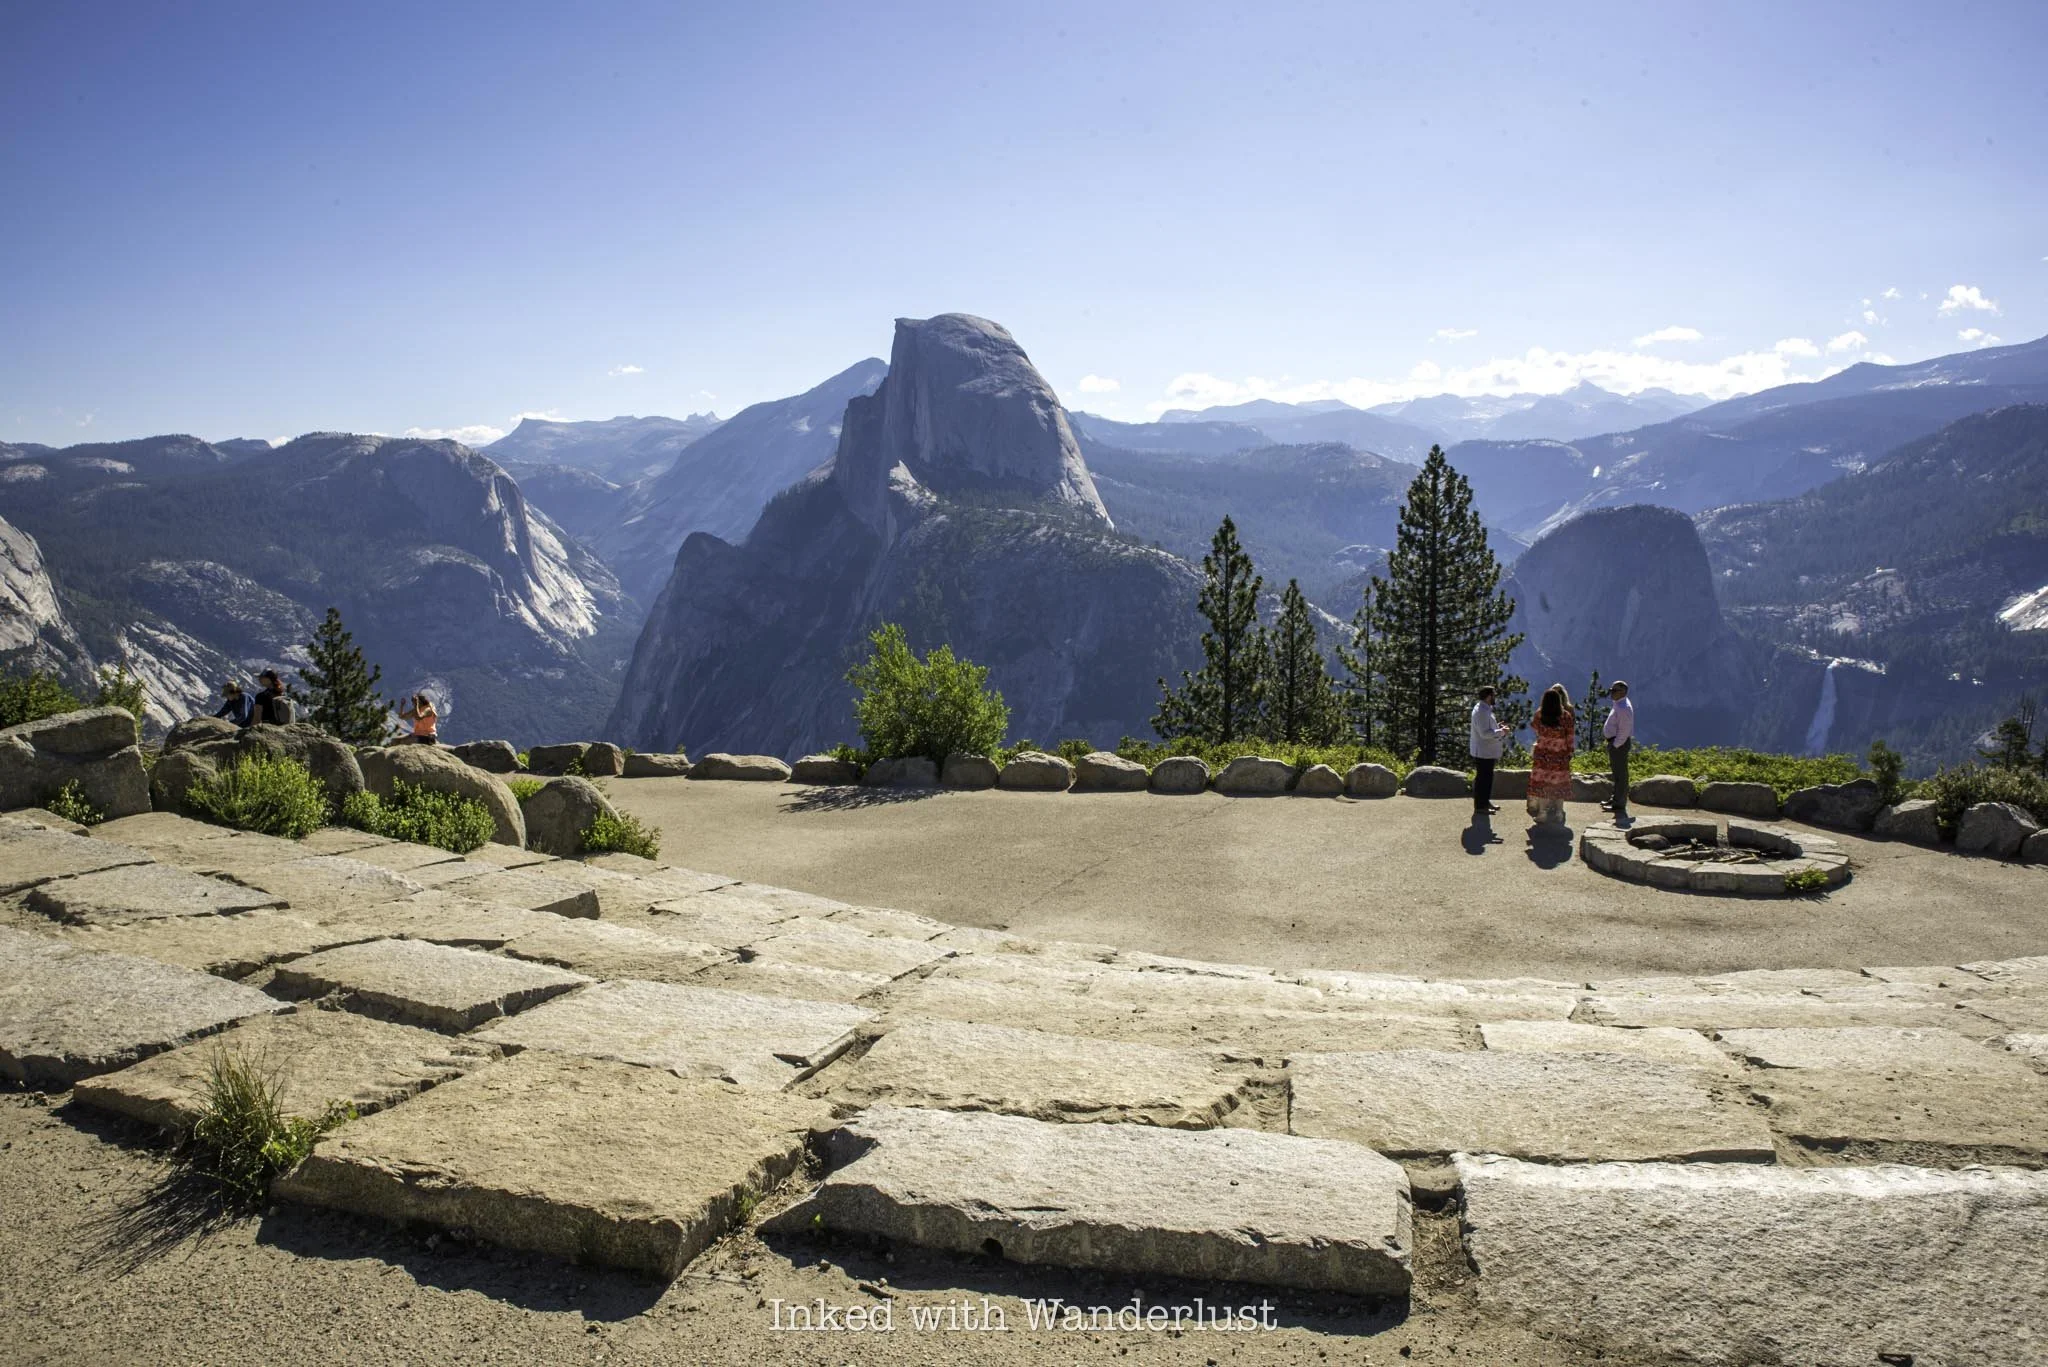
8) Glacier Point (one hour or more)
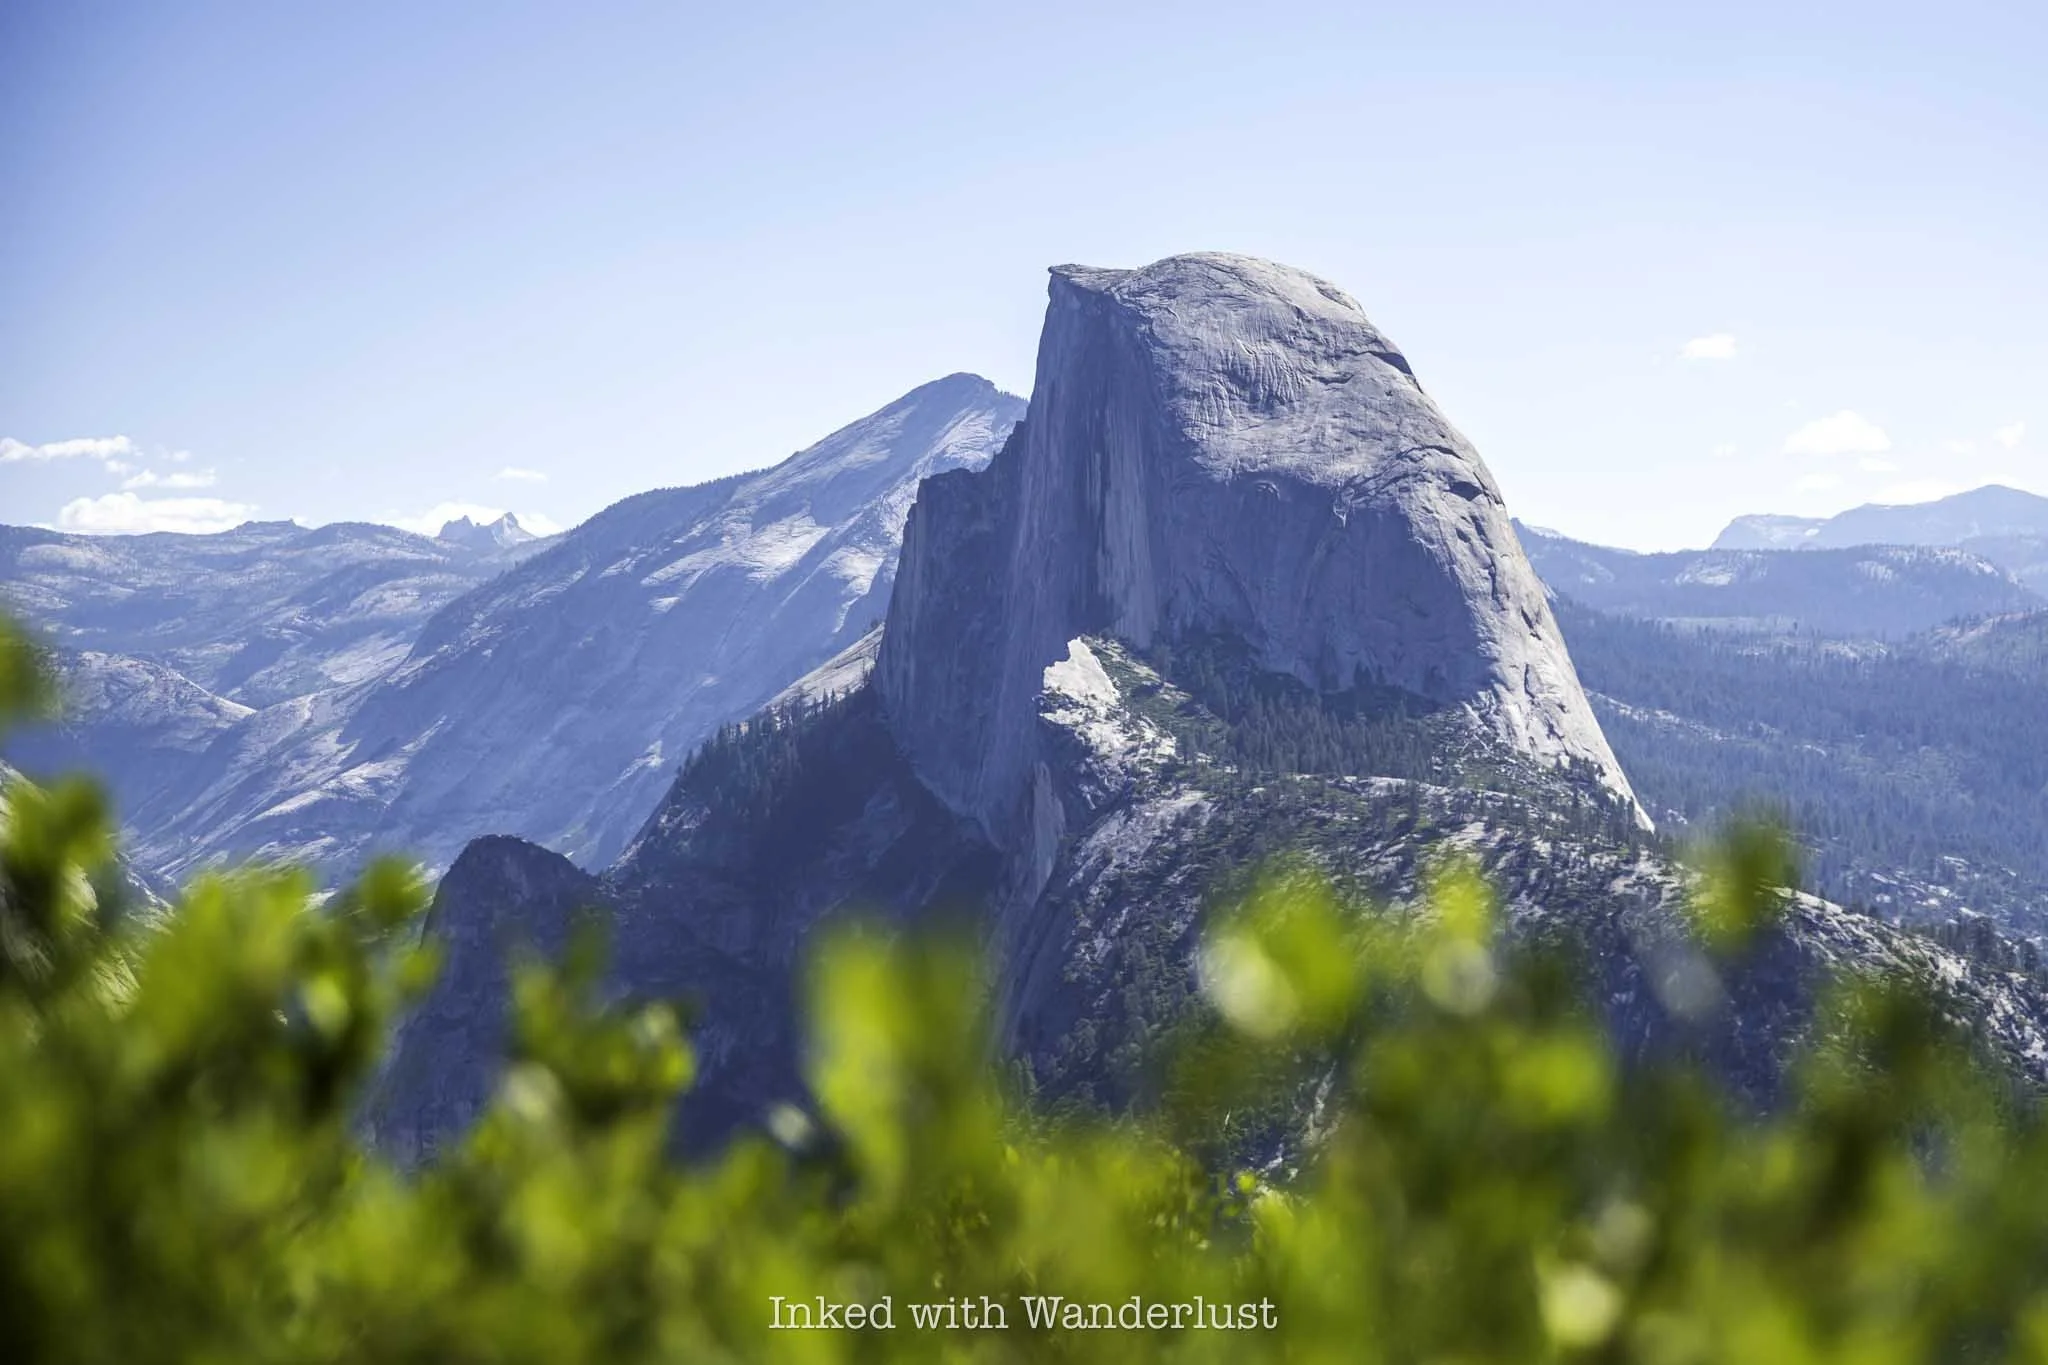
Until this point, you would have spent the majority of your one day in Yosemite in the valley. It’s now time to take a drive to Glacier Point. If you’ve never heard of Glacier Point, it’s one of the most scenic and popular viewpoints in the park.
From Glacier Point, you’ll have a wonderful view of the valley from 3,200 feet above. Yosemite Falls, North Dome, Teneya Canyon, Vernal Fall, Nevada Fall, and Clouds Rest are visible from here. Most notably, the commanding view of the infamous Half Dome is second-to-none.
There is no free shuttle to Glacier Point, though you can book the Glacier Point tour. This tour is seasonal and the final bus leaves at 1:30pm. If this is what you’ll want to do, then you’ll need to adjust this itinerary accordingly.
My recommendation is to take your own vehicle. From El Cap Meadow, take the shuttle back to your vehicle at Four Mile Trail. From there, drive down Southside Drive, loop back onto Northside Drive, and then follow the signs to Glacier Road.
Take in the incredible views, check out the historic geologic hut and if you time it right, stick around and witness a jaw-dropping sunset. From here, simply drive back to the valley and on to your hotel or campground.
If you can help it, I implore you to consider spending two days at Yosemite (or even three) as there is so much more to the park than just the valley. Yosemite’s east side is a hikers paradise and Hetch Hetchy, the original valley, is stunning. Thanks for reading!
Did you find this post useful?
If you did, consider leaving a tip through the Buy Me A Coffee button below! Whether it’s $1 or $5, every bit helps offset small travel costs like coffee, water, lunch, parking, or park entry fees. Your support means the world—thank you!


Northern California Waterfall Road Trip Itinerary (6 Waterfalls!!)
The northern half of California is literally teething with one gorgeous waterfall after another. Some, like Burney Falls, are easy to…
Disclosure: This post contains affiliate links. If you make a purchase through these links, I may earn a small commission at no additional cost to you. I only recommend products or services that I believe will add value to my readers.
The northern half of California is literally teething with one gorgeous waterfall after another. Some, like Burney Falls, are easy to view as they require little to no effort beyond driving there. Others, such as the upper portion of Yosemite Falls, require extra effort and determination.
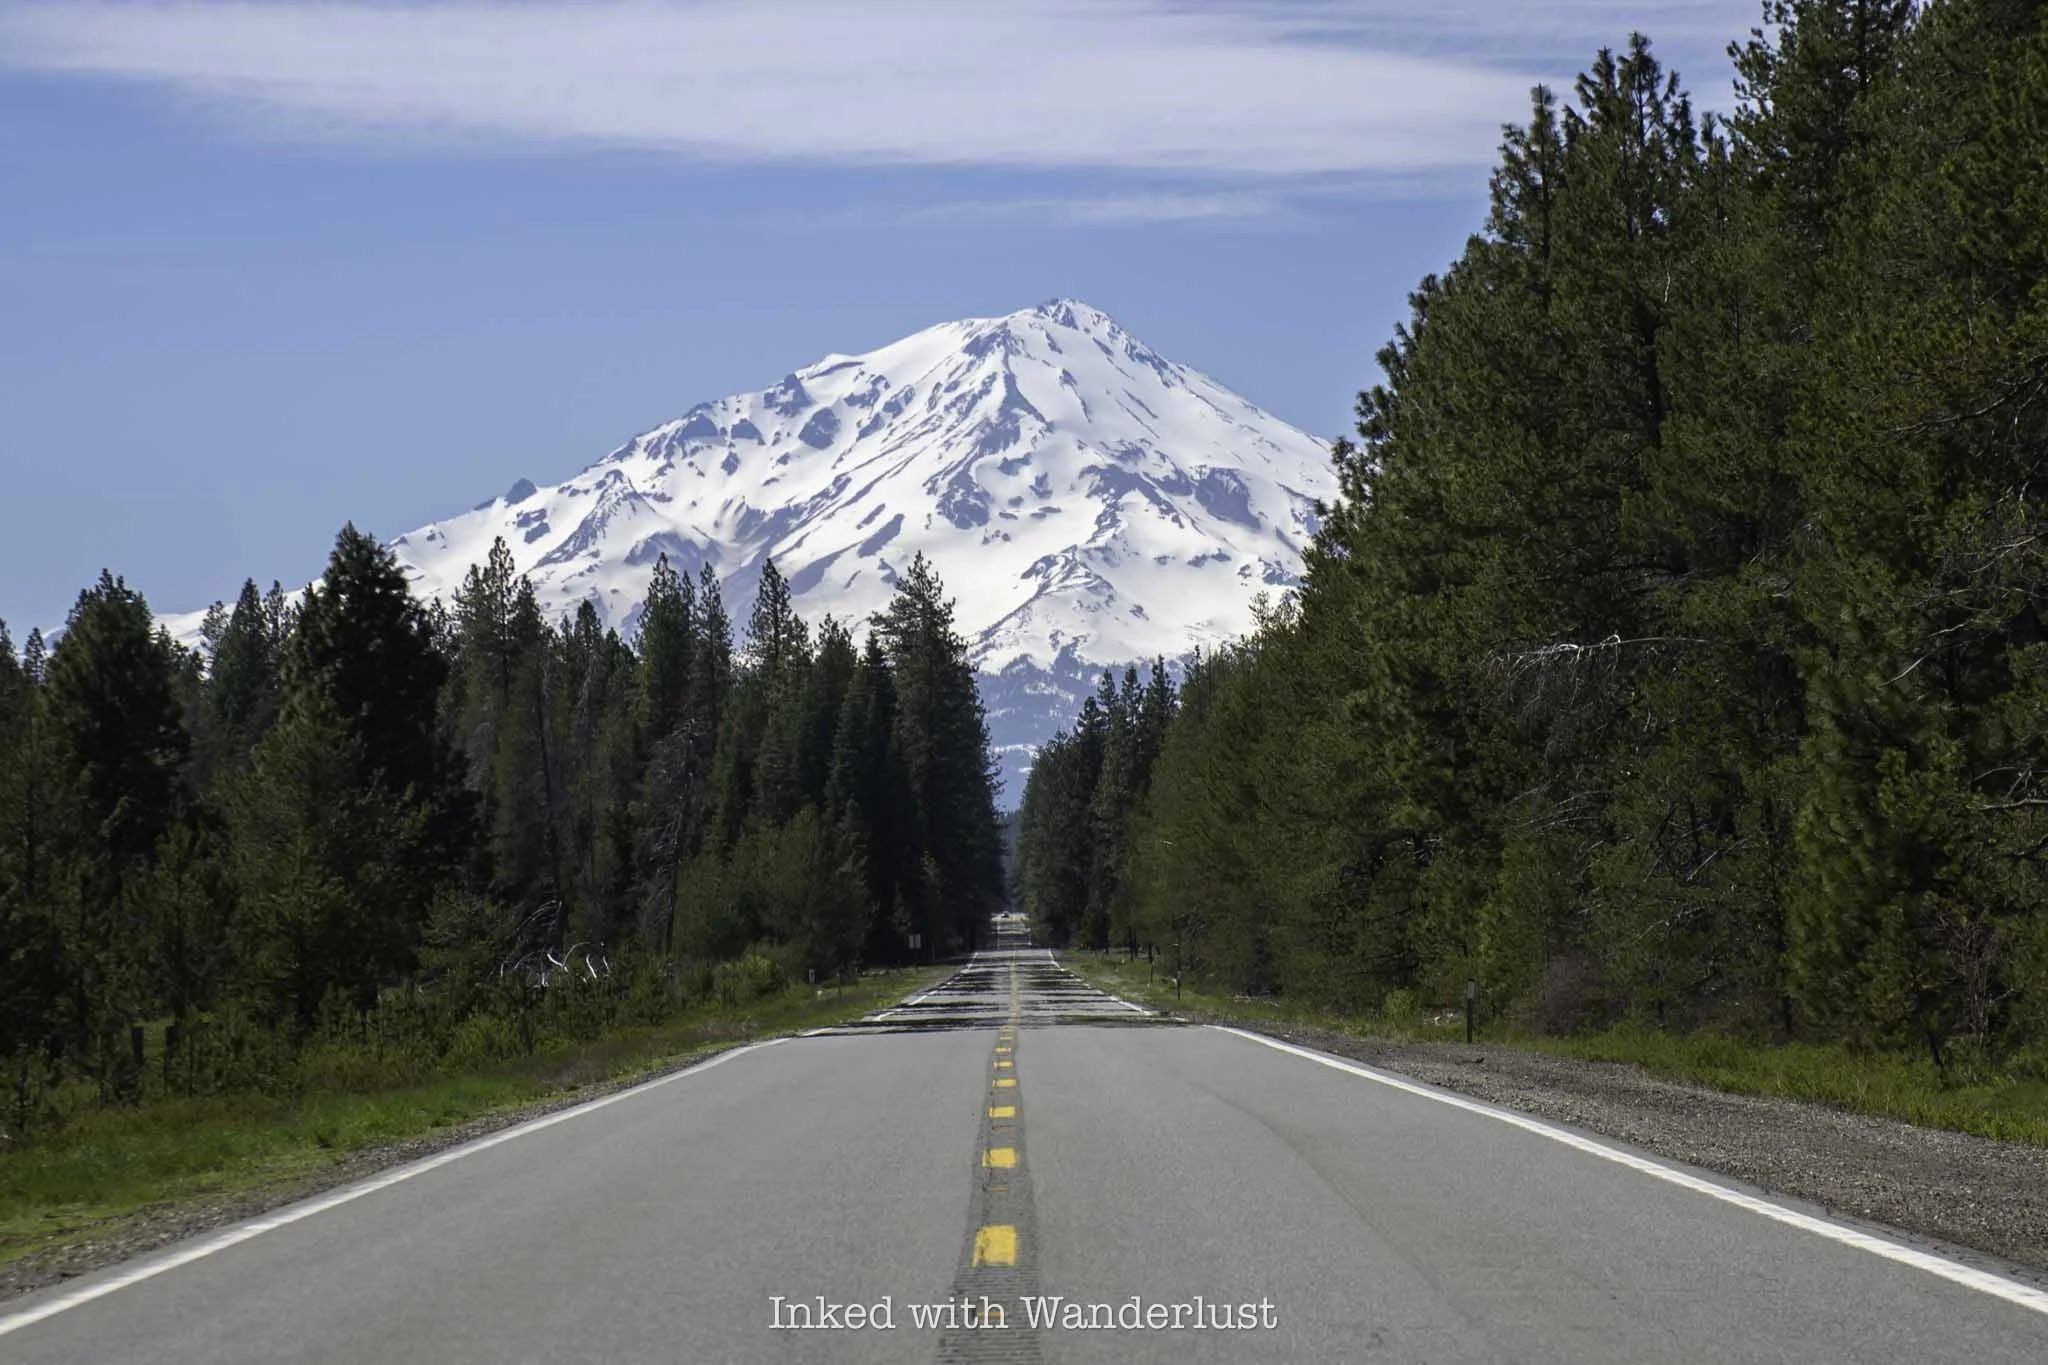
The Shasta region, located in the upper sector of California, has many of the former. In fact, between the small mountain towns of Burney and Dunsmuir along a 60-mile stretch of road are six such waterfalls, some of which require nothing more than getting out of your car to see.
If you plan correctly and don’t linger for too long, seeing all six of these waterfalls is entirely doable. I have been to all of these falls, numerous times, and will provide what I believe to be a solid Northern California waterfall road trip itinerary to see them.
Additionally, I’ll provide information about parking, some helpful (from experience) tips, area restaurants, hotel recommendations, and more. Let’s get into it!
Buy me a coffee?
If you found this blog helpful, consider leaving a tip through the Buy Me A Coffee button below! Whether it’s $1 or $5, every bit helps offset small travel costs like coffee, water, lunch, parking, or park entry fees. Your support means the world—thank you!
I Recommend Beginning in Dunsmuir
The town of Dunsmuir is located right off of Interstate-5 in the Shasta region of California. It is here where you’ll find the first two waterfalls on this list. One of which requires the most amount of effort of the six to see.
You could also begin in the town of Burney and save Dunsmuir for last if you wish. This itinerary, however, will focus on beginning in Dunsmuir. If you want to begin in Burney, simply hit these waterfalls in the reverse order.
There are numerous hotels and local eateries in Dunsmuir. To start your day, I recommend a breakfast burrito and coffee at Up and Running Espresso. Enjoy your breakfast, secure yourself a parking spot, and head off to your first waterfall of the day.
1) Mossbrea Falls

Admittedly, this one’s a bit tricky. It’s fairly easy to get to, but you’ll need to be ok with a little trespassing to see it. Mossbrea Falls itself isn’t the issue, it’s the route you’ll need to take that traverses across private property.
I wrote an extensive guide with step-by-step instructions on how to get to Mossbrea Falls. Additionally, it’s full of helpful tips, advice, and picture references to ensure a smooth experience.
You’ll need to walk through a private retreat and then along railroad tracks (Union Pacific property) for about a mile to reach the falls. Both property owners have relaxed their stance on hikers going through their property, as I had no issues at all when I went.
Mossbrea Falls is easily one of the most beautiful waterfalls I’ve ever seen. It’s almost like stepping into the pages of a fairytale novel. Trust me, it’s worth the effort. If you knock this one out first thing in the morning, you should be able to complete it in two hours or less.
When you’re done, and if it’s open, consider stopping for lunch at nearby Yaks on the 5 restaurant. It’s right down the street from Mossbrea and serves can’t-miss, delicious artisan burgers.
READ ALSO: “The Ultimate Guide to Mossbrea Falls in Dunsmuir”
2) Hedge Creek Falls

From where you parked for Mossbrea Falls, head north on Dunsmuir Avenue or on Interstate 5 to Hedge Creek Falls. As you get closer, you’ll see signs indicating which exit to take and where to park.
From the small pull out-style lot, it’s a short jaunt down to the relatively small, but nonetheless beautiful fall. This single flow fall flows 35-feet over a dramatic basalt shelf with towering pines and other greenery abound.
A unique aspect to Hedge Creek Falls is you’re able to walk behind it, offering a unique perspective. This is the only fall on this list where you can do that, which helps it to stand out.
READ ALSO: “Hedge Creek Falls: A Short Hike to an Incredible Waterfall”
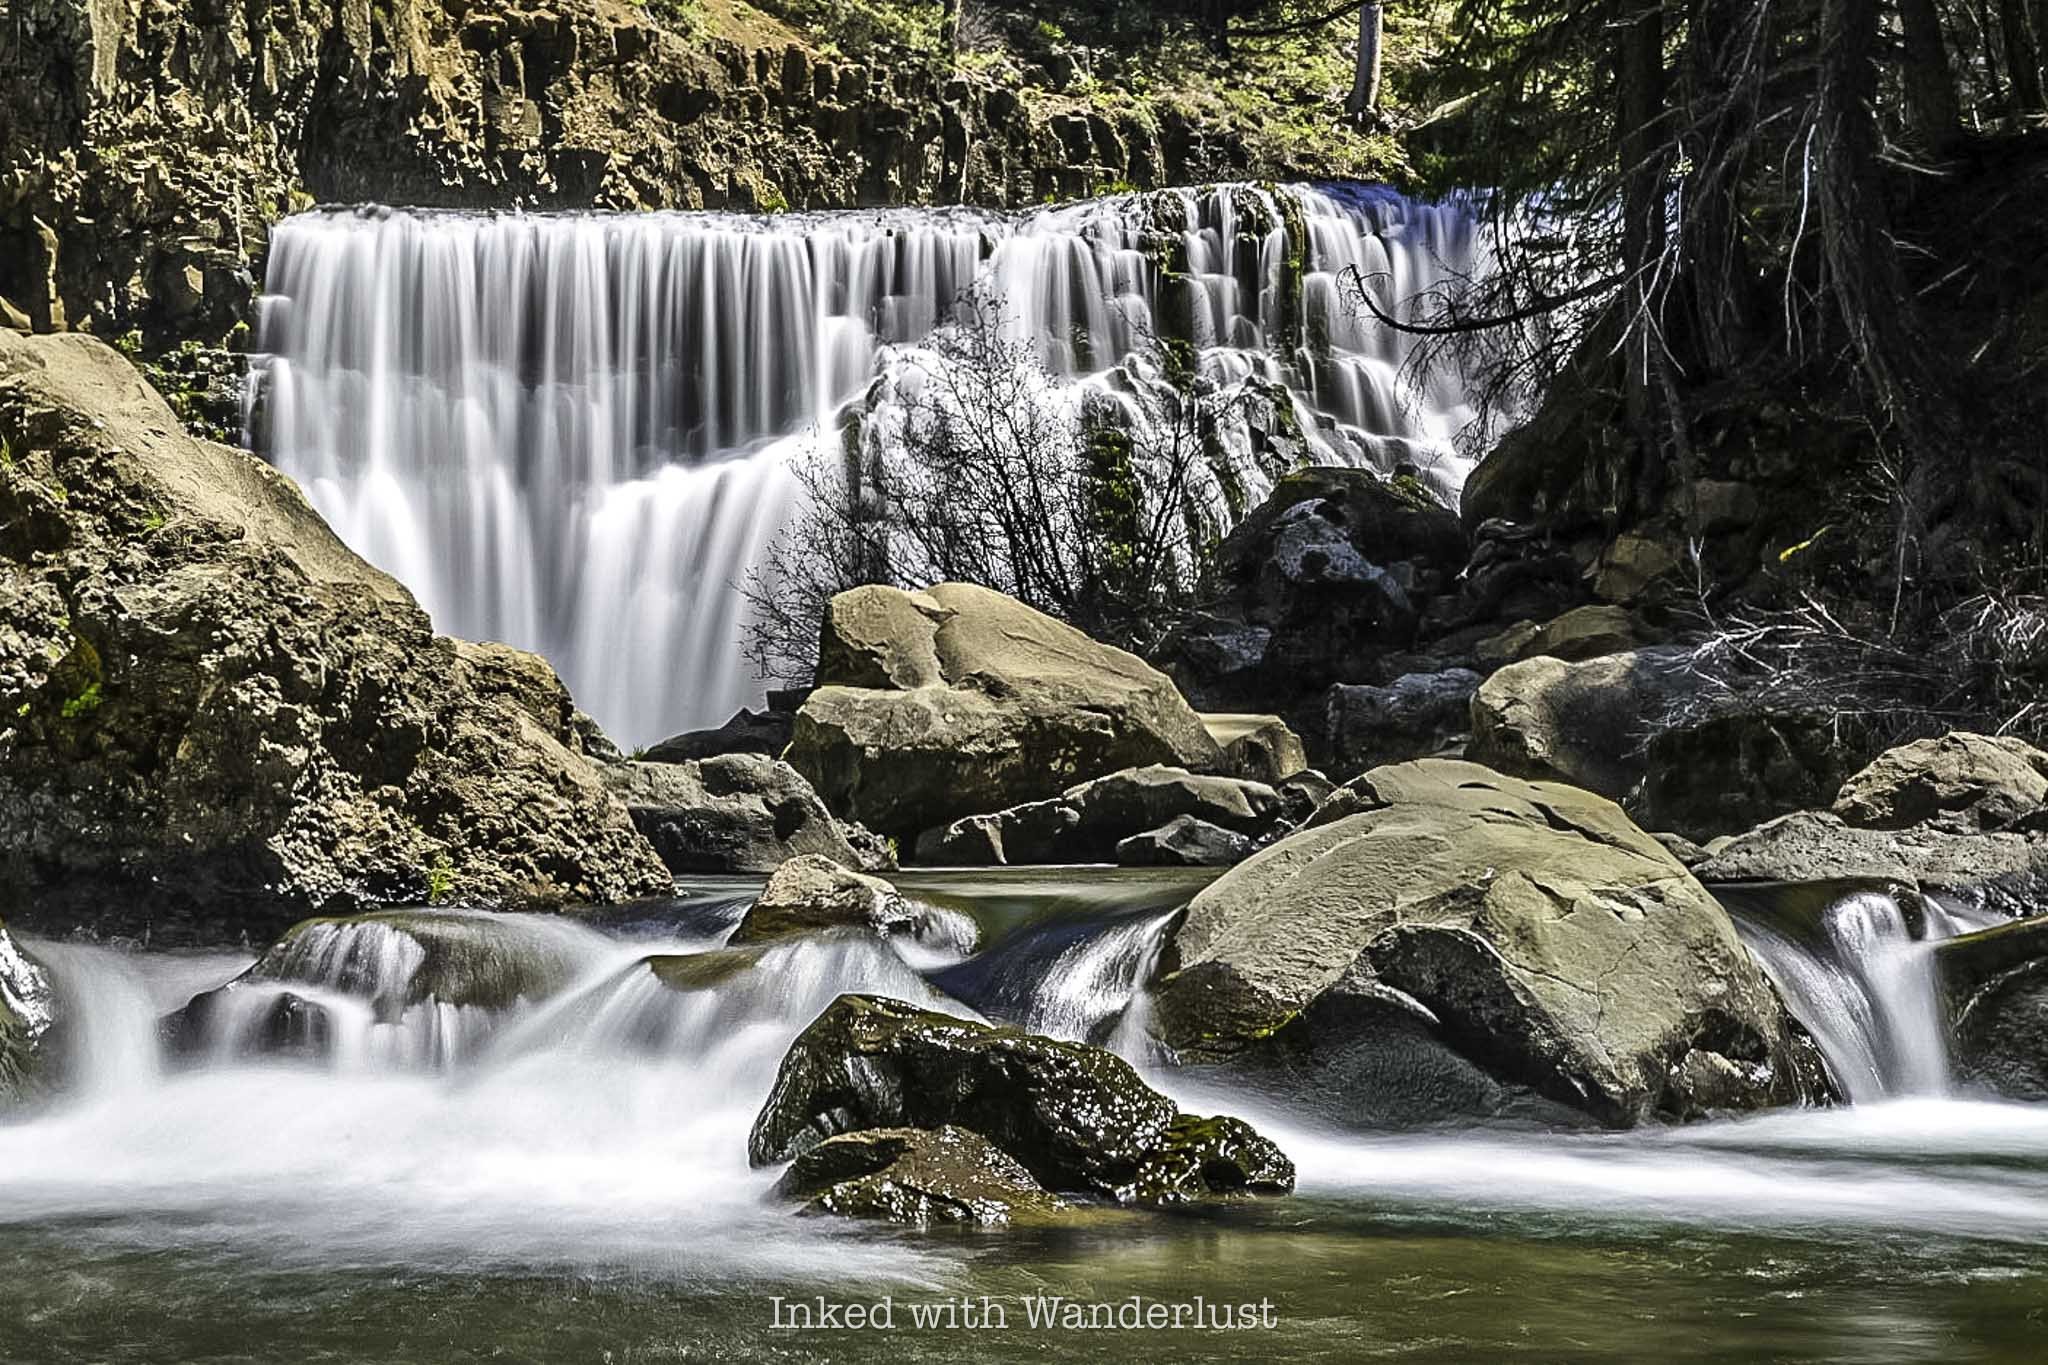
3) Upper McCloud Fall

To reach your next destination, you’ll head east on CA-89 towards to the historic town of McCloud. More specifically, McCloud River Falls. From Hedge Creek Falls, it’ll take roughly 25 minutes of drive time to reach the upper fall.
There, you’ll find three incredible waterfalls along a single 3.9-mile (out and back) trail. However, you likely won’t have time to hike it and still make it to the final waterfall. Instead, drive to each one as they all have their own lots and viewing areas.
I suggest beginning at Upper McCloud Falls. You can see it fairly well from the viewing decks but for a better view, head a bit further down the trail to an unmarked spur trail. Shortly after the concrete ends, you’ll see said unmarked spur trail on your left.
Take your time as it’s a bit sketchy. From the bottom, you’ll get an incredible “head-on” view of the fall and can access the pool if you want to swim. I do recommend saving that for the middle and/or lower falls, though.
4) Middle McCloud Fall
After checking out the upper fall, you’ll next head to Middle McCloud Fall. The middle fall is the largest and, in my opinion, most picturesque of the three. It also has a large and deep pool at the base.
However, it’s also the one that requires the most effort to see, provided you want to see it from its base. There are a couple of viewing platforms just steps from the parking lot if you’re ok with seeing it from afar.
To get to the base, you’ll hike the fourth of a mile (one-way) dirt trail to the bottom. Getting there is easy, but it’ll be an uphill slog on the way out. It’s not difficult at all, but be prepared for it.
I encourage you to take a dip in the pool down there. It’s a great way to cool off on a hot summer day and you won’t find a better view. Many folks cliff jump here as well, but I would check for underwater boulders before doing so.
READ ALSO: “How to Hike to the Base of Middle McCloud Falls”
5) Lower McCloud Fall

Next, head further down the road to Lower McCloud Fall. This 12 foot singular fall plunges into a bowl-shaped pool surrounded by basalt rock walls. It’s the most popular (for obvious reasons) for swimming out of the three.
There is no steep trail to take and you won’t need to go down a sketchy spur trail to reach it either, as it’s mere feet from the parking lot. If you skipped swimming at the middle fall, definitely don’t skip it here.
If you want to want to hike the entire trail, I recommend starting here as opposed to the upper fall. You’ll get the initial climb done on your way in, when you have the most energy. The way back will be a breeze as it’ll be all downhill.
READ MORE: “McCloud River Falls: Three Fantastic Waterfalls in One Hike”
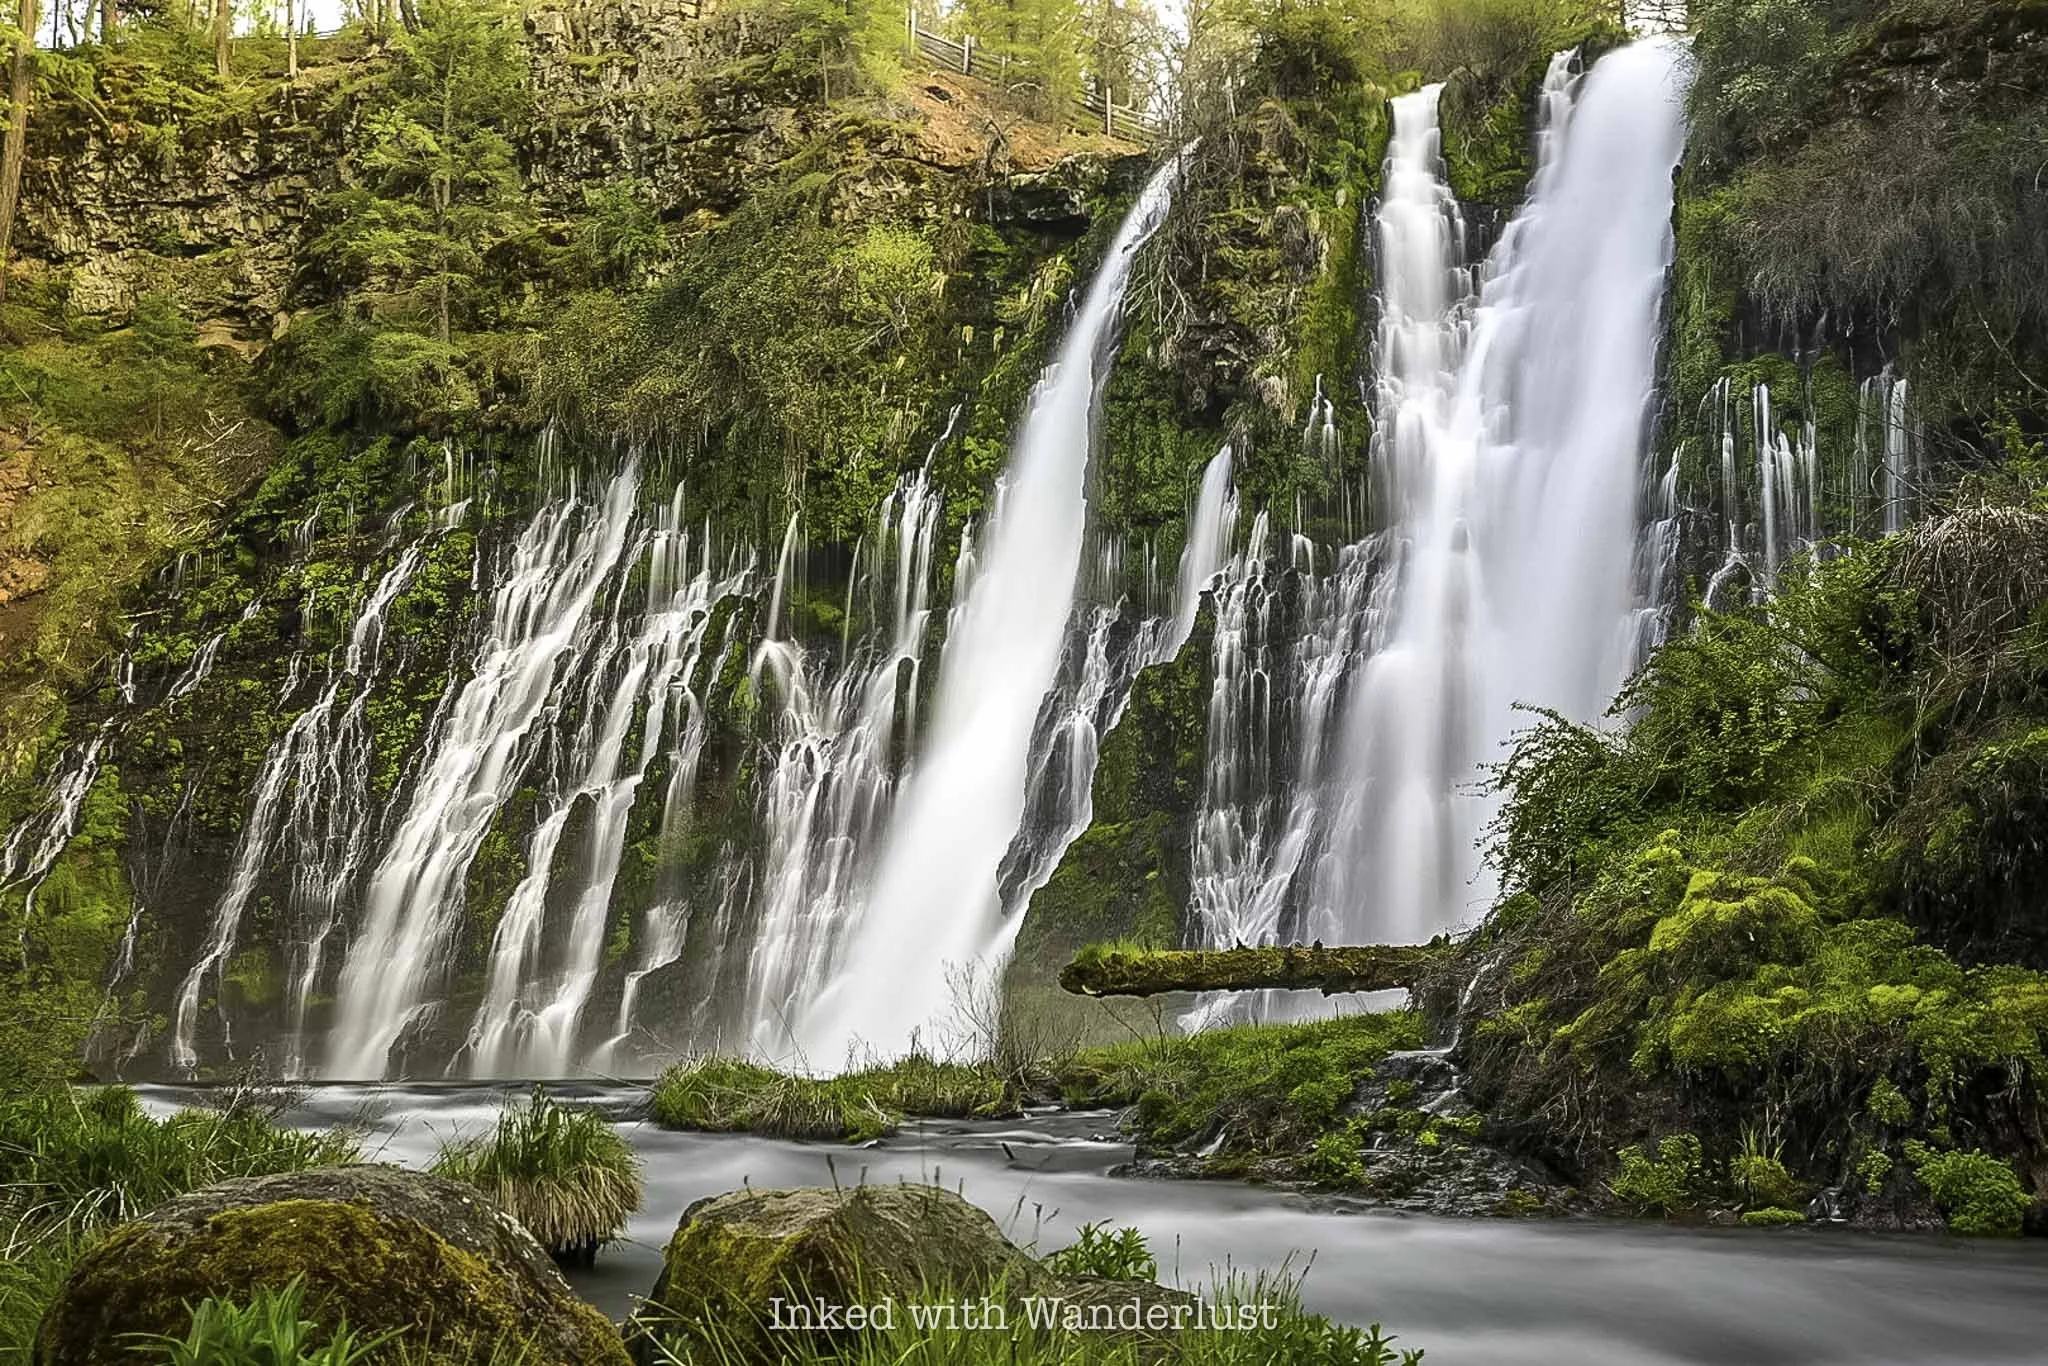
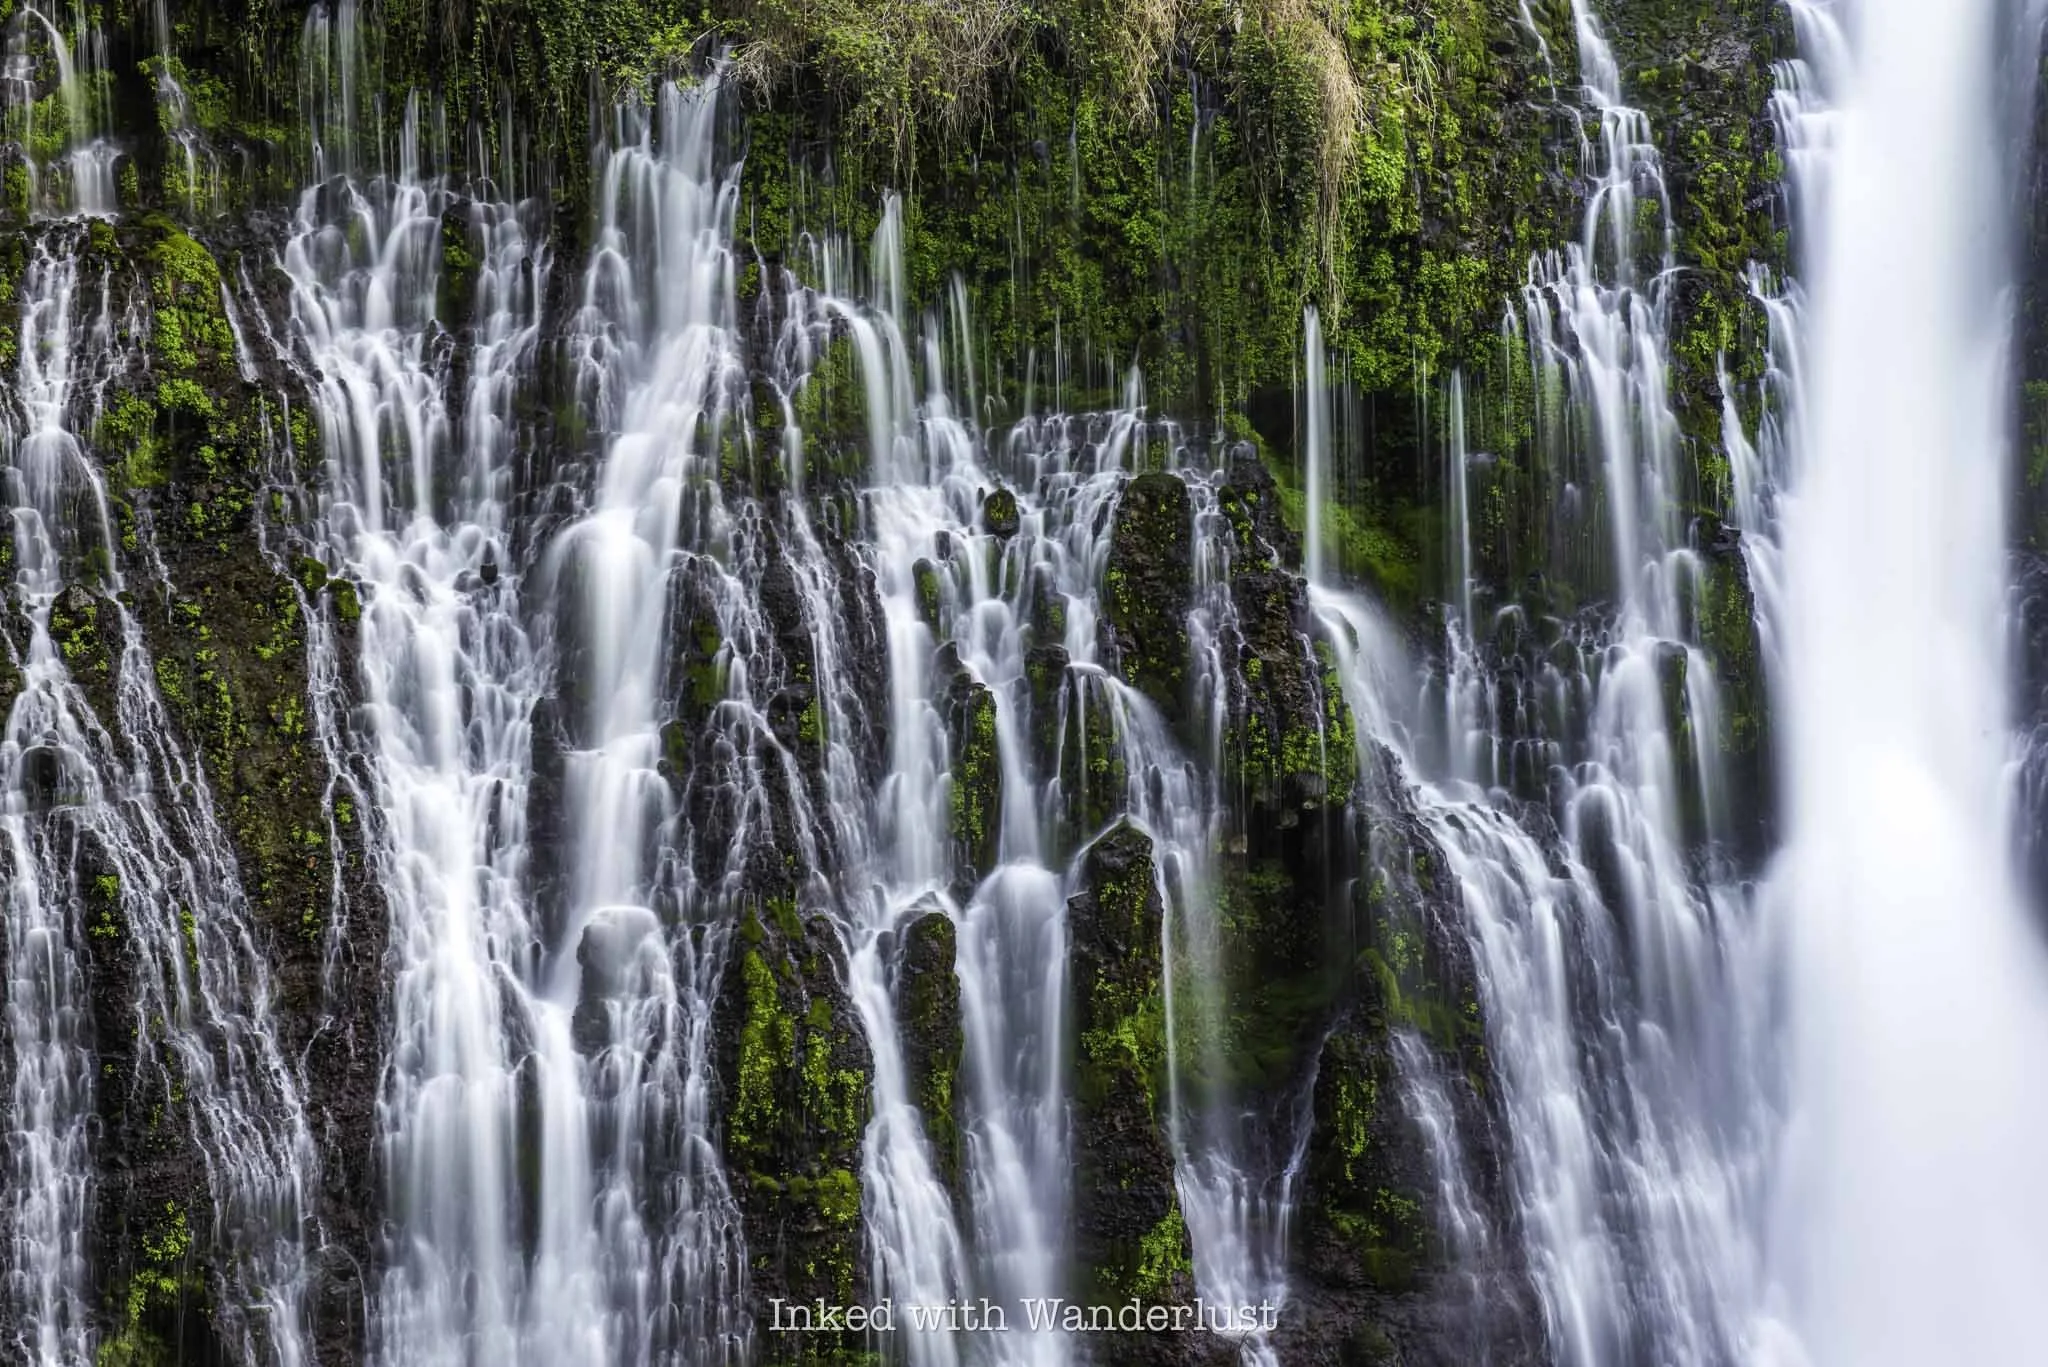
6) Burney Falls

Your final waterfall on your Northern California waterfall road trip is the awe-inspiring Burney Falls. If you’ve never been to Burney Falls, you’re in for a treat. It’s largely fed by Burney Creek, but also by underground rivers that flow outward through the large basalt wall.
You can view Burney from above at the accessible (and paved) viewing deck but for the full experience, head down the short path to its base and pool. It’s a sight you can only truly appreciate in person.
Burney Falls does get crowded during the day, which is why I recommend saving it for last and getting there in the late afternoon or closer to sunset. That’s what I do whenever I visit and I almost always have it to myself or I’m sharing it with just a few others.
On the way to Burney Falls from McCloud Falls, you’ll pass the location of the infamous scene from the movie “Stand by Me” where the boys ran for their lives across a bridge from an oncoming train. It’s still there if you want to check it out this piece of Hollywood history.
As stated earlier, to do this in the reverse order, go to Burney Falls in the morning. From there, stop at the three McCloud Falls. Then, drive to Dunsmuir and knock out Hedge Creek Falls before concluding at Mossbrea Falls.
If you’re planning to stay near Burney Falls, I recommend Shasta Pines Motel in the town of Burney. It’s a no-frills motel with little in the way of amenities, but it’s clean and affordable with comfortable bedding. From Burney, you can check out Subway Cave, Lassen-Volcanic National Park, and more!
READ MORE: “McArthur-Burney Falls State Park Ultimate Guide”
Buy me a coffee?
If you found this blog helpful, consider leaving a tip through the Buy Me A Coffee button below! Whether it’s $1 or $5, every bit helps offset small travel costs like coffee, water, lunch, parking, or park entry fees. Your support means the world—thank you!


PROVERBS 16:9

10 Best Things to do in One Day in San Francisco
Being born and raised in the San Francisco Bay Area, I was never more than an hour's drive away from San Francisco or how locals refer to it, "The City". It's been…
Being born and raised in the San Francisco Bay Area, I was never more than an hour's drive away from San Francisco or how locals refer to it, "The City". It's been some time since I've moved away, but my fondness for the city never faded.
Despite living a state away, I still visit the city (and bay area, in general) fairly regularly. In fact, my wife and I recently discussed planning a mini-vacation there to reconnect with it and the attractions we love.
When I started thinking about it more, I thought about how many people visit San Francisco for the first time every year. The city is huge and can seem daunting to those who've never been (to be honest, I've been there dozens of times and it still feels daunting).
Then I started thinking about those who may only have one day to spend. If they asked me which quintessential attractions I would recommend for a one day visit, what would they be and in which order should they do them?
That's who this post is for. If you only have one day to spend in San Francisco, I'm going to recommend ten attractions that I feel you could fit into a one day visit. I’ll also recommend several other “must-see’s” if you happen to have another day or two to spend. But first…
Buy me a coffee?
If you found this blog helpful, consider leaving a tip through the Buy Me A Coffee button below! Whether it’s $1 or $5, every bit helps offset small travel costs like coffee, water, lunch, parking, or park entry fees. Your support means the world—thank you!
Should I Take My Car to San Francisco?

It's no secret that San Francisco, and California in general, has had its issues with crime in recent years. In the city, vehicle breaks ins have occurred regularly, with locals resorting to leaving their windows rolled down so thieves can just look through the car without breaking the window.
While there has been recent success with combating this problem, it can still happen without warning, whether at night or in broad daylight. Having your own vehicle to take you around to these places would be the most economical option, but you'll face this potential issue and others.
Aside from the possibility of theft, parking can be a huge headache, as it’s limited in many places and you'll likely need to pay a flat or hourly rate. That said, public transportation is readily available, as are ride sharing options.
Unless you're planning to take trips outside of the city or San Francisco is just one stop on your trip, no, you won't need your own vehicle. Everything listed below can be accessed either by ride sharing, public transportation, walking, biking, etc.
Now, let’s get to the ten things to do in one day in San Francisco…
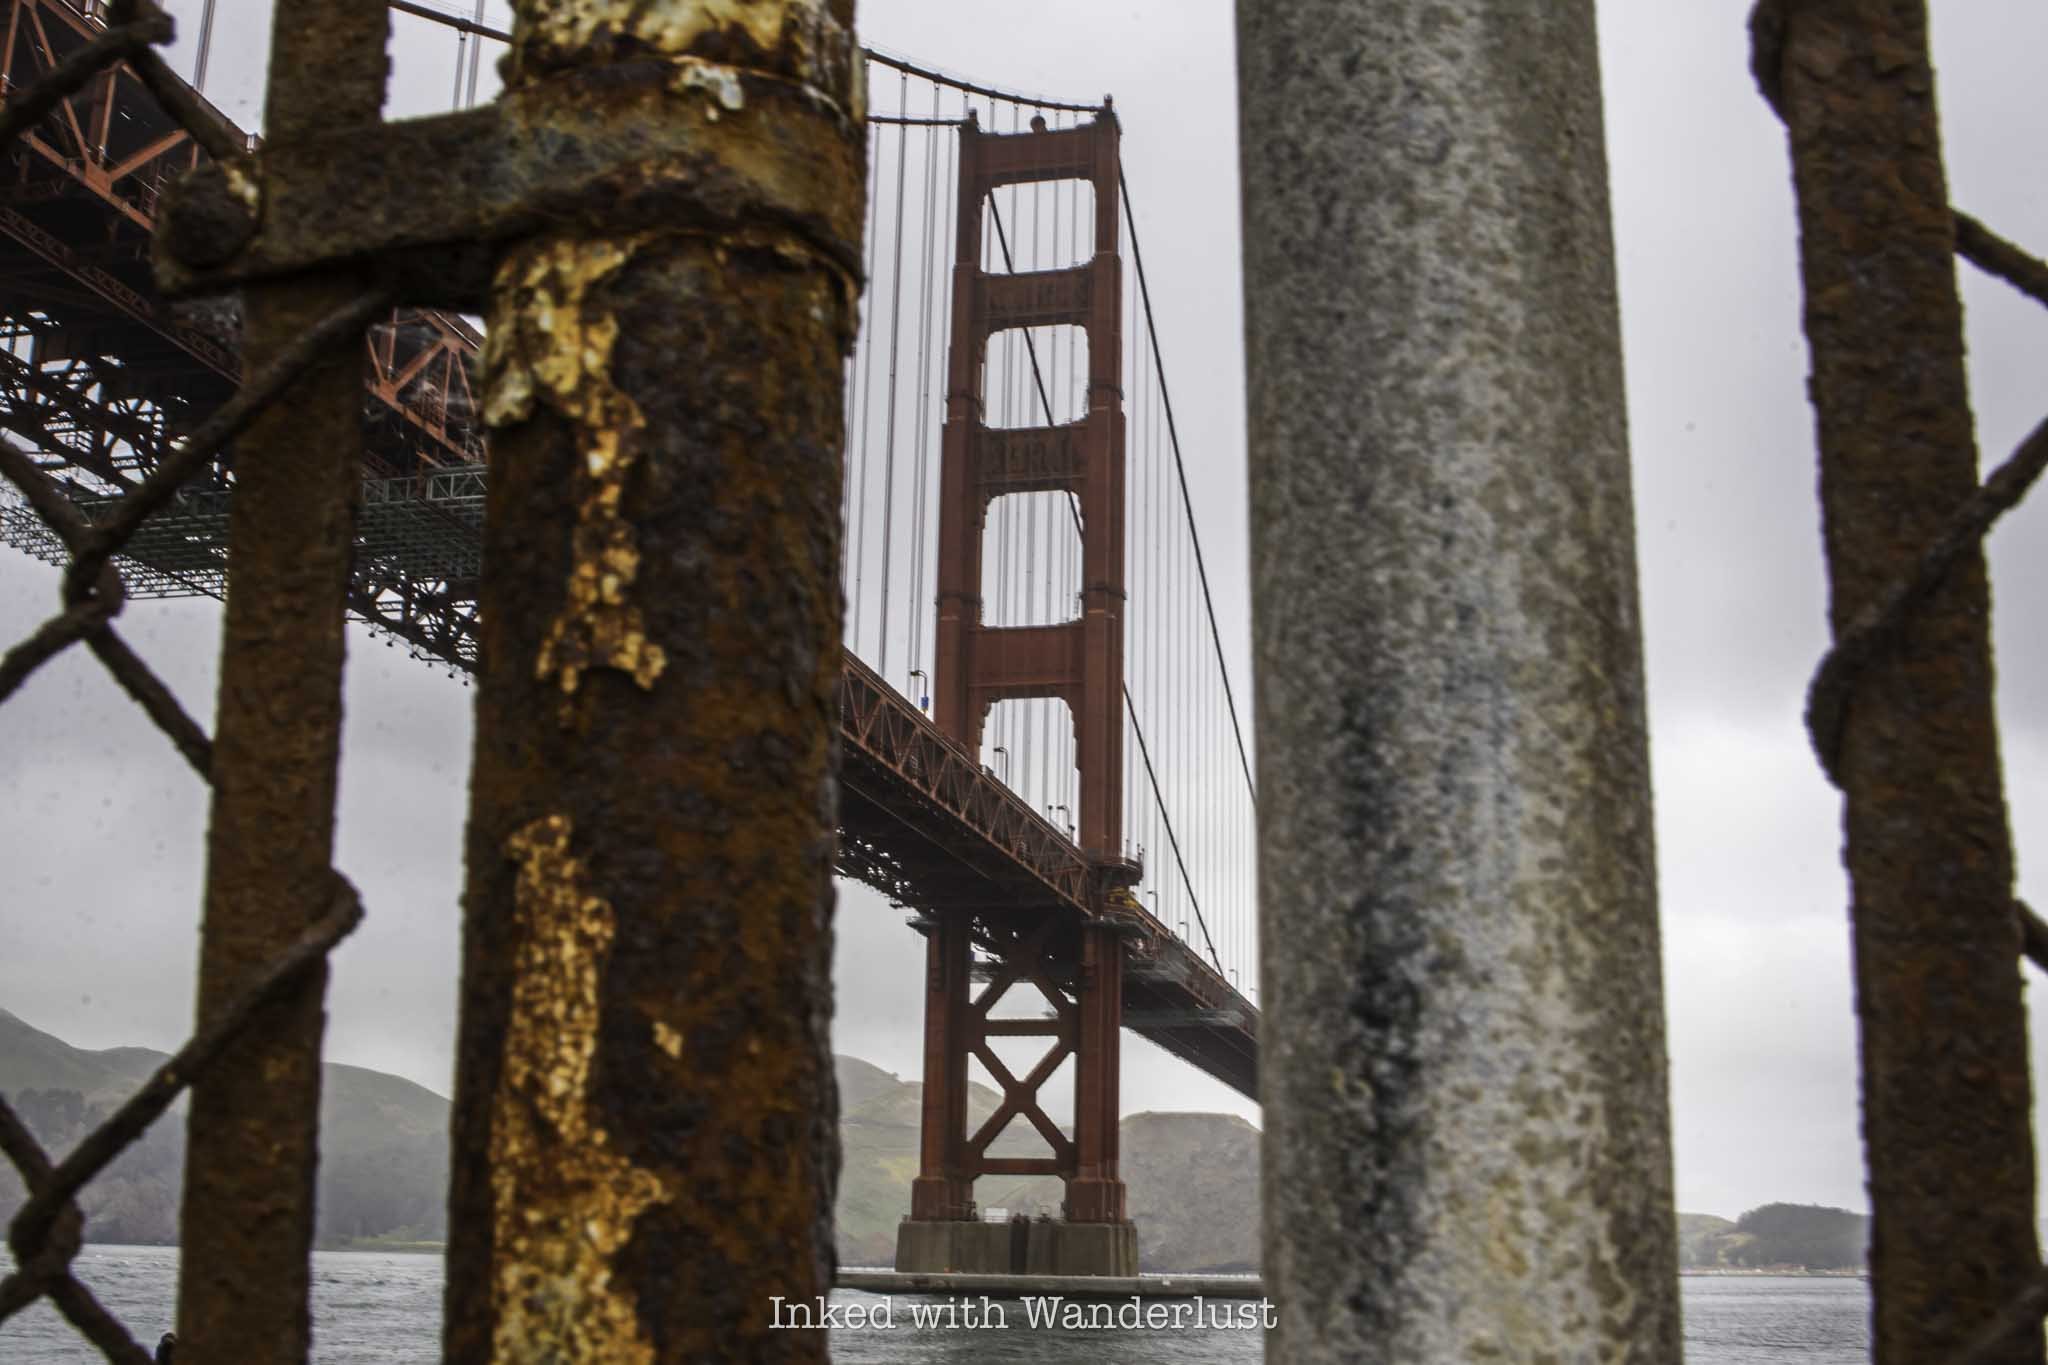
1) The Golden Gate Bridge

I recommend beginning your day on the north side of the city, with your first stop being the iconic, Golden Gate Bridge. No first visit to the city would be complete without it, as it's the quintessential top attraction. There are two official viewpoints, one on the south (city) side and another on the north (Marin) side of the bridge.
If you'll have your own vehicle, definitely check out both, as they each offer their own perspectives of the bridge. If you do go to the Marin Headlands (north) side, there are several hiking trails and additional viewpoints you can check out, such as Battery Spencer, Kirby Cove, Point Bonita Lighthouse, Fort Baker and more.
If you're short on time or will be utilizing ride sharing, stick to the city side at the Golden Gate Bridge Pavilion. There, you'll get a decent view of the bridge, as well as access to several hiking trails, a cafe/gift shop, and more.
From either side, you'll be able to access the walking/biking path of the bridge. Keep in mind that the walking path is 1.7-miles, one way, from one end to the other. Most people walk about a third of the bridge and call it a day. So don't feel like you have to walk the whole thing.
PRO TIP: If you have extra time, I highly recommend taking a trip to Muir Woods National Monument. From the bridge, it's only a twenty minute drive outside of the city. You could easily spend a half day (or more) exploring this special place.
2) Explore Fort Point National Historic Site
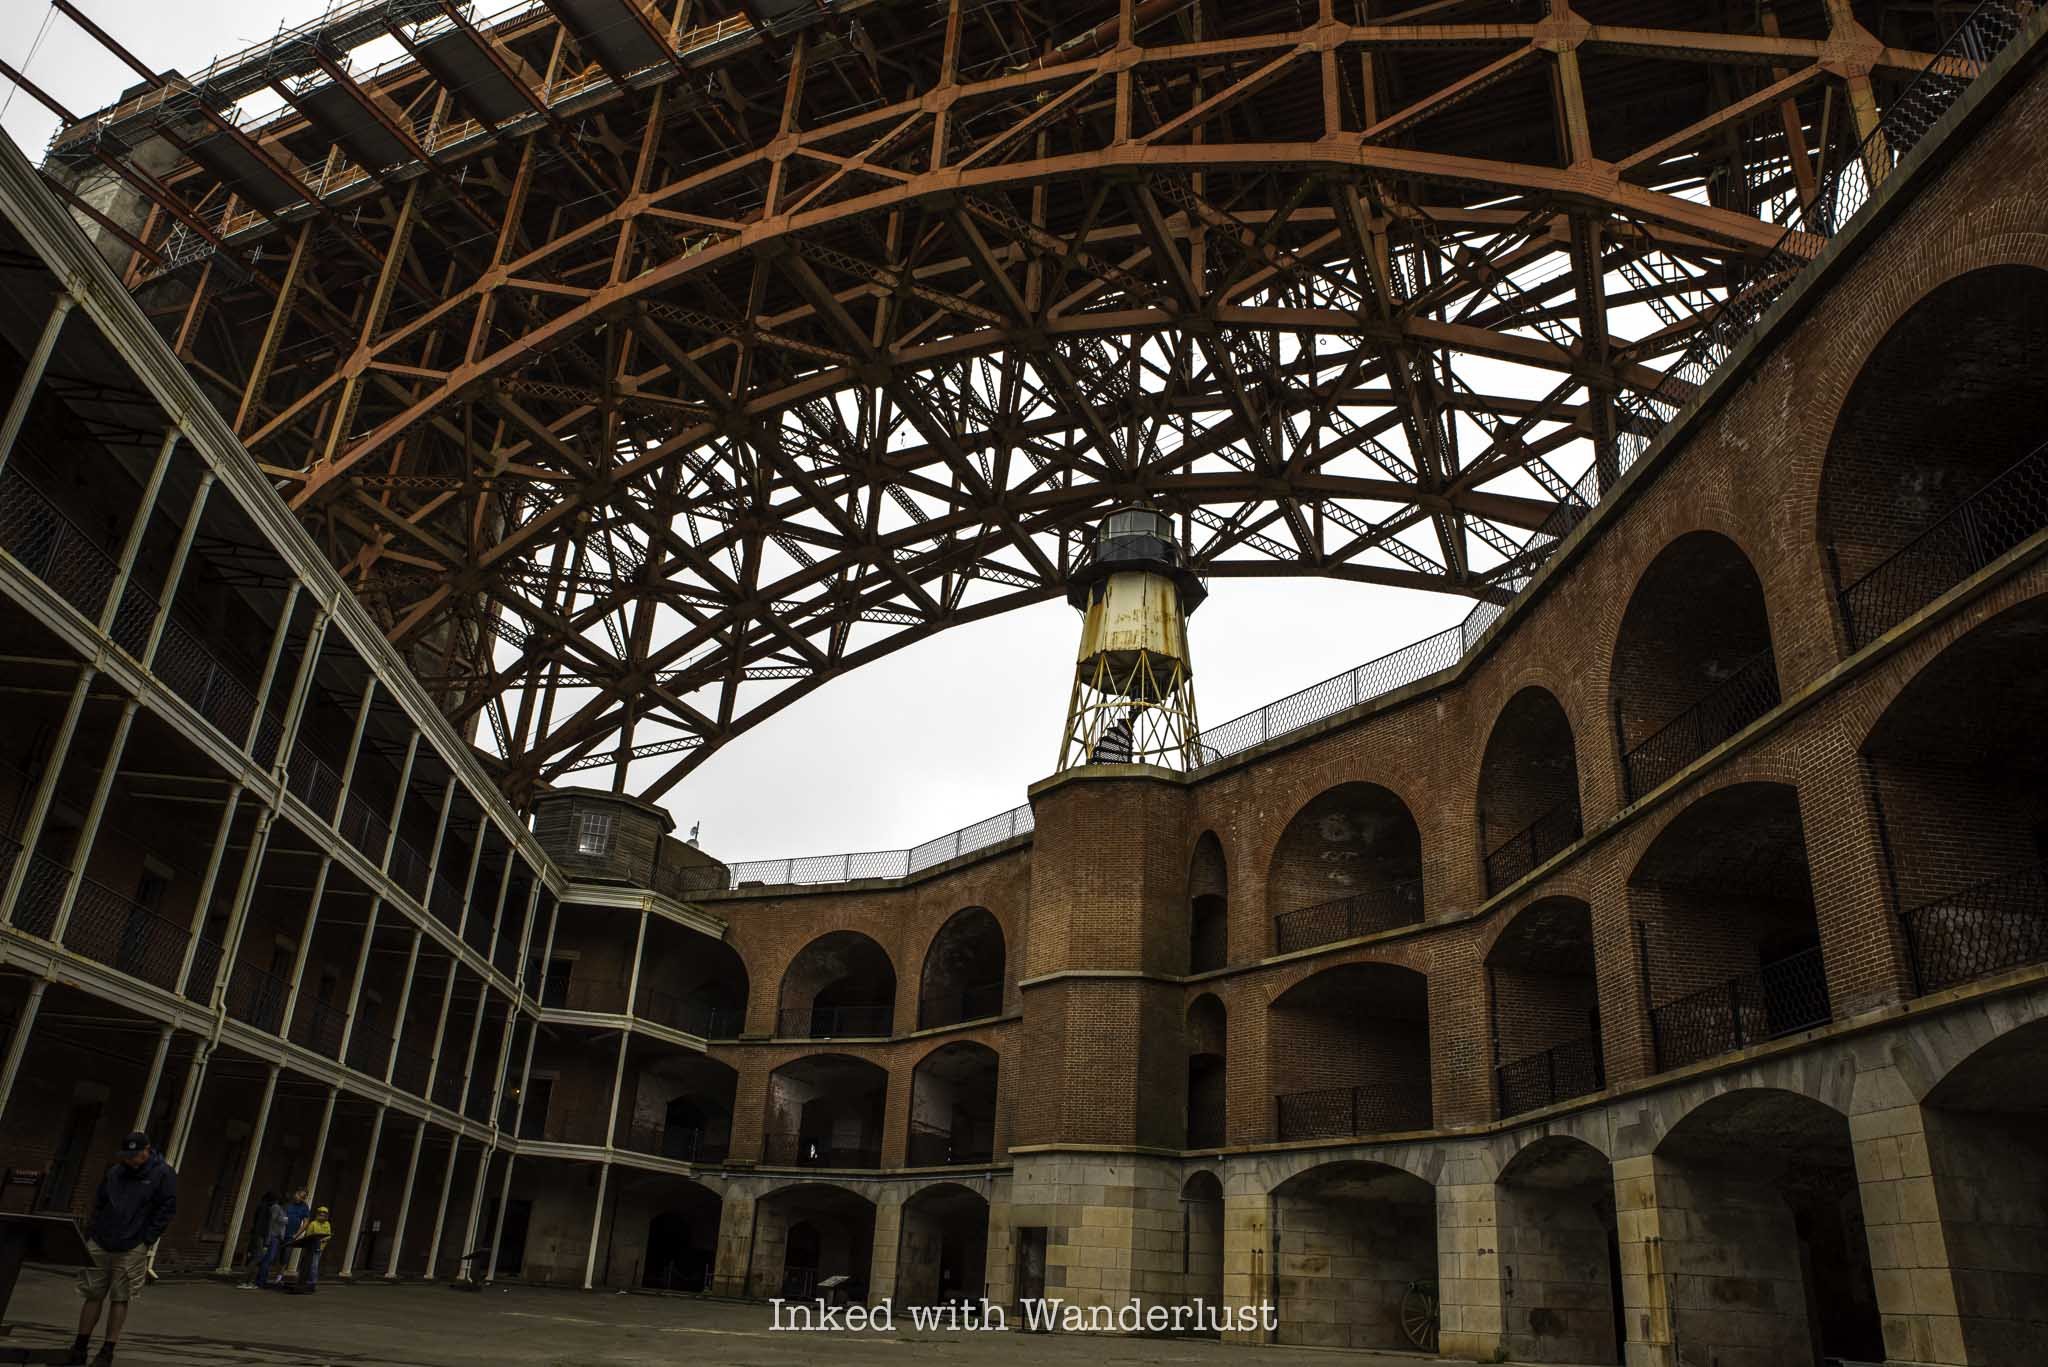
Your time on the north side of San Francisco continuous at Fort Point, a highly historical, civil war-era Army fort situated under the Golden Gate Bridge. The fort was constructed between 1853 and 1861, predating the bridge now spanning over it.
Fort Point is free to enter but depending where you park, there may or may not be a fee. If you park close to the fort, you won't have to pay a fee but if you park above the fort at Battery East Vista, you will have to pay.
At the fort are several museum-style exhibits showing what life was like at the fort, as well as several examples of weaponry of the period, a gift shop, and in my opinion, one of the best views of the Golden Gate Bridge you can get.
If you park at the Golden Gate Bridge Pavilion, it's an easy fifteen minute walk down to Fort Point. Otherwise, it's an even easier drive down to it from there. The parking closest to the fort tends to fill quickly so if you're already parked nearby, it'll likely be easier to just walk.
3) Visit the Palace of Fine Arts
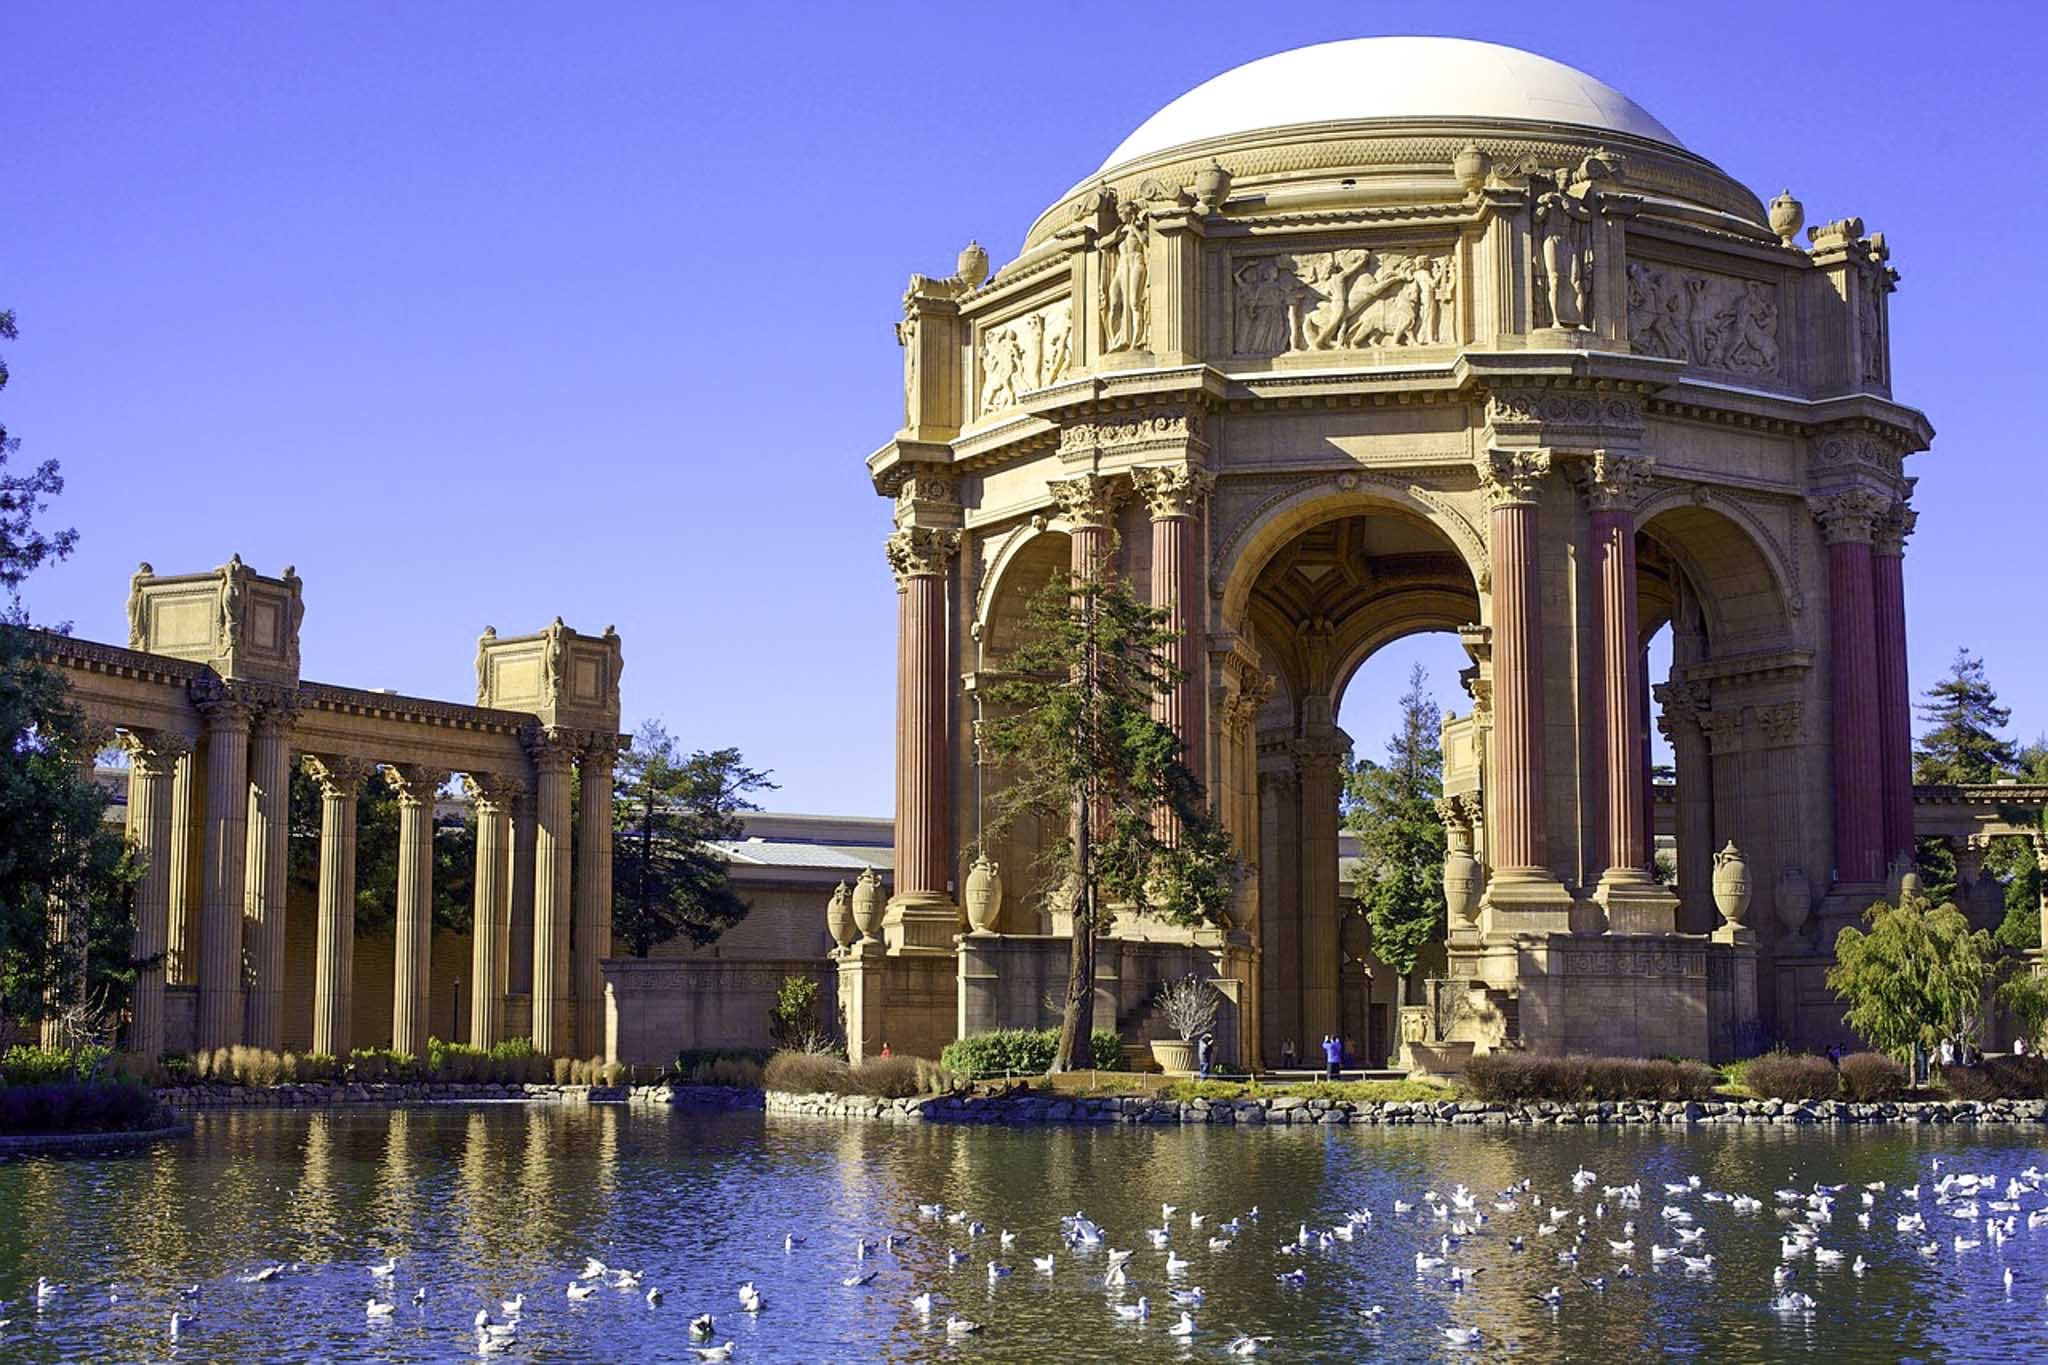
The Palace of Fine Arts in San Francisco is a magical place that feels like stepping into a storybook. Built in 1915, it looks like an ancient Roman or Greek ruin with grand columns, a huge dome and a peaceful lagoon often full of swans and ducks. It’s a nice spot to take photos, have a picnic or just walk around enjoying the beauty of the architecture.
One of the coolest things about visiting the Palace of Fine Arts is how peaceful it feels, even though it’s right in the middle of a bustling city. The sound of the water fountain and birds make it such a relaxing place to sit and take a break.
If you’re into photography or art, this spot is full of inspiration—there’s something inspirational about the way the sunlight hits the dome and reflects in the lagoon. And even if you’re not into art, just being there makes you feel like you’re part of something special.
Another reason to visit is how much fun you can have exploring the area. The Palace of Fine Arts is close to other amazing San Francisco spots like the Golden Gate Bridge and Crissy Field. You can spend the day walking, biking or just enjoying the fresh air and views.
4) See the Ruins of Sutro Baths and Hike Lands End
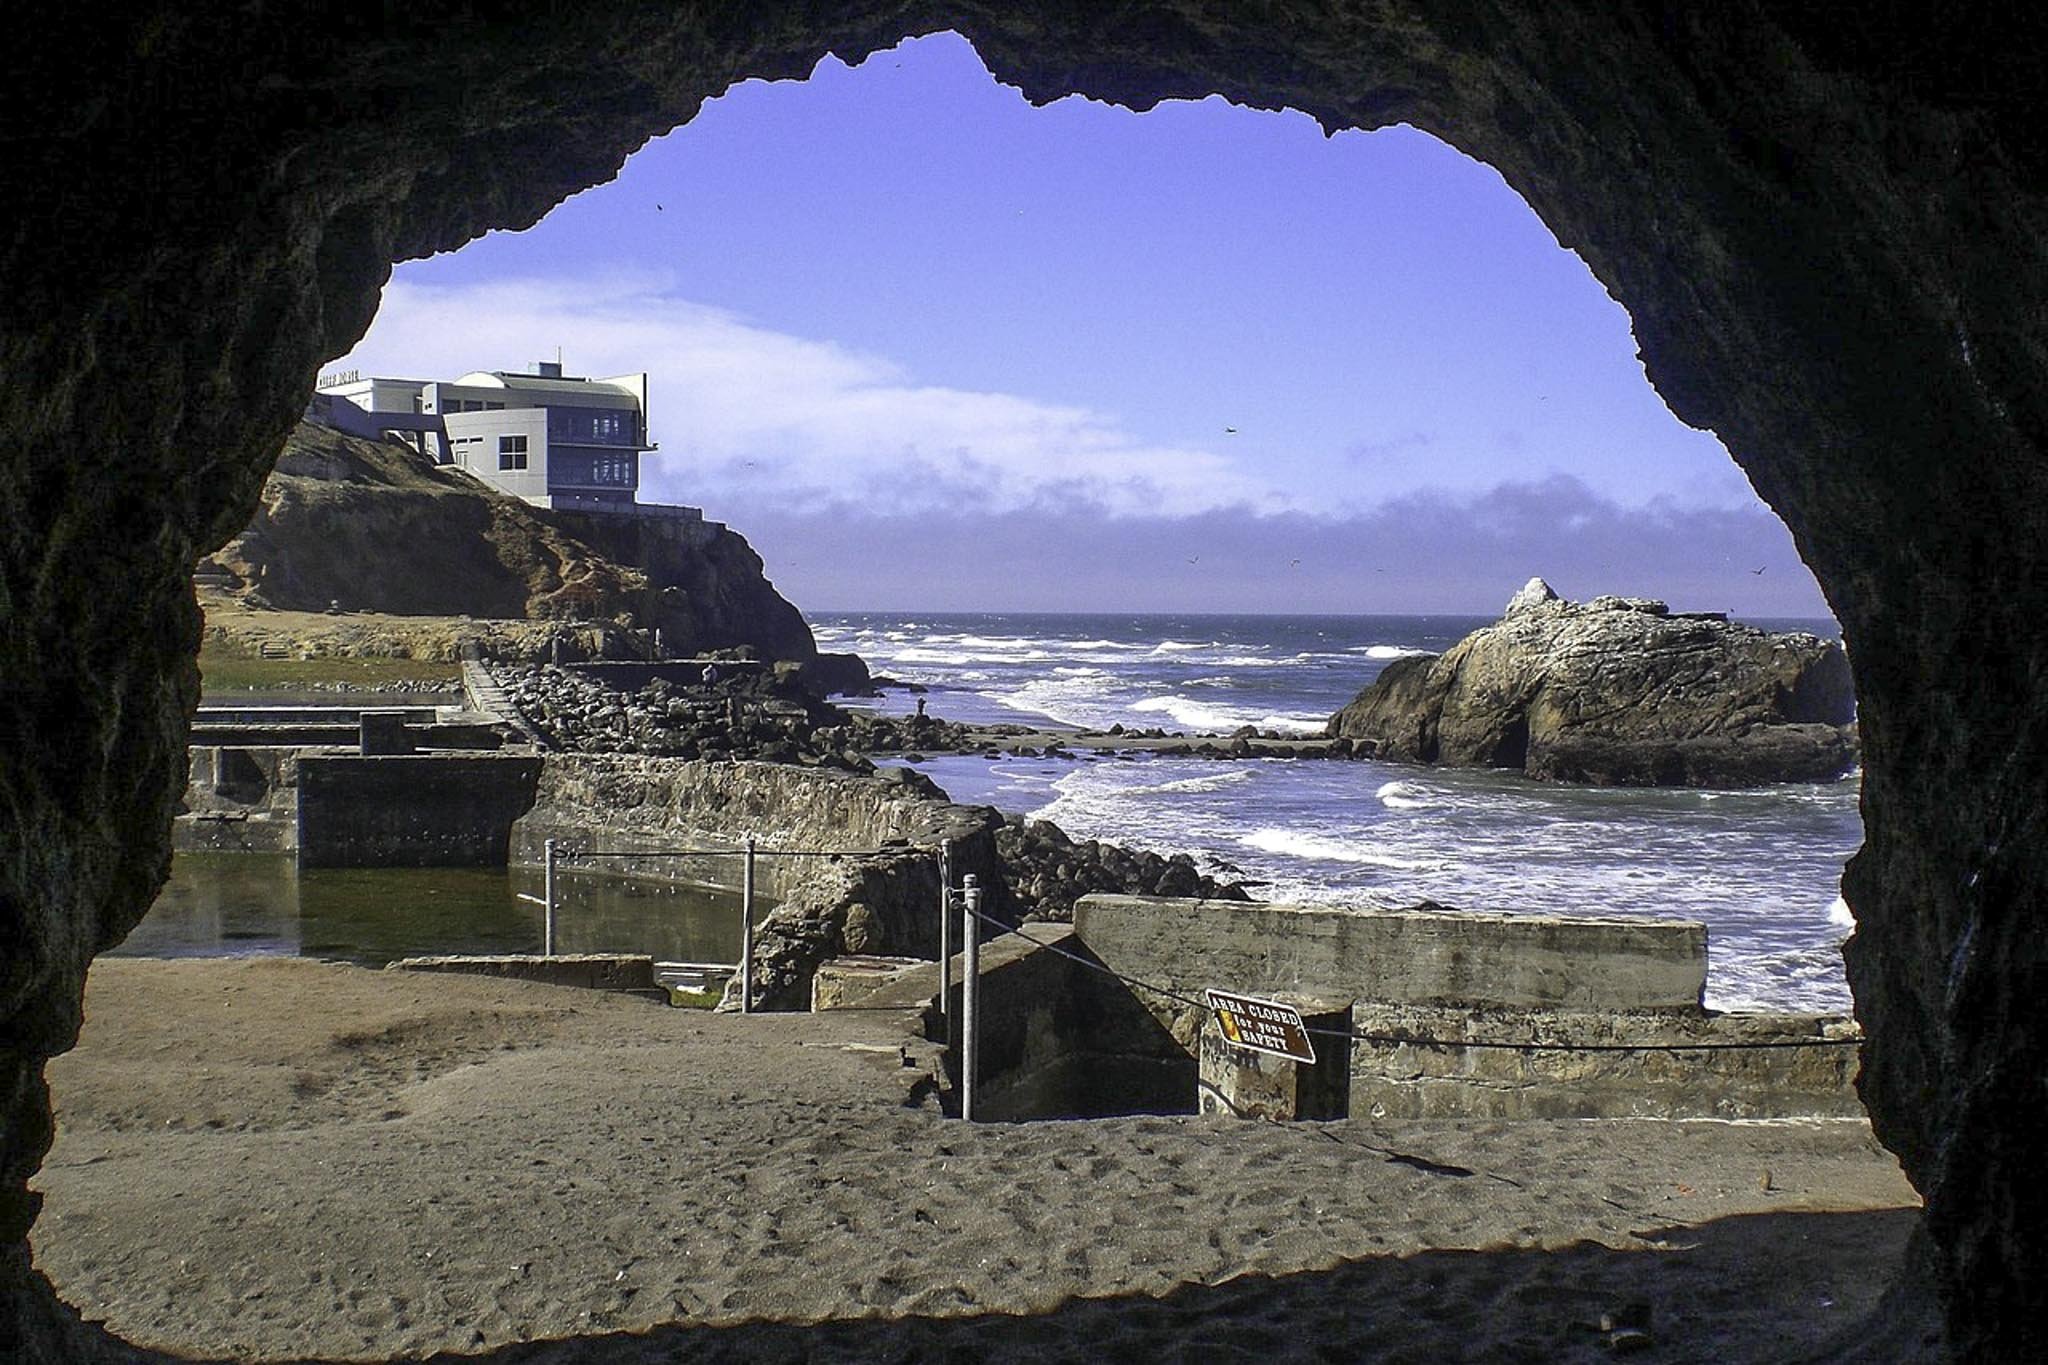
The ruins of Sutro Baths in San Francisco is one of the coolest places to explore. It's the site of a huge, former, indoor swimming pool complex built in the 1890s by a man named Adolph Sutro. People came from all over to swim in the saltwater pools and check out the amazing glass ceiling and decorations.
Today, even though the baths are in ruins, they’re still an exciting spot to visit and explore. You can walk around the old stone walls, see what’s left of the pools and imagine what it was like back in its glory days.
One of the best parts of visiting the Sutro Baths is the view. The ruins sit right on the edge of the ocean, and the waves crashing against the rocks make it feel wild and dramatic. You can also go up nearby trails for even better views of the coastline and the Golden Gate Bridge in the distance.
The adjoining Lands End trail also connects to the ruins, making it an easy add on to your visit. Whether you’re a history buff, a nature lover, or just someone who enjoys unique places, the Sutro Baths and Lands End trail is the perfect post-lunch stop while visiting San Francisco.
5) Walk the Embarcadero

When you're finished exploring Sutro Baths, you'll bid adieu to the city's north side and make your way west, where the next set of San Francisco attractions are located. First up is the historic Embarcadero.
San Francisco's historic Embarcadero is a section of road packed with all sorts of things to do and discover. While the official road goes on much further, the 1.3-mile walking portion begins near the historic ferry building/Pier 14 and ends near Fisherman's Wharf.
While you could drive it, the only way to discover all it has to offer is by walking. Not accounting for stops, it'll take roughly thirty minutes to go from the ferry building to Pier 39. The entire thing is paved, well maintained and flat.
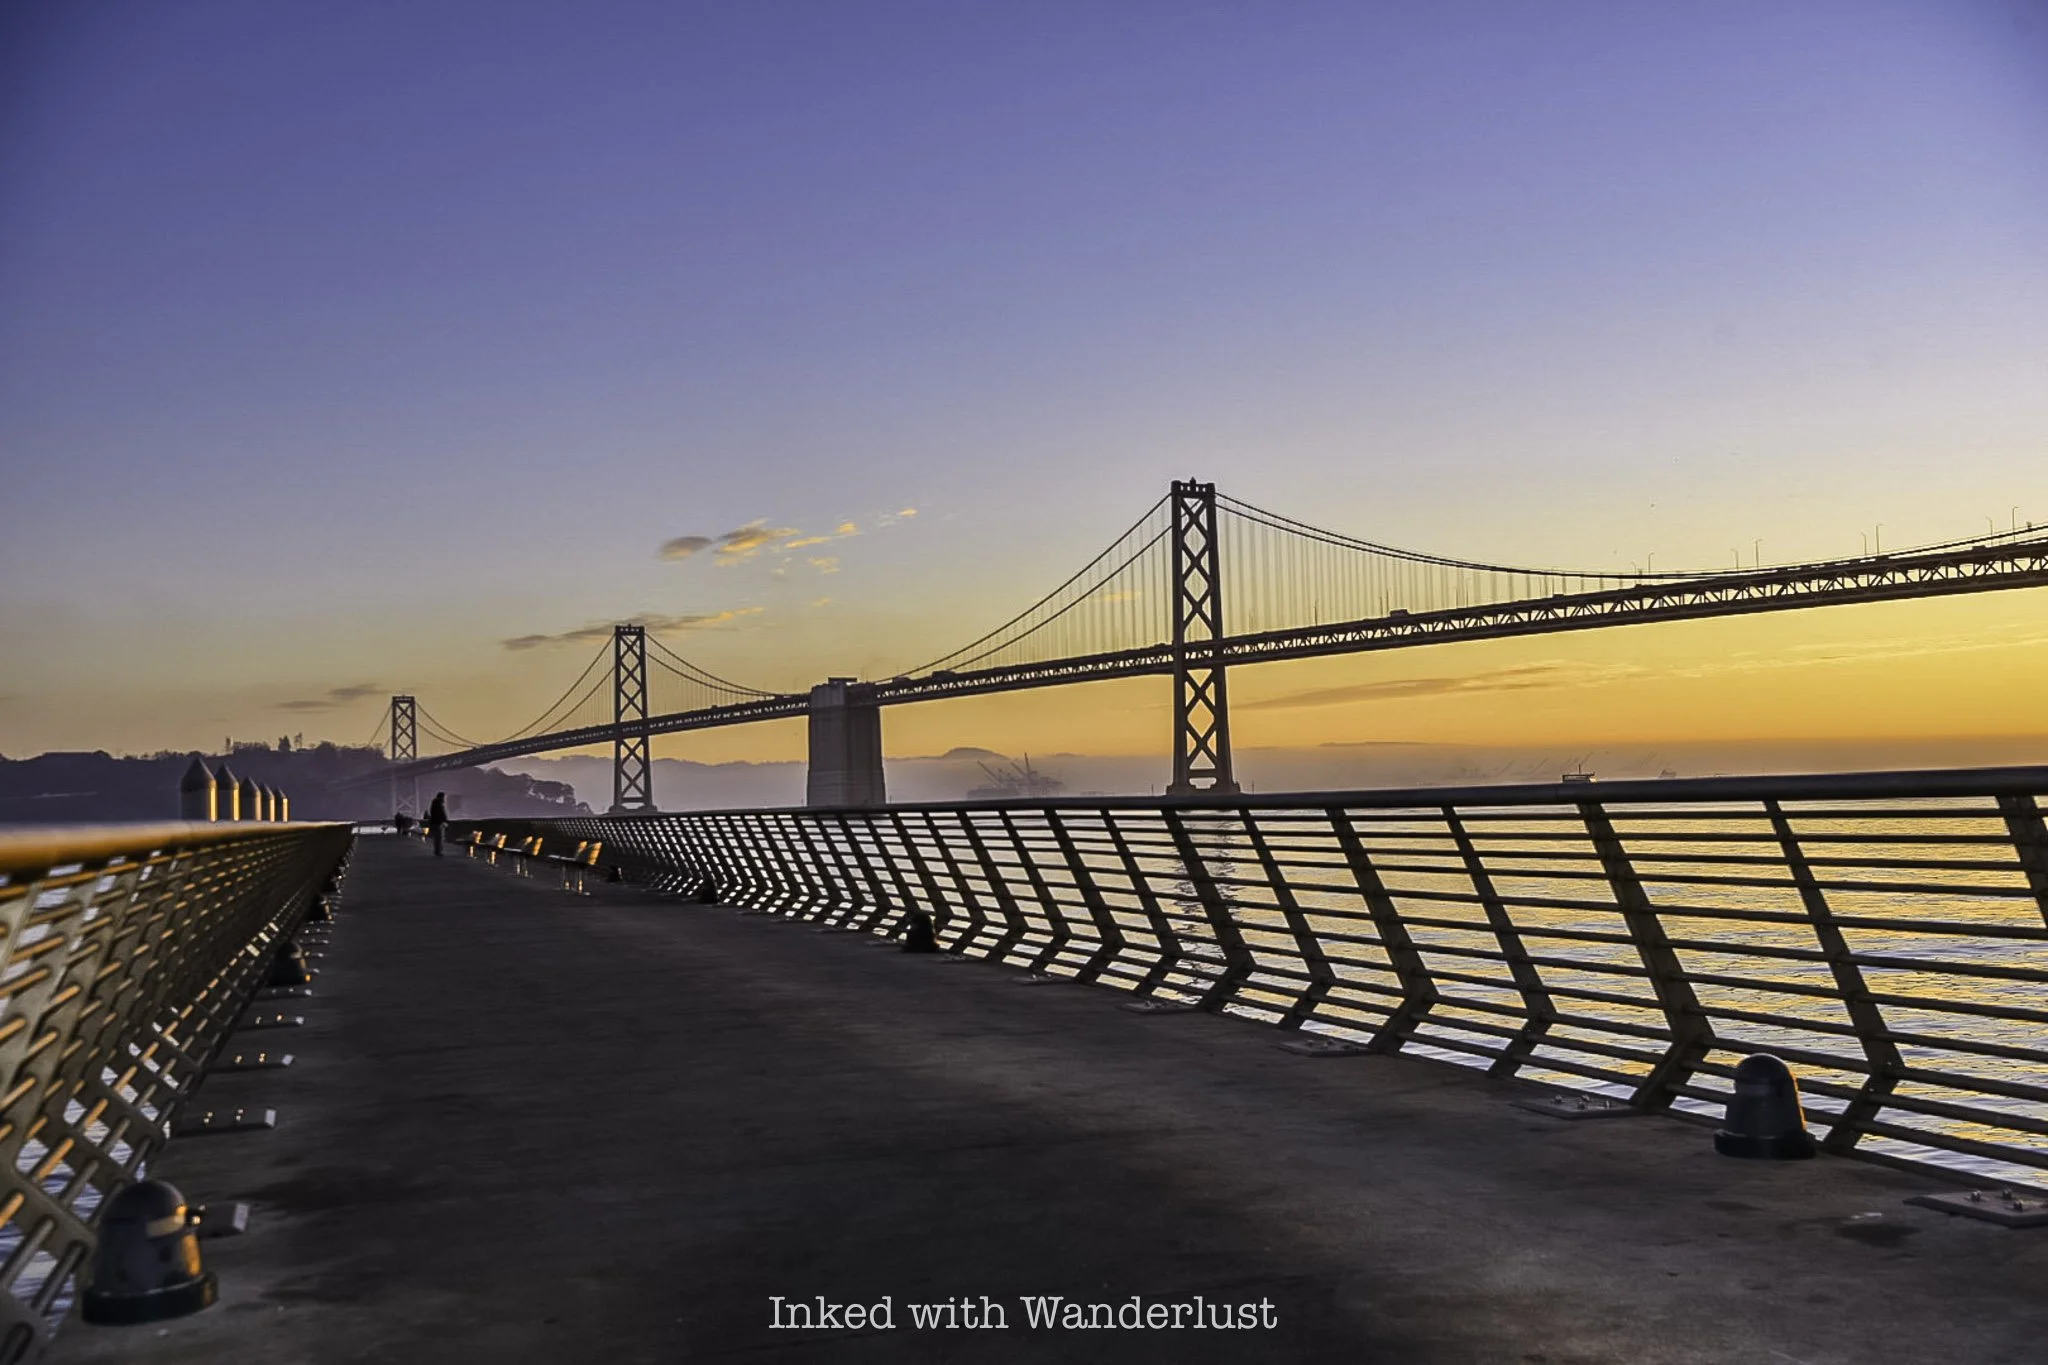
Along the way, you'll pass several piers and attractions, such as Pier 14 (which offers fantastic views of the Bay Bridge), the historic ferry building, Exploratorium, numerous shops and restaurants, Aquarium by the Bay, and Pier 33, which is where tours to Alcatraz Island leave from.
If you've never done it, I highly recommend taking a tour of Alcatraz Island, a former federal prison that housed infamous criminals such as Al Capone and Machine Gun Kelly. You'll need a whole half day (at minimum) to devote to it, but it's well worth spending an extra day for, in my opinion.
6) Admire the Infamous Sea Lions at Pier 39

Pier 39 is an infamous tourist hot spot in the city, featuring numerous shops, restaurants and even a carousel. While all of those are fine for what they are, the real attraction at Pier 39 is the massive colony of sea lions who have carved out a home at a set of nearby boating docks for that last thirty-five years and counting.
These curious, charismatic sea lions often put on a show for spectators, with their playful nature on full display. How many you see entirely depends on the time of year and food availability, but 2024 saw a record 2,100 sea lions move in.
The best times of year to see a large colony are March through May, and August through October. To find them, head towards the end of the pier and go left through the walkway going behind the structures. When in doubt, just listen for the sea lions barking and head in that general direction.
Afterwards, if you're feeling famished, look no further than Fog Harbor Fish House, located near the entrance of Pier 39 on the second level to the left. Here, you can enjoy their award winning clam chowder and for your main course, a serving of their incredibly flavorful filet mignon.
7) Take in Epic Views at Coit Tower
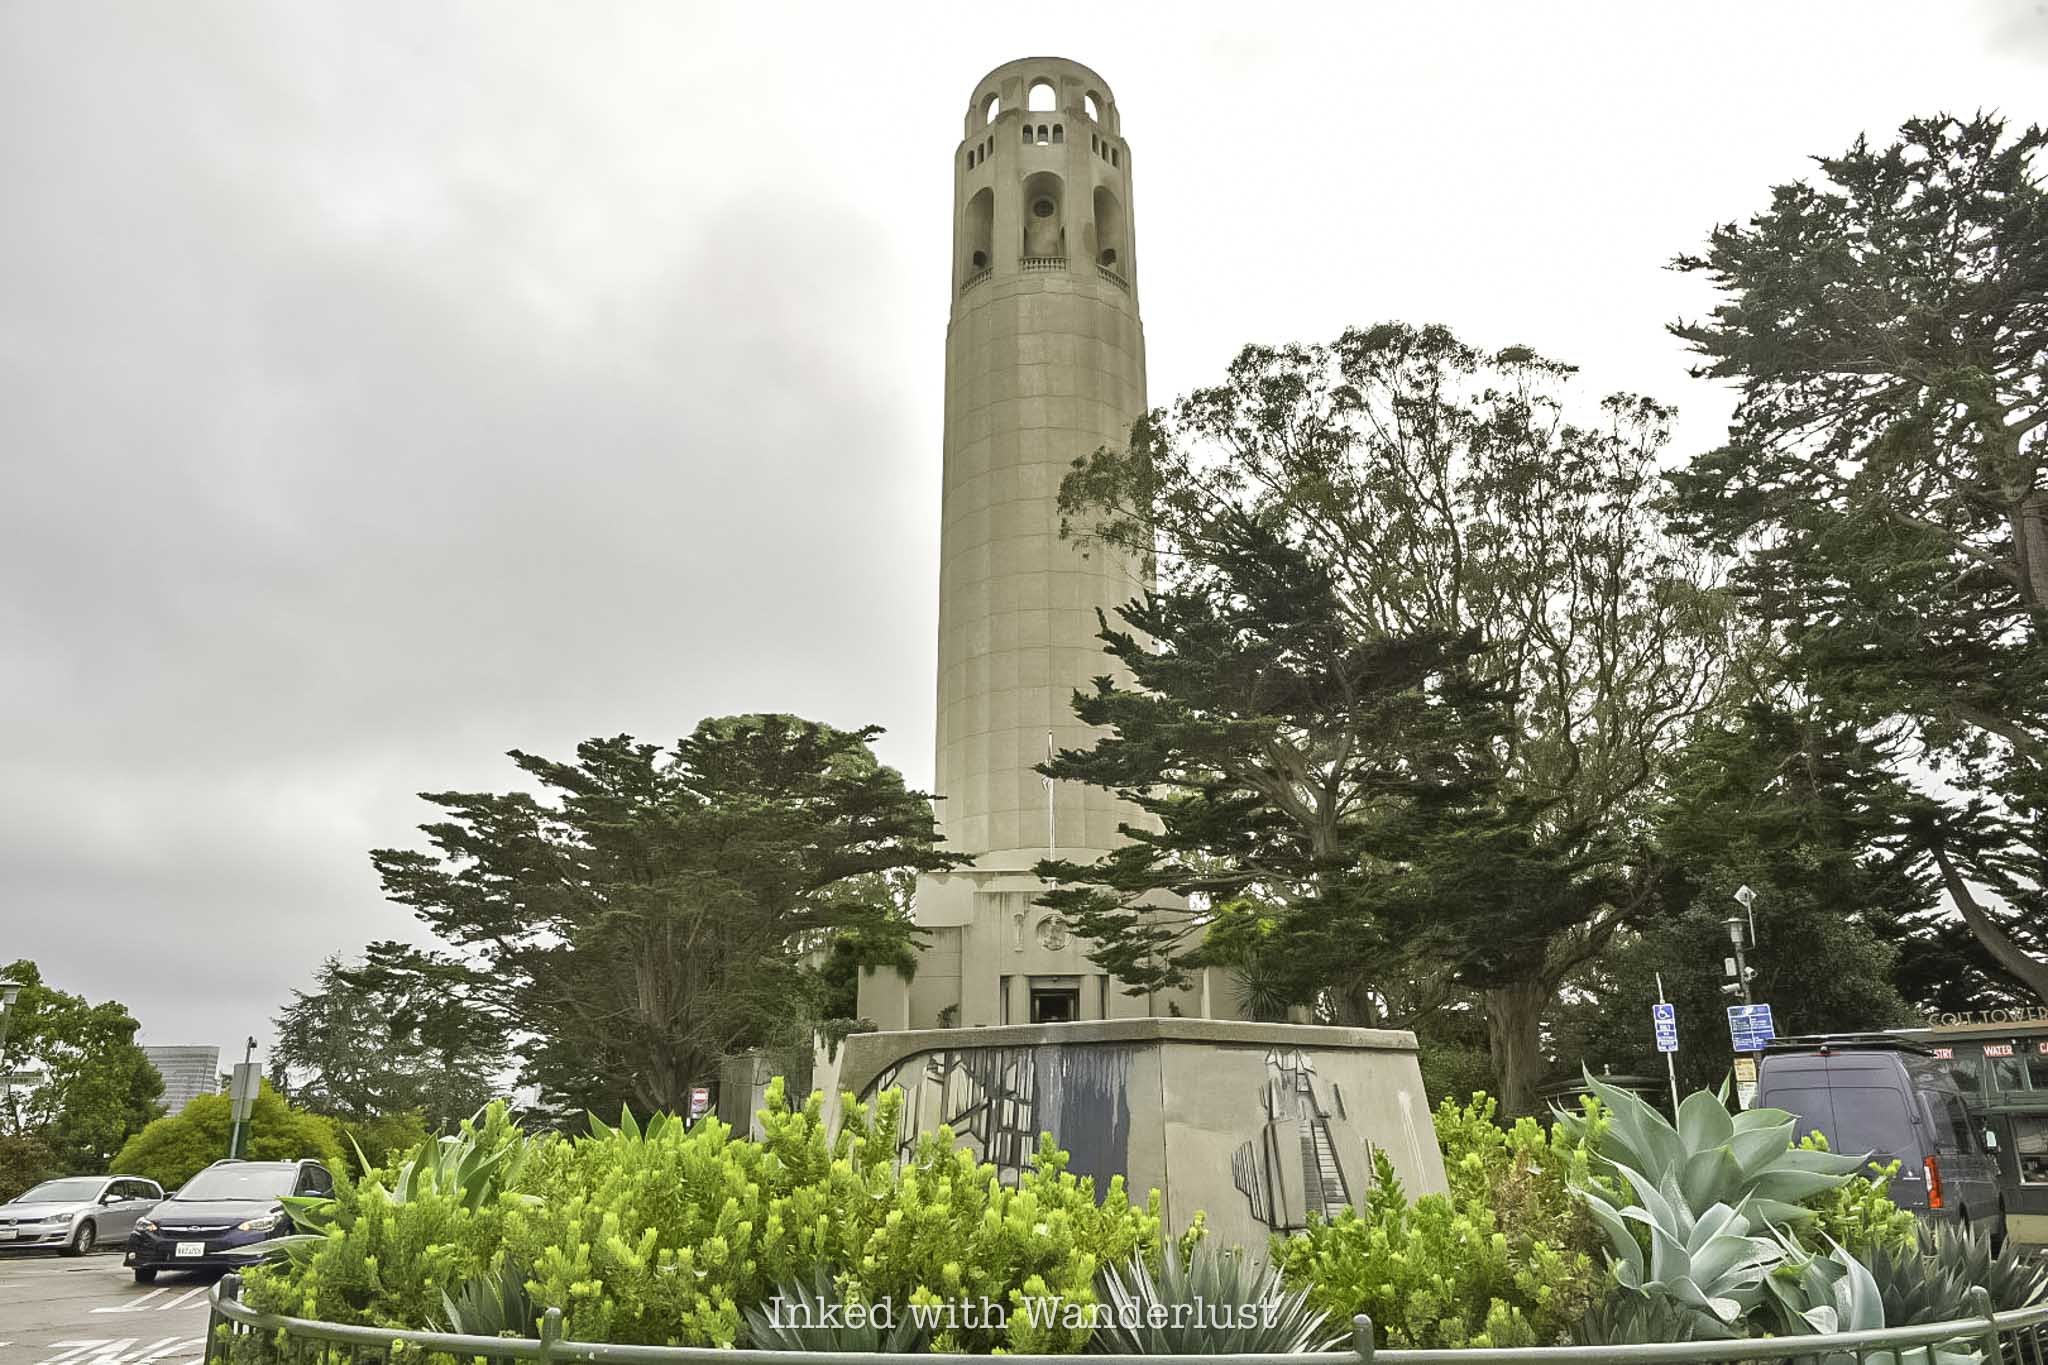
Coit Tower is an iconic sight in San Francisco and is a fantastic place to visit, especially if you love amazing views. This tall, white tower sits on top of Telegraph Hill and is one of the city’s most famous landmarks.
From the top of the tower, you'll get incredible 360-degree views of the city, including the Golden Gate Bridge, Alcatraz and the Bay. It’s a great spot to snap some photos and really take in how beautiful the city is.
What makes Coit Tower extra special are the murals inside. These colorful paintings cover the walls on the first floor and were created in the 1930s by local artists. The murals show scenes of life in California during the Great Depression, from farmers and factory workers to busy city streets.
Another fun thing about Coit Tower is the adventure of getting there. You can take the steep, winding Filbert Street Steps, which are lined with beautiful gardens and even wild parrots if you’re lucky! The climb is a bit of a workout, but the views along the way make it totally worth it.
Coit Tower closes at 4pm daily, so I recommend hailing a ride share (or driving yourself) instead of walking there from Pier 39, so you can save yourself some time. If you can help it, don't skip it. It may not have the same grandeur as the Golden Gate Bridge, but it's a culturally significant place worth visiting.
8) Drive the Iconic Lombard Street
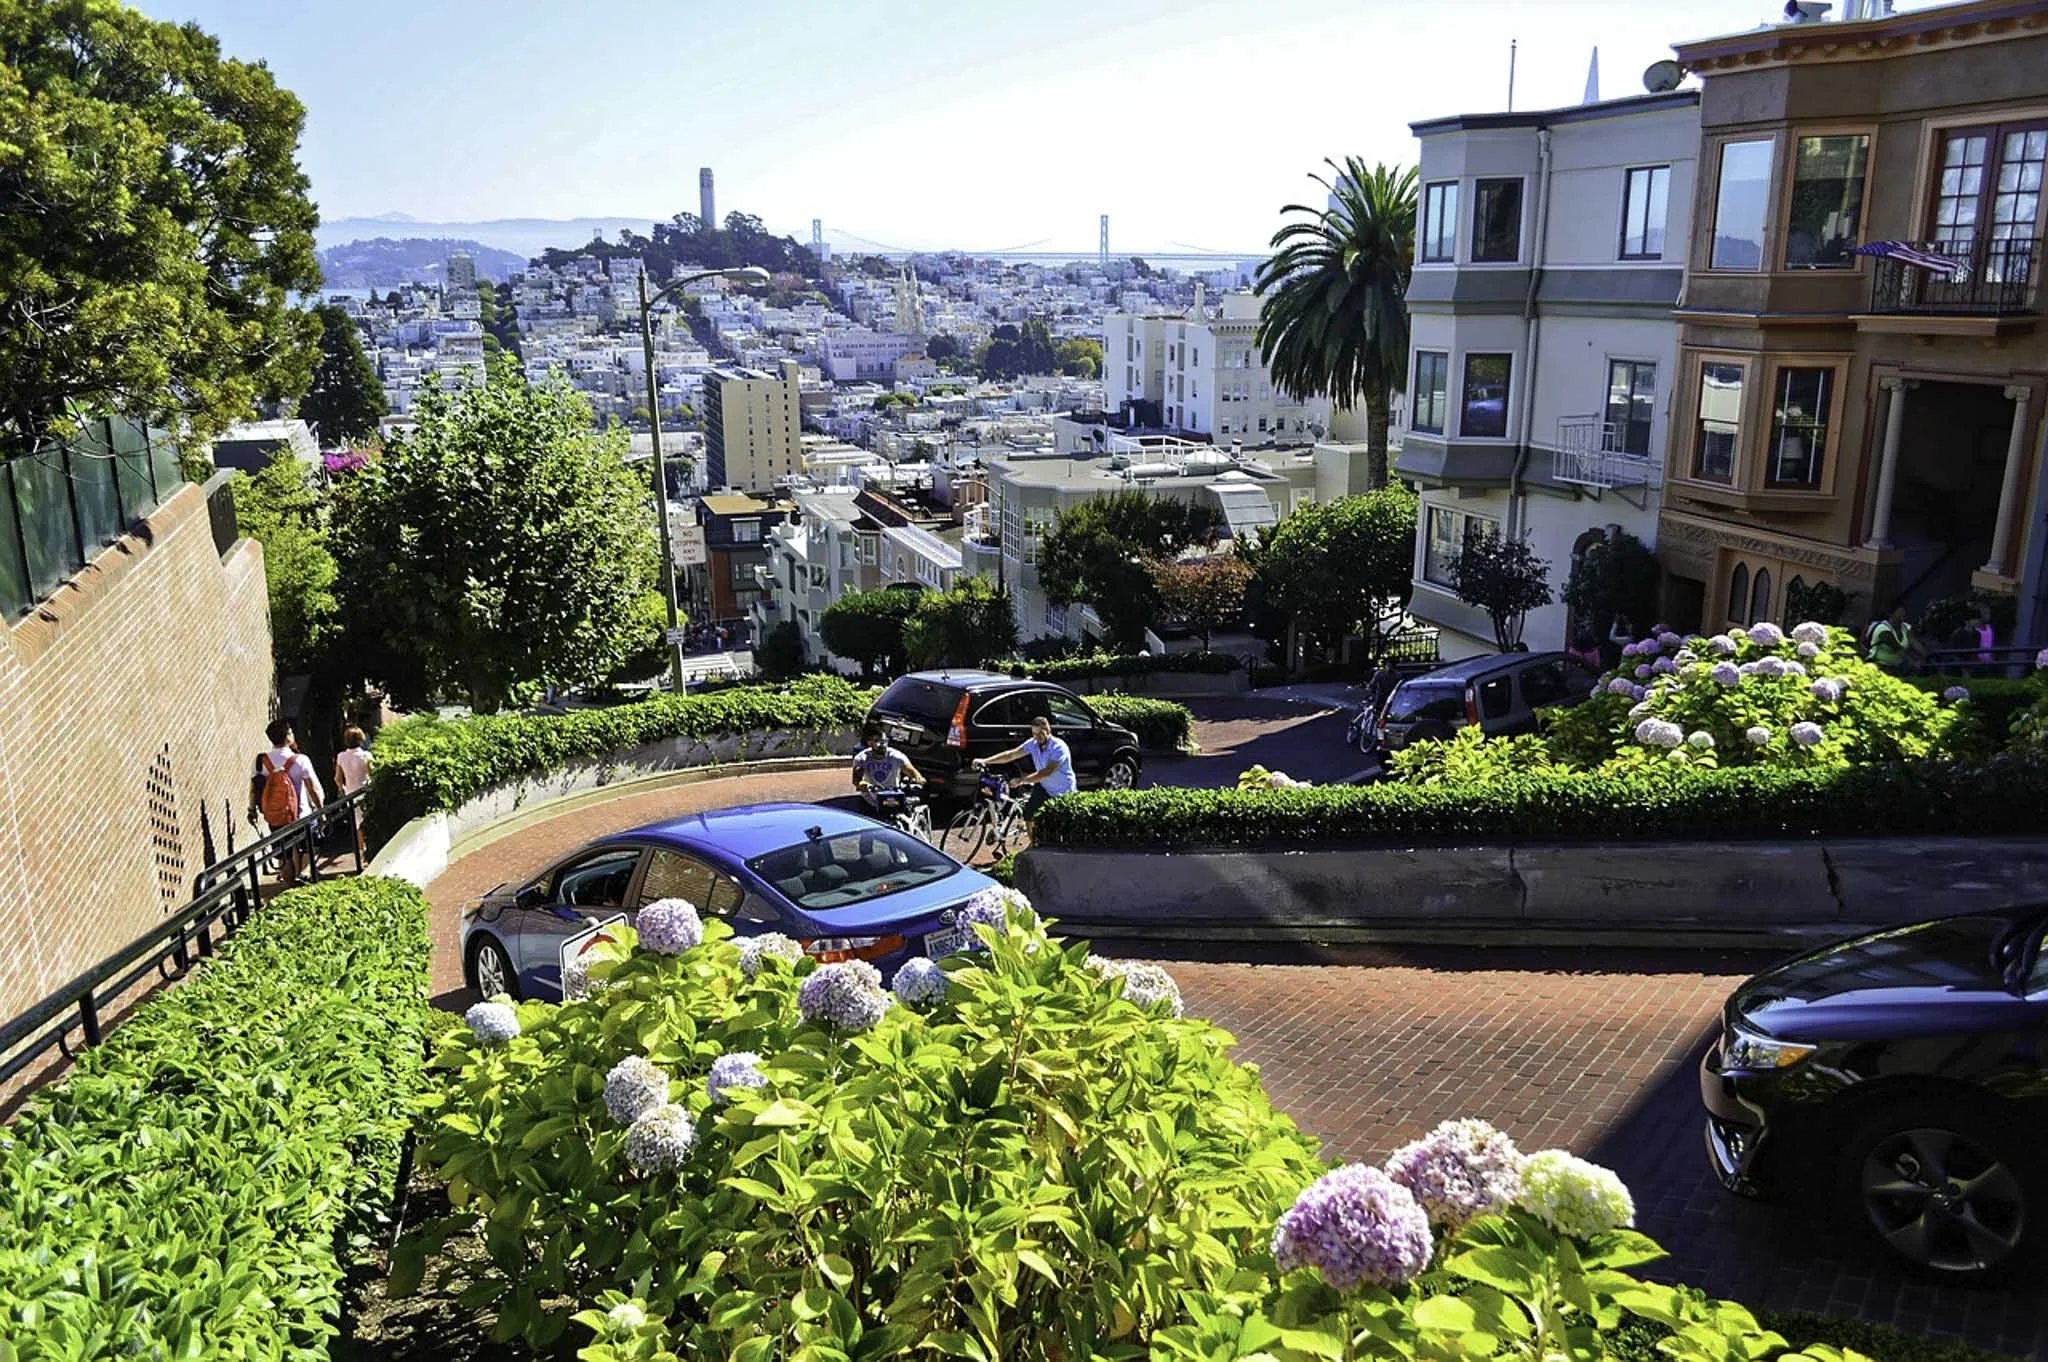
Lombard Street in San Francisco is one of the coolest and most famous streets in the world! What makes it so special is its unique zigzag shape. Known as the “crookedest street in the world,” it has eight sharp turns packed into just one block.
Driving down it feels like being on a roller coaster, but without the speed. If you’re not driving, you can walk along the sidewalks and see the street from a whole new perspective. Either way, it’s a super fun experience that you can’t find anywhere else.
What makes Lombard Street even more amazing is how beautiful it is. The street is lined with colorful flowers, green plants, and charming houses. In the spring and summer, the hydrangeas bloom, making the street look like something out of a postcard.
Visiting Lombard Street is also really easy to fit into your day. It’s located in the Russian Hill neighborhood, close to other cool spots like Fisherman’s Wharf and North Beach. After driving or walking down Lombard Street, you can explore nearby shops, grab a bite to eat, or hop on a cable car!
9) Ride a Cable Car

Riding a cable car in San Francisco is one of the best ways to experience the city! These old-fashioned trolleys are super fun and let you travel up and down the city’s famous steep hills. It’s like a ride and a way to get around all in one!
As you ride, you can hang onto the side rails (if you’re brave) or grab a seat and enjoy amazing views of the city. You’ll get to see iconic sights like the Bay, Alcatraz and the Golden Gate Bridge in the distance. Plus, the sound of the cable car’s bell is so unique, it’ll feel like you’re transporting back to another time.
Another reason to ride a cable car is that it’s a part of San Francisco’s history. These trolleys have been running since the 1800s, and they’re the only cable cars in the world that still operate! It’s a cool way to connect with the city’s past while having fun at the same time.
You can hop on at famous spots like Fisherman’s Wharf, Union Square or Lombard Street and ride all the way to Chinatown and other popular neighborhoods. Whether it’s your first time in the city or you’ve been here before, a cable car ride is a must-do activity that’ll make your visit unforgettable.
10) Indulge at Ghirardelli Square
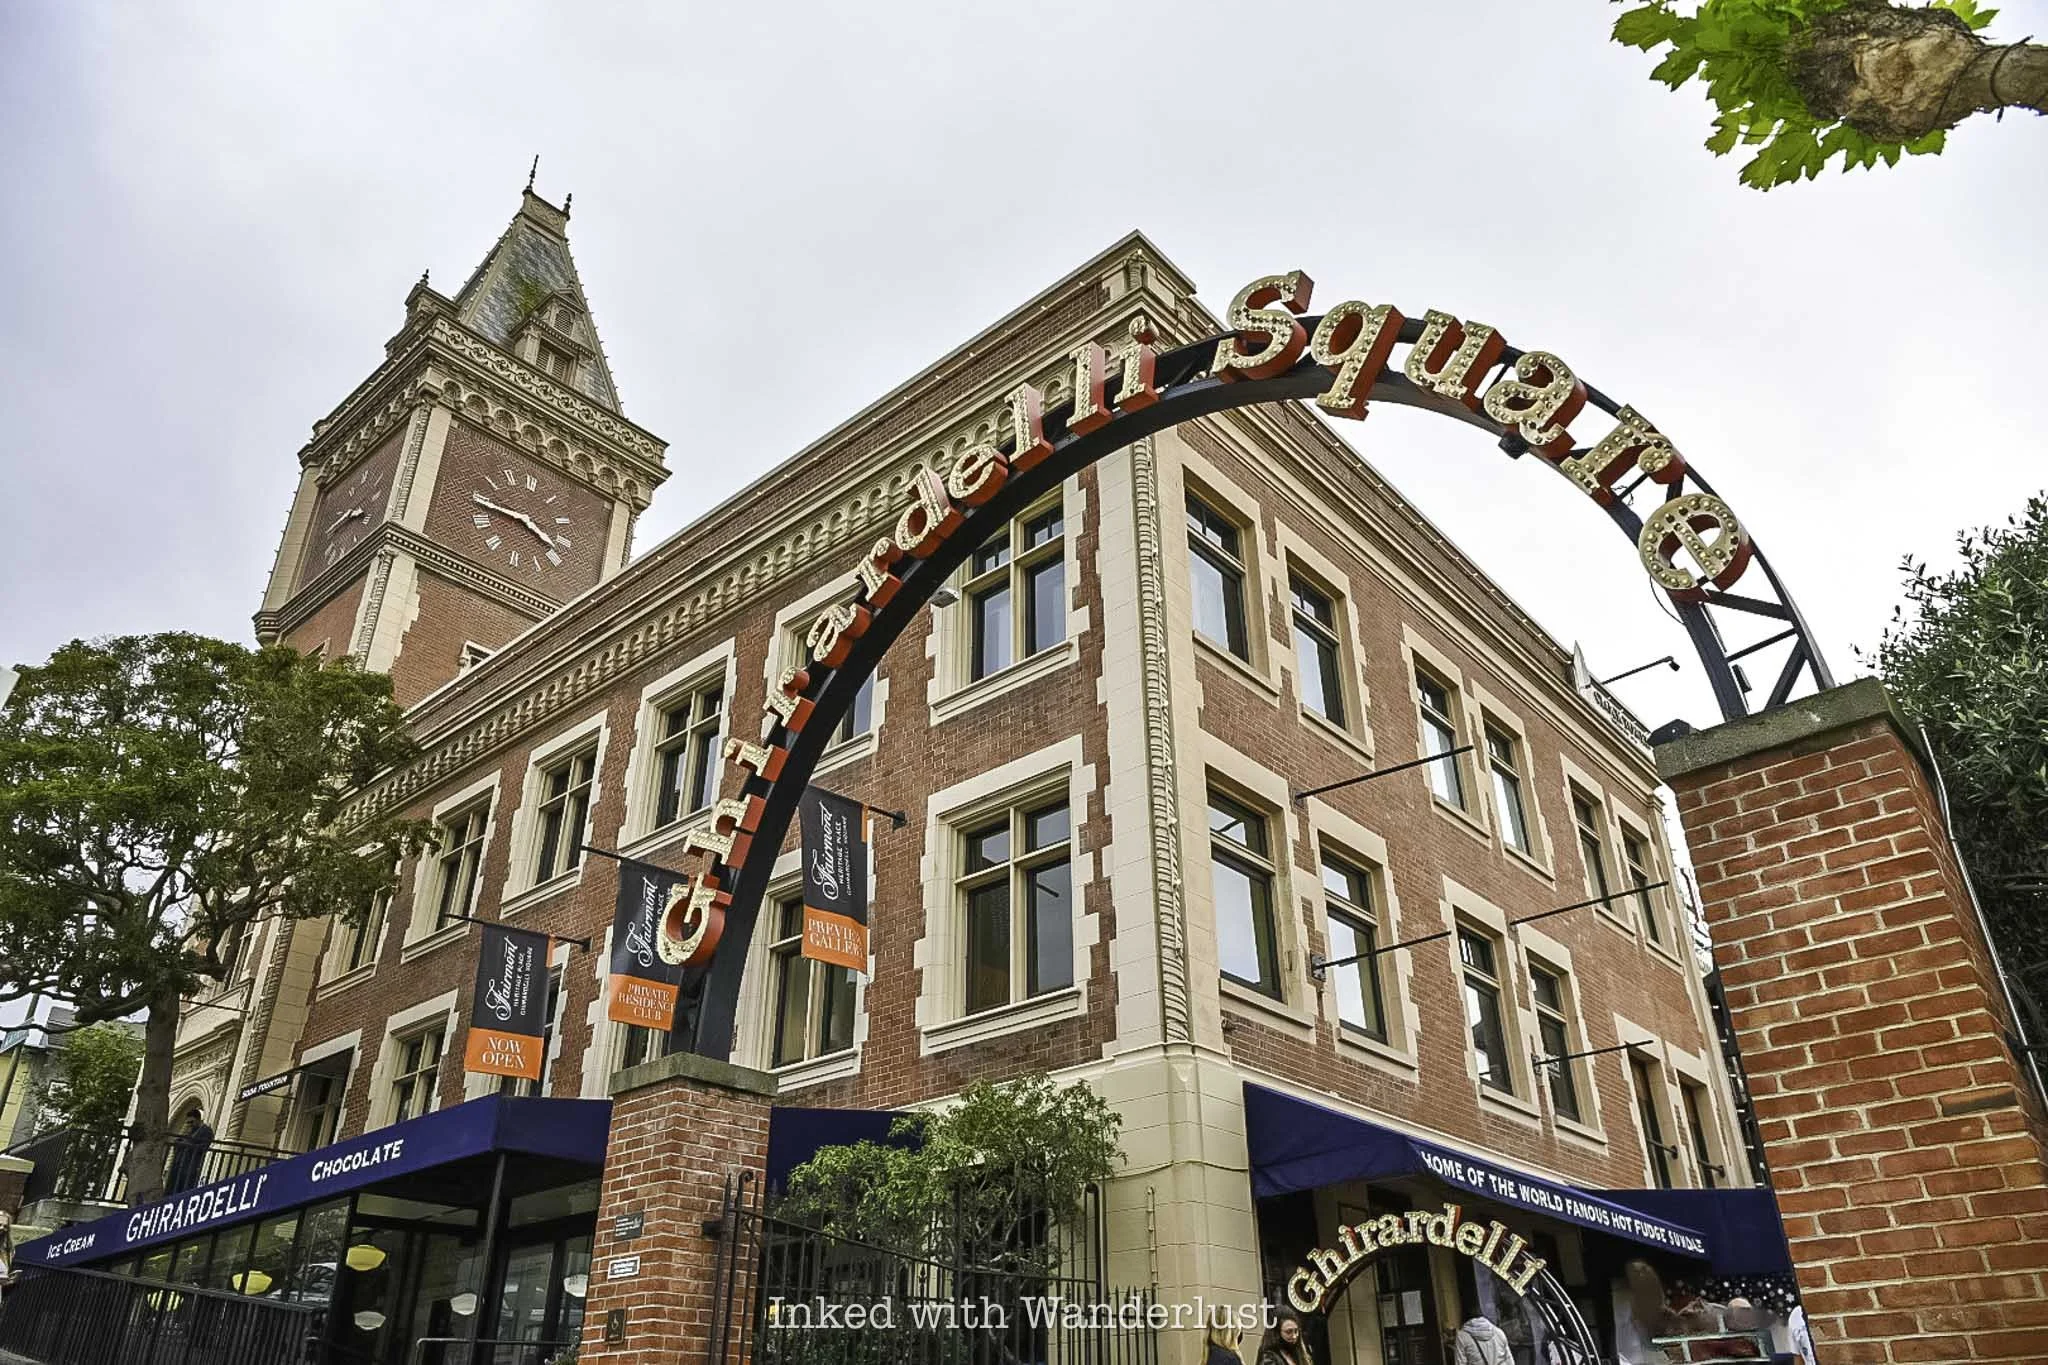
Ghirardelli Square in San Francisco is a sweet spot that every visitor should check out. This historic square is home to the famous Ghirardelli chocolate company, so you can imagine how amazing it smells with the chocolate aroma.
You can visit the Ghirardelli Ice Cream and Chocolate Shop and treat yourself to their world-famous sundaes or pick up some delicious chocolate to take home. Watching the chocolatiers make treats right in front of you is fun for children and adults alike, and you might even get a free sample when you walk in the door!
But Ghirardelli Square isn’t just about chocolate—it’s a great place to hang out and explore. The square has charming shops, restaurants and beautiful views of the San Francisco Bay. You can grab a meal, do a little shopping or simple relax and take in the lively atmosphere. Particularly in the evening, when everything is lit up with beautiful gold lights.
In my opinion, there’s no better way to cap your one day in San Francisco than with a chocolate sundae from the most iconic chocolatier in the world. From here, simply make your way back to your hotel or rental and enjoy your well deserved rest. This concludes my pick of ten things to do in one day in San Francisco.
What to Skip (if you run low on time)
I acknowledge that this itinerary is fairly hardcore and doesn't leave much room for error. Things happen. Feet get sore, kids get tired, attractions close unexpectedly, you get stuck in traffic, you spend too much time at another attraction, etc.
If you find yourself running low on time and you need to sacrifice one or more of the above listed attractions, I suggest skipping the Palace of Fine Arts, Coit Tower and walking the Embarcadero. If you're REALLY low on time, also skip Fort Point and possibly even Sutro Baths/Lands End.
The Golden Gate Bridge is non-negotiable for a first-time visit to the city. If you have a fear of bridges or heights, you don't need to walk on it in order to enjoy it. Simply view it from one of the many available viewpoints. Either way, go see it.
Additionally, in my opinion, riding a cable car, the sea lions at Pier 39 and driving Lombard Street are also quintessential San Francisco. So I definitely recommend keeping those, along with the bridge, as part of your itinerary.
What Else to do If You Have Extra Days

I always recommend spending at least a few days in any city or destination in order to get the most out of your experience. If you’re able to carve out an extra day or two, here's a list of a few other attractions around San Francisco you should definitely check out.
Golden Gate Park
Twin Peaks
Painted Ladies (row of colorful houses from the title sequence of the Tv show, Full House)
Union Square
Haight-Ashbury
San Francisco Zoo
California Academy of Sciences
San Francisco Museum of Modern Art
Crissy Field
Exploratorium
Fisherman’s Wharf
Buy me a coffee?
If you found this blog helpful, consider leaving a tip through the Buy Me A Coffee button below! Whether it’s $1 or $5, every bit helps offset small travel costs like coffee, water, lunch, parking, or park entry fees. Your support means the world—thank you!